Preventing Nonspecific Antibody Binding in Stem Cell Research: A Complete Guide to Optimization and Validation
This comprehensive guide addresses the critical challenge of nonspecific antibody binding in stem cell research and applications.
Preventing Nonspecific Antibody Binding in Stem Cell Research: A Complete Guide to Optimization and Validation
Abstract
This comprehensive guide addresses the critical challenge of nonspecific antibody binding in stem cell research and applications. Tailored for researchers, scientists, and drug development professionals, it provides foundational knowledge on binding mechanisms, practical methodological applications, advanced troubleshooting strategies, and rigorous validation techniques. By synthesizing current best practices, the article equips readers with a systematic framework to enhance experimental reliability, improve data interpretation, and advance the development of stem cell-based diagnostics and therapies through optimized immunostaining protocols.
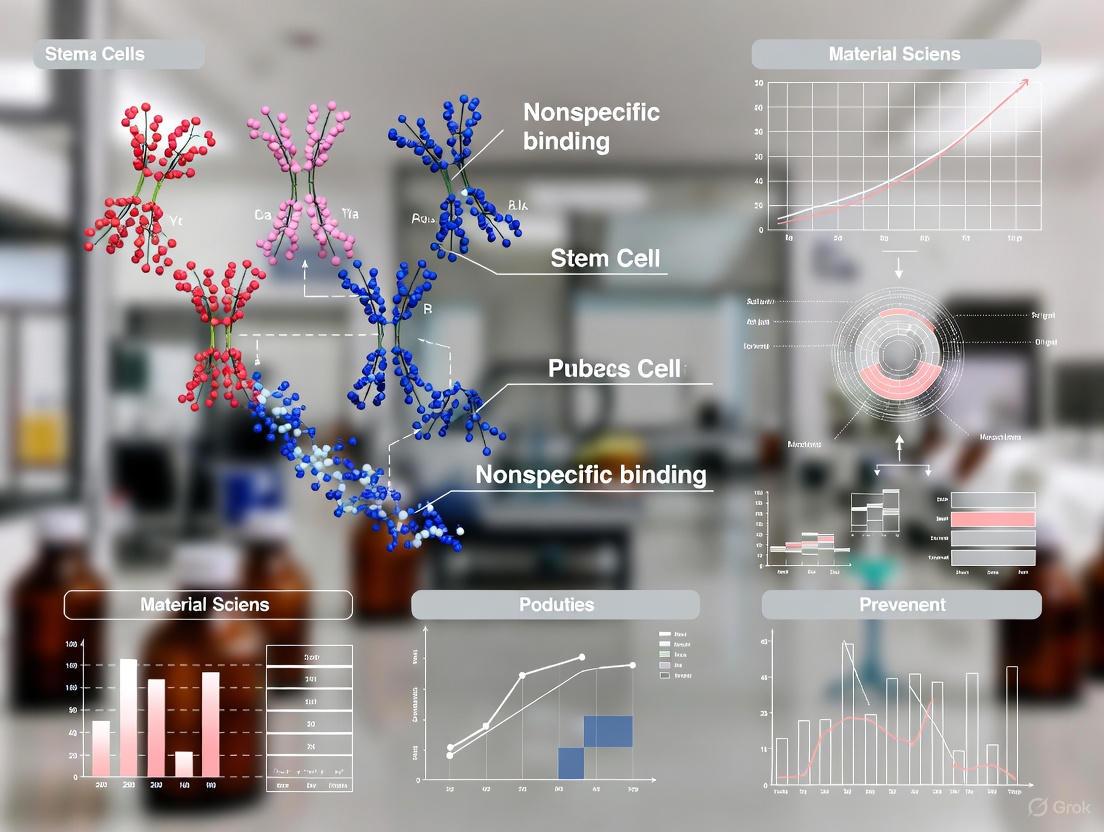
Understanding Nonspecific Antibody Binding: Mechanisms and Stem Cell Implications
Defining Nonspecific vs. Specific Binding in Cellular Contexts
FAQ: Understanding the Core Concepts
What is the fundamental difference between specific and nonspecific binding?
Specific binding refers to the high-affinity interaction between an antibody and its intended target epitope. This binding is governed by complementary molecular shapes and specific intermolecular forces, such as hydrogen bonding and hydrophobic interactions, within the antigen-binding site (Fab region) [1].
Nonspecific binding occurs when an antibody attaches to cellular or tissue components other than its target epitope. This can happen through several mechanisms, including:
- Binding to Fc receptors on immune cells (e.g., neutrophils, monocytes, macrophages) [2] [3].
- Electrostatic or hydrophobic interactions with serum proteins, other antibodies, or tissue components [4] [1].
- Adherence to non-viable, "sticky" cells with damaged membranes [2].
Why is preventing nonspecific binding especially critical in stem cell research?
In stem cell research, accurate phenotyping and isolation of pure cell populations are paramount. Nonspecific antibody binding can lead to:
- Misidentification of cell types, crucial when characterizing pluripotent stem cells or differentiated progeny.
- Contamination of sorted populations, such as the overgrowth of target cells by residual stromal cells during isolation protocols [5].
- Inaccurate assessment of differentiation status, potentially leading to erroneous conclusions about experimental outcomes.
Troubleshooting Guide: Resolving Nonspecific Binding
Problem 1: High Background Fluorescence in Flow Cytometry or Immunofluorescence
Potential Causes and Solutions:
Cause: Over-concentration of Antibody
- Solution: Perform an antibody titration study to determine the optimal dilution that maximizes the signal-to-background ratio [2].
Cause: Fc Receptor-Mediated Binding
Cause: Non-viable Cells
- Solution: Include a viability dye (e.g., 7-AAD or propidium iodide) in your staining panel to identify and exclude dead cells during analysis [2].
Cause: Lack of Protein in Buffers
- Solution: Add Bovine Serum Albumin (BSA) or fetal bovine serum (FBS) (typically 1-5%) to your washing and staining solutions to compete for nonspecific binding sites [2].
Problem 2: High Background Staining in Immunohistochemistry (IHC)/Immunocytochemistry (ICC)
Potential Causes and Solutions:
Cause: Inadequate Blocking of Reactive Sites
Cause: Endogenous Enzyme Activity
- Solution: Quench endogenous enzymes prior to detection [1]:
- For Peroxidase: Treat with 3% H₂O₂ for 15 minutes.
- For Alkaline Phosphatase: Treat with 1 mM Levamisole.
- Solution: Quench endogenous enzymes prior to detection [1]:
Cause: Hydrophobic/Ionic Interactions
- Solution: Add low concentrations of non-ionic detergents (e.g., 0.3% Triton X-100 or Tween 20) to the antibody diluent to reduce hydrophobic interactions [1].
Problem 3: Low Purity in Magnetic-Activated Cell Sorting (MACS)
Potential Cause: Nonspecific Uptake of Immunomagnetic Particles
- Solution: Implement rigorous strategies to mitigate nonspecific binding during the separation of delicate cells, such as human adipose tissue-derived microvascular endothelial cells (HAMVECs). This was critical to achieving high-purity cultures and preventing overgrowth by contaminating stromal cells [5].
Experimental Protocols for Validation and Mitigation
Protocol 1: Standard Blocking Procedure for IHC/ICC
- Preparation: After deparaffinization, rehydration, and antigen retrieval (for IHC), wash slides with PBS.
- Blocking: Incubate the sample with an appropriate blocking buffer (e.g., 5% normal serum or 1-5% BSA) for 30 minutes at room temperature (or overnight at 4°C for stubborn backgrounds).
- Antibody Incubation: Without washing away the blocking buffer, apply the primary antibody diluted in the same blocking buffer. This maintains the blocking effect during the specific binding step [4].
- Wash and Detect: Proceed with thorough washing and subsequent detection steps.
Protocol 2: Fc Receptor Blocking for Flow Cytometry
- Prepare Cells: Harvest and wash cells in a cold buffer containing protein (e.g., 1% BSA in PBS).
- Block: Resuspend the cell pellet in FcR blocking buffer (commercial reagent or 5% appropriate normal serum). Incubate on ice for 10-15 minutes.
- Stain: Without washing, add the fluorochrome-conjugated antibody panel directly to the cell suspension and proceed with the staining protocol [6] [2].
Research Reagent Solutions
Table 1: Essential Reagents for Preventing Nonspecific Binding
| Reagent | Primary Function | Example Application |
|---|---|---|
| Normal Serum | Blocks nonspecific protein-binding sites and provides antibodies that bind to reactive sites [4] [6]. | Used as a 1-5% solution in blocking buffers for IHC/ICC and flow cytometry. |
| Bovine Serum Albumin (BSA) | Competes with antibodies for nonspecific hydrophobic binding sites on tissues and cells [2] [1]. | Added at 1-5% to antibody diluents and wash buffers. |
| FcR Blocking Reagent | Binds to Fc receptors on immune cells, preventing nonspecific antibody attachment [6] [2]. | Essential for staining immune cells or stem cells expressing Fc receptors. |
| Non-Ionic Detergents | Reduces hydrophobic interactions that contribute to background staining [1]. | Use Triton X-100 or Tween 20 at ~0.3% in buffers. |
| Viability Dyes | Allows for the identification and exclusion of non-viable cells during analysis [2]. | Critical for obtaining clean flow cytometry data from delicate cell cultures. |
Workflow and Pathway Diagrams
Experimental Workflow for Specific Binding Assurance
Causes and Solutions for Nonspecific Binding
Frequently Asked Questions (FAQs)
1. What are the primary causes of non-specific antibody binding in stem cell research? The three primary causes are: (1) Non-specific binding to Fc receptors (FcRs) expressed on various immune cells and some stem cells; (2) High background caused by "sticky" dead cells with exposed DNA and damaged membranes; and (3) Charge-based interactions between antibodies and cellular or biomaterial surfaces [2] [7].
2. Why is Fc receptor blocking critical for stem cell flow cytometry or immunohistochemistry? Fc regions of antibodies can bind to Fc receptors on cell surfaces, causing false positive signals. This is especially critical when working with immune cells or stem cells that may express these receptors. Blocking is essential to ensure that antibody binding is specific to its target antigen and not mediated by Fc-FcR interactions [2] [7].
3. How do dead cells contribute to non-specific binding and high background? Dead cells are inherently "sticky" due to their damaged membranes, which expose intracellular components like DNA. These exposed molecules can bind antibodies non-specifically, leading to high background fluorescence and cell clumping, which can obscure accurate data analysis [2].
4. What role does surface charge play in non-specific binding? Biomaterial surfaces and cellular membranes often have net negative charges. Positively charged regions on antibodies can interact with these surfaces through ionic or electrostatic interactions, leading to non-specific adsorption. This is a significant consideration when staining cells on biomaterial scaffolds or when the staining buffer has insufficient protein [2] [8] [9].
5. Are protein blocking steps always necessary in immunohistochemistry? Evidence is conflicting. Some studies conclude that for routinely fixed paraffin-embedded samples, Fc receptors may not retain their ability to bind antibodies, potentially making blocking steps unnecessary. However, the consensus and most standard protocols still recommend blocking to prevent any potential non-specific binding, especially for sensitive applications [10].
Troubleshooting Guides
Table 1: Troubleshooting Non-Specific Antibody Binding
| Problem Category | Specific Issue | Possible Cause | Recommended Solution |
|---|---|---|---|
| Fc Receptor Binding | High background on monocytes, macrophages, or B-cells. | Fc portion of antibody binding to FcγRs on immune cells [2] [7]. | Use an Fc blocking reagent prior to antibody staining [2]. |
| Use F(ab) or F(ab')₂ antibody fragments instead of whole IgG [7]. | |||
| Dead Cell Sticking | High background and cell clumping. | Non-viable cells with exposed DNA and damaged membranes [2]. | Include a viability dye (e.g., 7-AAD, Propidium Iodide) to identify and exclude dead cells during analysis [2]. |
| Incubate specimen at 37°C for 30 min prior to staining to promote endocytosis of surface proteins [2]. | |||
| Charge Effects | High background across all cells. | Lack of protein in washing/staining buffers; antibodies sticking to plastic or cells [2]. | Add protein (e.g., 0.1-5% BSA or FBS) to all washing and antibody dilution buffers [2]. |
| Non-specific binding to biomaterial scaffolds. | Ionic/hydrophobic interactions between antibody and charged surface [8] [9]. | Optimize surface charge of biomaterial; ensure proper protein coating of scaffold [8]. | |
| Other Causes | Artifactual cell clumping. | Interactions between mouse IgG2 antibodies mediated by complement protein C1q [2]. | Avoid using IgG2 class antibodies; remove plasma via washing or pre-lysis with NH4Cl [2]. |
Table 2: Key Research Reagent Solutions
| Reagent | Function & Mechanism | Application Notes |
|---|---|---|
| Fc Blocking Reagent | Recombinant protein that binds to Fc receptors, preventing antibody Fc regions from binding [2]. | Use prior to antibody incubation. Some vendors include it in their antibody reagents. |
| Viability Dyes (7-AAD, PI) | DNA-binding dyes that are excluded by live cells but penetrate dead cells with compromised membranes [2]. | Allows for gating and exclusion of non-viable cells during flow cytometry analysis. |
| Bovine Serum Albumin (BSA) | Inert protein that saturates non-specific binding sites on cells and plastic surfaces [2]. | Typically used at 0.1-5% in buffers to reduce background from charge interactions. |
| F(ab) Antibody Fragments | Antibody fragments lacking the Fc region, eliminating binding to Fc receptors [7]. | Ideal for staining cells with high FcR expression. Must be validated for affinity. |
| Normal Serum | Serum from the host species of the secondary antibody, used to block non-specific sites [10]. | A traditional blocking agent, though its necessity in fixed samples is debated [10]. |
Experimental Protocols
Protocol 1: Comprehensive Blocking for Flow Cytometry on Stem/Immune Cells
This protocol is designed to minimize all three primary causes of non-specific binding in a single workflow.
Materials:
- Staining buffer (PBS with 1% BSA or FBS)
- Purified Fc Block (e.g., recombinant protein or anti-CD16/32)
- Viability dye (e.g., 7-AAD, FITC-conjugated dye)
- Target-specific antibodies
Procedure:
- Prepare Single Cell Suspension: Create a single-cell suspension from your culture or tissue and perform a cell count.
- Fc Receptor Blocking: Resuspend the cell pellet in staining buffer containing the Fc block reagent. Incubate on ice or at 4°C for 10-15 minutes [2].
- Viability Staining (Optional): If using a viability dye compatible with this step, add it to the cell suspension and incubate as per manufacturer's instructions.
- Antibody Staining: Add your titrated, target-specific antibodies directly to the tube without washing. Incubate for the recommended time (typically 30-60 minutes on ice or at 4°C).
- Wash and Analyze: Wash cells twice with staining buffer to remove unbound antibody. Resuspend in staining buffer and analyze via flow cytometry. Use viability dye to gate out dead cells [2].
Protocol 2: Antibody Titration for Optimal Signal-to-Background
A critical yet often overlooked step; excess antibody is a common cause of non-specificity.
Materials:
- Target cells (with high and low/no expression of the antigen)
- Antibody of interest
Procedure:
- Prepare Dilutions: Prepare a series of two-fold dilutions of the antibody in staining buffer, covering a range from below to above the manufacturer's recommended concentration.
- Stain Cells: Aliquot a constant number of cells into separate tubes. Add a different antibody dilution to each tube, including a no-antibody control.
- Incubate and Wash: Follow your standard staining protocol.
- Analyze: Analyze all samples on the flow cytometer. Plot the Median Fluorescence Intensity (MFI) against the antibody concentration. The optimal concentration is the one that gives the best signal (MFI of positive cells) with the lowest background (MFI of negative cells), typically found at the plateau of the titration curve [2].
Signaling Pathways & Experimental Workflows
Diagram 1: Mechanisms of Non-Specific Binding
Diagram 2: Experimental Workflow for Optimal Staining
Characterizing and isolating stem cells often relies on the use of antibodies to target specific protein markers. However, a significant and often underreported challenge in this field is non-specific antibody binding, which can lead to inaccurate data, misinterpretation of results, and failed experiments [11]. Stem cells present a unique set of vulnerabilities that make them particularly susceptible to these issues. Their complex surface marker expression, high degree of cellular plasticity, and the frequent lack of universally specific biomarkers create a perfect storm for non-specific interactions [12]. This technical support guide is designed to help researchers identify, troubleshoot, and prevent the pitfalls of non-specific binding in their stem cell workflows.
FAQs and Troubleshooting Guides
Q1: My antibody staining shows unexpected signals in my stem cell cultures. How can I determine if this is non-specific binding?
A: Unexpected signals are a common symptom of non-specific binding. To diagnose this, we recommend a systematic approach:
- Check Antibody Specificity: Always consult the antibody datasheet for validation in your specific application (e.g., flow cytometry, immunocytochemistry) and species. An antibody validated for western blot may not work for immunofluorescence [13].
- Perform a Negative Control: Include a control where the primary antibody is omitted and only the secondary antibody is applied. Any signal in this control indicates non-specific binding of the secondary antibody [13].
- Use an Isotype Control: Incubate your cells with a non-specific immunoglobulin of the same isotype (e.g., IgG) as your primary antibody. This helps identify background staining caused by Fc receptor binding or other non-specific interactions [14].
- Conduct a Peptide Blocking Experiment: This is a definitive test for antibody specificity. Pre-incubate the primary antibody with a 5-fold excess (by weight) of the immunizing peptide used to generate the antibody. Then, use this "blocked" antibody alongside your standard protocol. A specific signal will be significantly reduced or absent in the blocked sample, while non-specific staining will remain [15].
Q2: What are the best practices for blocking to prevent high background in stem cell immunostaining?
A: Stem cells can be "stickier" than differentiated cells, making effective blocking crucial.
- Select the Right Blocking Reagent: The choice of blocker can dramatically impact your results. Test different blocking reagents to find the optimal one for your stem cell line. Common and effective options include:
- Ensure Adequate Blocking Time: Blocking should be performed for at least 30 minutes at room temperature prior to antibody incubation [13].
- Verify Antibody Dilution: Over-concentrated antibody is a primary cause of high background. Titrate your antibody to find the optimal dilution that provides a strong specific signal with minimal noise. Always use the diluent recommended by the manufacturer if available [13].
Q3: I am using a well-validated antibody, but I'm getting inconsistent results between different stem cell lines. Why?
A: This highlights a key vulnerability of stem cells: their marker expression is dynamic and context-dependent.
- Dynamic Marker Expression: Stem cell surface markers can change with cell density, metabolic state, and differentiation status. A marker highly expressed in pluripotent stem cells may be rapidly downregulated upon the initiation of differentiation [12].
- Cross-Reactivity Concerns: An antibody validated for human stem cells may have unintended cross-reactivity with other proteins in a different species or cell type. Always verify the immunogen sequence and check for homology in your model system [11].
- Cellular Heterogeneity: Your stem cell population may not be homogeneous. Subpopulations with different marker expression profiles can lead to what appears to be inconsistent staining [12].
Experimental Protocol: Validating Antibody Specificity via Immunizing Peptide Block
This protocol is essential for confirming that your observed antibody signal is specific to your target antigen [15].
Materials:
- Primary antibody
- Immunizing/blocking peptide (available from the antibody supplier)
- Appropriate blocking buffer (e.g., TBST with 3% BSA or a commercial diluent)
- Two identical stem cell samples (e.g., cell cultures on coverslips)
Method:
- Prepare Antibody Solutions:
- Dilute your primary antibody to its optimal working concentration in blocking buffer. Split this solution equally into two tubes.
- To the first tube ("Blocked"), add a five-fold mass excess of immunizing peptide (e.g., 5 µg peptide for every 1 µg of antibody).
- To the second tube ("Control"), add an equivalent volume of blocking buffer only.
- Pre-incubate: Incubate both tubes with agitation for 30 minutes at room temperature or overnight at 4°C.
- Apply to Samples: Apply the "Blocked" solution to one sample and the "Control" solution to the other identical sample.
- Continue Standard Protocol: Complete your standard immunostaining protocol (washes, secondary antibody, mounting, etc.) for both samples.
- Interpret Results: Compare the staining. A specific signal will be significantly reduced or absent in the sample stained with the "Blocked" antibody. Any remaining signal is due to non-specific binding.
Data Presentation: Quantitative Impact of Non-Specific Binding
The following table summarizes data from a study investigating CD206 expression in pig muscle, which clearly demonstrates how non-specific binding can lead to vastly different experimental conclusions depending on the antibody used [11].
Table 1: Variability in CD206-Positive Cell Quantification Using Different Antibodies
| Antibody Designation | Host Species | Reported Percentage of CD206+ Cells | Statistical Significance (vs. Consensus) |
|---|---|---|---|
| Anti-CD206 (1) | Rabbit | 8.2% | Not Significant |
| Anti-CD206 (2) | Mouse | 9.83% | Significant |
| Anti-CD206 (3) | Goat | 12.76% | Significant |
Conclusion from Data: The study found that only a small subset of cells (约 7.5%) were consistently identified by all three antibodies, suggesting that a significant portion of the signal from two of the antibodies was likely non-specific [11]. This underscores the critical importance of antibody validation.
Visualization: Experimental Workflow and Binding Mechanisms
The following diagrams outline the key experimental workflow for validating antibody specificity and the conceptual difference between specific and non-specific binding.
Diagram 1: Antibody Specificity Validation Workflow
Diagram 2: Specific vs. Non-Specific Antibody Binding
The Scientist's Toolkit: Essential Reagents for Preventing Non-Specific Binding
Table 2: Key Research Reagent Solutions for Immunostaining Stem Cells
| Reagent | Function & Rationale |
|---|---|
| Bovine Serum Albumin (BSA) | A common blocking agent that coats non-specific protein-binding sites on cells and the substrate, reducing background [11]. |
| Normal Sera (e.g., Goat, Donkey) | Serum from an unrelated species is used for blocking to prevent secondary antibodies from non-specifically binding to Fc receptors on cells [13]. |
| Commercial Antibody Diluents | Optimized buffers that often contain proprietary proteins and stabilizers to enhance specific antibody binding and minimize aggregation [11]. |
| Immunizing/Blocking Peptides | Short peptide sequences corresponding to the antibody's epitope. Used in blocking experiments to confirm antibody specificity [15]. |
| Triton X-100 | A detergent used to permeabilize cell membranes for intracellular staining. Concentration and time must be optimized to avoid destroying epitopes or increasing background [11]. |
| Polymer-based Detection Reagents | These detection systems (as opposed to biotin-avidin) offer higher sensitivity and can reduce background, especially in tissues with high endogenous biotin [13]. |
Consequences for Data Interpretation and Experimental Validity
Troubleshooting Guides
FAQ 1: How can I reduce high background staining in my stem cell immunohistochemistry experiments?
High background staining, or non-specific binding, obscures specific signal and can lead to misinterpretation of protein localization and expression levels in stem cell populations [16].
| Cause of High Background | Solution | Key Experimental Parameters to Document |
|---|---|---|
| Primary Antibody Concentration Too High [16] | Perform a titration experiment to find the optimal dilution that maintains signal and reduces background [16]. | Primary antibody host, catalog number, RRID, and all tested dilution factors [17]. |
| Insufficient Blocking [16] | Block with normal serum from the secondary antibody host species. Use peroxidase blocking (3% H₂O₂) for HRP systems and avidin/biotin blocking kits for streptavidin-biotin systems [16] [1]. | Blocking reagent, concentration, incubation time and temperature [17]. |
| Hydrophobic/Ionic Interactions [1] | Include a gentle detergent like 0.05% Tween-20 in buffers. Adjust the ionic strength of the antibody diluent [16] [1]. | Exact composition of antibody diluents and wash buffers [17]. |
| Tissue Section Drying [16] | Ensure tissue sections remain hydrated at all times by using a humidity chamber during incubations [16]. | Incubation conditions (e.g., humidity chamber used). |
| Over-Development with Chromogen [16] | Monitor chromogen development under a microscope and stop the reaction as soon as specific signal is clear [16]. | Chromogen type and development time. |
Detailed Protocol: Blocking for Streptavidin-Biotin Systems
- After peroxidase blocking and serum blocking, incubate the sample with avidin for 15 minutes at room temperature [1].
- Rinse the sample with buffer.
- Incubate the sample with biotin for 15 minutes at room temperature to block any remaining biotin-binding sites on the avidin [1].
- Proceed with application of the biotinylated primary antibody.
FAQ 2: What should I do if I get no signal or a very weak signal when staining stem cell colonies?
Weak or absent staining prevents accurate assessment of stem cell markers, potentially leading to false conclusions about a cell's pluripotent status or differentiation fate [18].
| Cause of Weak/No Signal | Solution | Key Experimental Parameters to Document |
|---|---|---|
| Antibody Not Validated for IHC/ICC [16] | Use antibodies validated for your specific application (e.g., IHC on FFPE tissue) and species. Always run a positive control tissue [16]. | Antibody validation data for the application, source of positive control tissue or cell line [17]. |
| Incorrect Antibody Concentration [16] | Titrate the primary antibody. Start with the datasheet recommendation and test a range of dilutions (e.g., 1:50, 1:100, 1:200) [16]. | All primary antibody dilution factors tested and the resulting signal intensity. |
| Inactive Detection System [16] | Test secondary antibody and detection reagents (e.g., HRP-DAB) independently to confirm activity [16]. | Lot numbers and expiration dates for all detection reagents. |
| Suboptimal Antigen Retrieval [16] | Optimize heat-induced epitope retrieval (HIER) by testing different buffers (e.g., Citrate pH 6.0, Tris-EDTA pH 9.0), temperatures, and incubation times [16]. | Antigen retrieval method, buffer, pH, heating time, and cooling time. |
| Over-fixation [16] | Standardize fixation times. If over-fixation is suspected, increase the duration or intensity of antigen retrieval [16]. | Fixative type and exact fixation time [18]. |
Detailed Protocol: Heat-Induced Epitope Retrieval (HIER)
- Deparaffinize and rehydrate tissue sections.
- Place slides in a coplin jar filled with antigen retrieval buffer (e.g., 10mM Sodium Citrate, pH 6.0).
- Heat the jar in a microwave or pressure cooker according to your optimized protocol (e.g., microwave at high power for 20 minutes, ensuring the buffer does not boil dry).
- Cool the slides in the buffer at room temperature for at least 20 minutes.
- Rinse slides with distilled water and proceed with staining protocol.
FAQ 3: How can I minimize autofluorescence in fluorescent IHC of stem cell-derived tissues?
Autofluorescence can be misinterpreted as a true positive signal, leading to false positives and inaccurate quantification, especially in multiplex experiments [16].
| Cause of Autofluorescence | Solution | Key Experimental Parameters to Document |
|---|---|---|
| Lipofuscin in Aged or Differentiated Tissues [16] | Apply autofluorescence quenching reagents such as Sudan Black B (e.g., 0.1% in 70% ethanol) or commercial quenching kits before antibody incubation [16]. | Quenching reagent, concentration, and incubation time. |
| Formaldehyde-induced Fluorescence [16] | Use alternative fixatives where possible. Employ spectral imaging and unmixing techniques to separate true signal from background [16]. | Fixative used; if spectral unmixing is used, the methodology and software. |
| Non-specific Antibody Binding [16] | Use highly validated, cross-adsorbed secondary antibodies to minimize off-target binding. Ensure optimal blocking [16]. | Secondary antibody host, cross-adsorption details, and catalog number. |
Detailed Protocol: Autofluorescence Quenching with Sudan Black B
- After rehydration and before blocking, incubate sections with a fresh working solution of 0.1% Sudan Black B in 70% ethanol for 10-15 minutes.
- Rinse thoroughly with several changes of 70% ethanol, followed by a final rinse in PBS or your preferred buffer.
- Proceed with the standard blocking and antibody incubation steps.
Experimental Workflows
High Background Staining Troubleshooting Workflow
Weak or No Staining Troubleshooting Workflow
The Scientist's Toolkit: Research Reagent Solutions
| Reagent | Function in Preventing Non-Specific Binding | Key Considerations |
|---|---|---|
| Normal Serum [16] [1] | Blocks non-specific hydrophobic interactions by occupying sticky sites on tissue proteins. | Must be from the same species as the secondary antibody or an unrelated species [1]. |
| Bovine Serum Albumin (BSA) [1] | Serves as an alternative blocking agent to serum. | Often used at 1-5% in buffer solutions. |
| Non-ionic Detergents [16] [1] | Reduces hydrophobic interactions; aids in reagent penetration. | Tween-20 or Triton X-100, typically at 0.05-0.3% concentration [16] [1]. |
| Peroxidase Blocking Reagent [16] [1] | Quenches endogenous peroxidase activity to prevent false-positive signals in HRP-based detection. | Typically 3% H₂O₂; incubation time 10-15 minutes [1]. |
| Avidin/Biotin Blocking Kit [1] | Blocks endogenous biotin, which is prevalent in tissues like liver, kidney, and brain. | Essential when using streptavidin-biotin detection systems [1]. |
| Autofluorescence Quenchers [16] | Reduces tissue-intrinsic fluorescence, e.g., from lipofuscin or aldehydes. | Sudan Black B is a common chemical quencher [16]. |
| Validated Primary Antibodies [17] | The foundation of specificity; rigorously validated antibodies minimize off-target binding. | Use resources like Antibodypedia or CiteAb to find antibodies validated for your specific application [17]. |
In stem cell research, achieving specific antibody binding is critical for accurately characterizing cell populations, sorting cells, and analyzing surface markers. Non-specific antibody binding can lead to misinterpreted data, failed experiments, and unreliable conclusions. This technical support center addresses the key cellular factors—epitope availability, receptor expression, and membrane properties—that are fundamental to preventing these issues. The following FAQs, troubleshooting guides, and detailed protocols will help you identify, troubleshoot, and resolve common experimental challenges.
FAQs: Core Concepts and Troubleshooting
1. What causes non-specific antibody binding in flow cytometry experiments with stem cells? Non-specific binding occurs when an antibody binds to a cell without a specific epitope for it. Common causes include:
- Excessive Antibody Concentration: Using too high an antibody concentration can cause it to bind to lower-affinity, off-target sites. This is resolved by performing an antibody titration study to optimize the signal-to-background ratio [2].
- Fc Receptor Interactions: Fc regions of antibodies can bind to Fc receptors expressed on various immune cells present in stem cell preparations (e.g., neutrophils, monocytes, macrophages). Using an Fc blocking reagent prior to antibody staining is recommended to prevent this [2].
- Non-viable Cells: Dead cells are "sticky" due to exposed DNA from damaged membranes, leading to cell clumping and non-specific binding. Always exclude non-viable cells using a DNA-binding viability dye (e.g., 7-AAD or propidium iodide) and include a viability gate in your flow cytometry analysis [2].
- Low Protein in Solutions: A lack of protein in washing and staining buffers can cause antibodies to bind non-specifically to cells. This is fixed by including Bovine Serum Albumin (BSA) or Fetal Bovine Serum (FBS) in these solutions [2].
2. Why might my antibody fail to bind its target epitope on a membrane protein? This problem, known as epitope masking, happens when the antibody's binding site is obscured. In the context of membrane proteins, this can occur because:
- The target's native conformation hides the epitope [19].
- Other interacting proteins or lipids in the membrane block access to the epitope [20] [19].
- The epitope is a conformational epitope that is lost if the protein is denatured during purification or fixation [20].
- Solution: If epitope masking is suspected, use an antibody that recognizes an epitope in a different region of the target protein [19].
3. How does the native membrane environment affect antibodies targeting membrane proteins? Membrane proteins are challenging targets because their structure and function depend on the lipid bilayer. Outside this native environment, they can denature, leading to a loss of conformational epitopes.
- The Challenge: Purifying membrane proteins often requires detergents, which can disrupt essential lipid-protein interactions. This results in a loss of structural integrity, making the protein a poor immunogen for generating antibodies or an unreliable target for detection [20].
- Advanced Solutions: New strategies use membrane mimetics like nanodiscs, Saposin lipid nanoparticles (SapNPs), and Styrene-maleic acid-lipid particles (SMALPs) to stabilize membrane proteins in an artificial bilayer that closely mimics the native environment, preserving their native conformation for immunization or assay development [20].
4. What is a peptide blocking experiment and how can it validate antibody specificity? A peptide blocking experiment is a critical control to confirm that an antibody's binding is specific to its intended epitope.
- Principle: The antibody is pre-incubated with an excess of the immunizing peptide (the "blocking peptide") that corresponds to the epitope. This neutralizes the antibody's binding sites.
- Method: The neutralized antibody is then used alongside the untreated antibody on identical samples (e.g., western blot membranes or cell stains). Specific binding is confirmed when the staining or signal is absent in the sample treated with the neutralized antibody [15].
- Application: This protocol is essential for validating antibody specificity in techniques like western blot, immunohistochemistry (IHC), and immunocytochemistry (ICC) [15].
Troubleshooting Guide: Common Experimental Issues
| Problem | Possible Cause | Recommended Solution |
|---|---|---|
| High background staining | Non-specific antibody binding, often due to Fc receptor interactions or lack of protein in buffers. | Include Fc receptor blocking; Add BSA (1-5%) to washing and staining buffers [2]. |
| Unexpected bands in Western Blot | Antibody cross-reactivity with off-target proteins or different protein isoforms. | Perform a peptide blocking experiment to confirm specificity [15]; Check antibody datasheet for known isoform reactivity [19]. |
| No signal in immunoprecipitation (IP) | Epitope masking under native IP conditions; low protein expression [19]. | Use an antibody targeting a different epitope of the protein; Verify protein expression levels in input lysate [19]. |
| Antibody fails to detect membrane protein | Loss of native protein conformation during purification or isolation; epitope is not accessible in the membrane [20]. | Use alternative membrane protein stabilization methods (e.g., nanodiscs, liposomes) for immunogen preparation or assays [20]. |
| Weak or no signal in flow cytometry | Target receptor expression is too low; epitope is masked in live cells. | Validate receptor expression on your stem cell line; Consider using cell permeabilization if targeting an intracellular epitope [21]. |
Quantitative Data: Factors Influencing Epitope Masking
Recent research on viral epitopes provides quantitative insights into how antibody competition can mask epitopes, a concept highly relevant to stem cell surface marker detection. The following table summarizes key factors identified in a study on influenza virus [22].
| Factor | Impact on Epitope Masking | Experimental Finding |
|---|---|---|
| Epitope Proximity | Masking potency is higher for epitopes located close to each other. | Antibodies against hemagglutinin (HA) efficiently inhibit B cell activation targeting nearby epitopes [22]. |
| Antibody Affinity/Kinetics | High affinity and slow dissociation kinetics enhance masking potency. | Antibodies with slower off-rates (dissociation) were more potent at blocking epitope access [22]. |
| Antibody Valency | Multivalent binding (e.g., IgG) increases the effectiveness of masking. | The valency of the competing antibody contributes to the strength of the inhibitory effect [22]. |
| Epitope Location | Membrane-proximal epitopes are susceptible to multiple masking mechanisms. | These epitopes are subject to both direct (steric) and indirect masking [22]. |
Detailed Experimental Protocols
Protocol 1: Blocking with Immunizing Peptide to Validate Antibody Specificity
This protocol is used to confirm that a primary antibody binds specifically to the target epitope in applications like Western blot, IHC, and ICC [15].
Materials:
- Blocking buffer (e.g., TBST with 5% non-fat dry milk for Western blot)
- Antibody blocking (immunizing) peptide
- Primary antibody
- Two identical samples (e.g., Western blot membranes with identical lanes)
Steps:
- Determine Optimal Antibody Concentration: Use the predetermined optimal concentration for your assay. Calculate the total amount of antibody needed for two identical experiments.
- Prepare Antibody Solutions: Dilute the antibody in blocking buffer and divide it equally into two tubes.
- Tube 1 (Blocked): Add a five-fold excess (by weight) of blocking peptide to the antibody solution.
- Tube 2 (Control): Add an equivalent volume of buffer only.
- Incubate: Incubate both tubes with agitation for 30 minutes at room temperature or overnight at 4°C.
- Perform Staining: Apply the "Blocked" antibody solution to one sample and the "Control" antibody to the other. Complete your standard staining protocol.
- Analyze Results: Compare the results. The specific signal will be absent or significantly reduced in the sample stained with the "Blocked" antibody [15].
Protocol 2: Flow Cytometry Staining for Cell Surface Markers with Reduced Background
This protocol incorporates key steps to minimize non-specific binding in flow cytometry.
Materials:
- Staining buffer (PBS containing 1% BSA or FBS)
- Fc receptor blocking reagent
- Viability dye (e.g., 7-AAD)
- Primary antibodies conjugated to fluorochromes
- Flow cytometry tubes
Steps:
- Prepare Cells: Harvest and wash cells in cold staining buffer.
- Viability Staining: Resuspend cell pellet in viability dye solution and incubate as per manufacturer's instructions.
- Fc Receptor Blocking: Resuspend cells in staining buffer containing an Fc receptor blocking reagent. Incubate for 10-15 minutes on ice.
- Antibody Staining: Add pre-titrated fluorochrome-conjugated antibodies directly to the cell suspension. Mix gently and incubate for 30 minutes in the dark on ice.
- Wash and Resuspend: Wash cells twice with ample staining buffer to remove unbound antibody. Resuspend in staining buffer for analysis on the flow cytometer.
- Gating Strategy: During analysis, first gate on live cells based on the viability dye, then on your population of interest (e.g., based on forward and side scatter), before analyzing marker expression [2] [21].
The Scientist's Toolkit: Key Research Reagent Solutions
| Reagent / Tool | Function in Research | Key Considerations |
|---|---|---|
| Fc Blocking Reagent | Blocks Fc receptors on cells to prevent non-specific antibody binding, crucial for stem cell populations containing innate immune cells [2]. | Can be included in the antibody cocktail or used as a separate pre-incubation step. |
| Bovine Serum Albumin (BSA) | Used as a protein additive in buffers to saturate non-specific binding sites on cells and plastic surfaces, reducing background noise [2]. | Typically used at 1-5% concentration in PBS or Tris-based buffers. |
| Viability Dyes (e.g., 7-AAD) | Distinguishes live from dead cells; critical for excluding "sticky" dead cells that cause non-specific binding and clumping [2]. | Should be used in the same tube as other antibodies and included in the gating strategy. |
| Membrane Mimetics (Nanodiscs, SMALPs) | Stabilizes purified membrane proteins in a near-native lipid environment, preserving conformational epitopes for antibody development and binding studies [20]. | Superior to detergents for maintaining native protein structure and function. |
| Blocking Peptides | Synthetic peptides identical to the antibody's epitope; used in competition experiments to validate antibody specificity and identify non-specific binding [15]. | A 5:1 (peptide:antibody) mass ratio is a standard starting point for neutralization. |
Experimental Workflow and Signaling Pathway Diagrams
Diagram 1: Epitope Masking Mechanism
This diagram illustrates how a pre-existing antibody can block a B cell receptor from accessing its epitope, a key cause of failed detection.
Diagram Title: Antibody Competition Leading to Epitope Masking
Diagram 2: Antibody Specificity Validation Workflow
This flowchart outlines the key steps in a peptide blocking experiment to confirm antibody specificity.
Diagram Title: Peptide Blocking Assay Workflow
Practical Strategies: Blocking, Fragment Engineering, and Stem Cell-Tailored Protocols
In stem cell research, precise identification and characterization of cell populations through antibody-based detection is paramount. However, a common challenge complicating this analysis is non-specific antibody binding mediated by Fc receptors (FcRs). Fc receptors expressed on various cell types, including myeloid cells and certain stem cells, can bind the constant Fc region of antibodies rather than the specific antigen-binding Fab region. This non-specific interaction leads to elevated background staining, false-positive signals, and compromised data interpretation [23]. Fc receptor blocking is therefore an essential technical step to ensure the validity of flow cytometry and immunostaining experiments in stem cell biology, drug development, and cellular characterization.
Critical Reagents for Fc Receptor Blocking
Selecting the appropriate blocking reagent is critical and depends on the experimental model and cell type. The table below summarizes the primary classes of blocking reagents.
Table 1: Key Fc Receptor Blocking Reagents and Their Applications
| Reagent Type | Specific Examples | Target Species | Mechanism of Action | Application Notes |
|---|---|---|---|---|
| Species-Specific Monoclonal Antibodies | Mouse BD Fc Block (Purified rat anti-mouse CD16/CD32) [23] | Mouse | Binds to and blocks low-affinity Fcγ receptors (CD16/CD32); also reported to block FcγI (CD64) [23]. | Ideal for immunophenotyping mouse leukocytes. Does not require washing out before primary antibody addition [23]. |
| Rat BD Fc Block (Purified mouse anti-rat CD32) [23] [24] | Rat | Binds to and blocks rat CD32 (FcγR). | Used for blocking rat cell suspensions. | |
| Purified Recombinant Fc Proteins | Human BD Fc Block [23] | Human | Purified recombinant Fc proteins that compete with detection antibodies for binding to Fc receptors. | Designed to reduce nonspecific staining in human cell analysis, beneficial for identifying rare target cells [23]. |
| Normal Sera | Human AB Serum (HAB) [25] | Human | Uses a mixture of immunoglobulins from serum to saturate Fc receptors. | A common and effective method, especially for cells with high FcR expression (e.g., monocytes). Not necessary for staining of whole blood [25]. |
| Commercial Blocking Solutions | Human Fc Receptor Blocking Solution (#58948) [26] | Human | Contains a modified form of human IgG1 that blocks human Fc receptors. | Recommended for live cells prior to immunostaining; use at 2.5 μg per million cells for 10 minutes at room temperature without a subsequent wash step [26]. |
Experimental Protocols for Fc Receptor Blocking
Protocol 1: Blocking and Staining for Mouse or Rat Leukocytes
This protocol is adapted for use with species-specific monoclonal blockers like BD Fc Block [23].
- Cell Preparation: Harvest tissues and create a single-cell suspension. Remove red blood cells using a lysing buffer (e.g., BD Pharm Lyse) or a density gradient. Wash cells and resuspend at a concentration of 2 x 10^7 cells/mL [23].
- Fc Blocking: Add BD Fc Block reagent to the cells at a concentration of <1 μg per million cells. Incubate for 3–5 minutes at 4°C. This step does not require washing prior to the addition of primary antibodies [23].
- Antibody Staining: Add fluorochrome-conjugated primary antibodies, either directly to the Fc Block/cell mixture or by first transferring cells to a tube containing the pre-diluted antibody. For multicolor labeling, all directly conjugated antibodies can be added simultaneously [23].
- Incubation and Washing: Incubate at 4°C for 20–40 minutes in the dark. Wash the cells twice with wash buffer (e.g., PBS with 0.1% NaN3 and 1.0% FBS) [23].
- Data Acquisition: Resuspend the stained cell pellet in an appropriate buffer and acquire data on a flow cytometer as soon as possible. Analysis of freshly isolated leukocytes is recommended within 5 hours for activated cells, or up to 18 hours for other cell types [23].
Protocol 2: Blocking with Human AB Serum (HAB) for Human Cells
This protocol is suitable for human cells, particularly those with high FcR expression, such as monocytes or macrophages [25].
- Cell Preparation: Wash cells and resuspend at 10^7 cells/mL in a cold buffer (e.g., PBS with 2% newborn calf serum and 0.1% sodium azide). Ensure cell viability exceeds 90%; otherwise, remove dead cells using a method like Ficoll-Hypaque separation [25].
- Serum Blocking: Add 50 μL of cell suspension to a tube. Add 50 μL of heat-inactivated Human AB Serum (HAB) to the tube, mix well, and incubate for approximately 1 minute at room temperature [25].
- Antibody Staining: Add the predetermined optimal concentration of fluorochrome-conjugated primary antibody directly to the tube. For multi-color staining, add all antibodies simultaneously [25].
- Incubation and Washing: Vortex the tube briefly and incubate for 30 minutes at 4°C in the dark. Wash the cells twice with 1 mL of buffer [25].
- Data Acquisition: Resuspend the cells in buffer and keep them on ice or at 4°C, protected from light, until flow cytometric analysis [25].
Figure 1: Fc Receptor Blocking Workflow Decision Tree. This flowchart guides researchers in selecting the appropriate blocking method based on species and cell type. RT: Room Temperature.
Troubleshooting Guide and FAQs
Q1: I am observing high background fluorescence in my flow cytometry data from human stem cell cultures. Could Fc receptors be the cause, and how can I confirm this?
A: Yes, high background is a classic symptom of non-specific Fc receptor binding [27] [28]. This is especially common in cultures containing myeloid-lineage cells or stem cells expressing FcRs. To confirm and address this:
- Run an unstained control to establish the level of autofluorescence.
- Use a viability dye to gate out dead cells, which bind antibodies non-specifically [27] [28].
- Employ an Fc receptor blocking reagent prior to antibody staining. A significant reduction in background in your test sample compared to a non-blocked control confirms the issue was Fc-mediated [23] [26].
- Include an isotype control to determine the level of non-specific background staining [23].
Q2: After using an Fc block, I still see some background in my negative cell population. What are other potential causes?
A: While Fc blocking is crucial, other factors can contribute to background:
- Antibody Concentration: Too much antibody can lead to non-specific binding. Titrate your antibodies to find the optimal concentration [27] [28].
- Dead Cells: These bind antibodies nonspecifically. Always use a viability dye and gate out non-viable cells [28].
- Cell Autofluorescence: Certain cell types naturally autofluoresce. Using fluorochromes that emit in red-shifted channels (e.g., APC instead of FITC) can help minimize this issue [27].
- Insufficient Washing: Increase the volume, number, or duration of washes between staining steps [28].
Q3: I am working with mouse bone marrow and using a rat anti-mouse primary antibody. Are there special considerations for using Mouse BD Fc Block in this setup?
A: Yes, careful experimental design is essential. The Mouse BD Fc Block is a purified rat IgG2b antibody [23] [24]. If you are using an unconjugated rat primary antibody, your secondary reagent must be chosen carefully. It must not cross-react with the rat IgG2b Fc Block reagent. You must use an isotype-specific secondary antibody that is specific for the isotype of your primary rat antibody [24].
Q4: Can I use Fc receptor blocking for intracellular staining protocols?
A: The Fc blocking step is typically performed on live, unfixed cells prior to any surface or intracellular staining. After blocking and surface staining, cells are then fixed and permeabilized for intracellular antibody staining. The permeabilization step can expose new binding sites, but the initial Fc block helps reduce background at the critical surface staining stage [27].
Figure 2: Troubleshooting High Background in Flow Cytometry. A systematic approach to diagnosing and resolving common causes of high background signal, highlighting Fc receptor blocking as a key solution.
The Scientist's Toolkit: Essential Research Reagent Solutions
Table 2: Key Materials for Fc Blocking and Related Experiments
| Item | Function/Application | Example Product/Reference |
|---|---|---|
| Fc Blocking Reagents | To prevent nonspecific binding of antibodies to Fc receptors on cells. | Mouse BD Fc Block, Human BD Fc Block, Human AB Serum [23] [25] [26]. |
| Viability Dyes | To discriminate and gate out dead cells, which non-specifically bind antibodies. | Propidium Iodide (PI), 7-AAD, DAPI, Fixable Viability Dyes [27] [28]. |
| Isotype Controls | Negative controls to determine the level of non-specific background staining from antibodies. | Antibodies of the same species, isotype, and conjugation as the primary antibody [23] [28]. |
| Fixation & Permeabilization Buffers | For intracellular staining protocols. Required after surface staining to maintain cell structure and allow intracellular antibody access. | Formaldehyde, Saponin, Triton X-100, ice-cold Methanol [27] [28]. |
| Antibody Dilution Buffer | A optimized buffer to dilute antibodies and maintain their stability, often containing BSA or serum to minimize non-specific binding. | Flow Cytometry Antibody Dilution Buffer (e.g., #13616) or PBS with 0.5% BSA [26]. |
In the rigorous field of stem cell research, where the accurate characterization of cell populations is fundamental, Fc receptor blocking is not an optional step but a necessity. By understanding the principles behind non-specific binding and systematically applying the appropriate blocking reagents and protocols, researchers can significantly enhance the specificity and reliability of their data. Integrating Fc blocking into a broader strategy that includes proper controls, antibody titration, and viability staining ensures that experimental outcomes truly reflect biological reality, thereby advancing the development of safe and effective stem cell-based therapies.
In stem cell research, the accuracy of antibody-based detection is paramount for characterizing pluripotency, tracking differentiation, and assessing the purity of cellular therapies. Protein-based blocking is a foundational step designed to prevent nonspecific antibody binding, thereby ensuring that the resulting signal originates solely from the target antigen. Without effective blocking, high background noise and false-positive results can compromise data integrity, leading to incorrect conclusions about stem cell markers, differentiation status, or the success of genetic modifications like the creation of hypoimmune stem cells [29] [30]. This guide provides detailed protocols and troubleshooting advice to help researchers optimize their blocking strategies for the most reliable outcomes in stem cell workflows.
Blocking Buffer Comparison and Selection
Selecting the appropriate blocking agent is a critical decision that depends on your specific experimental goals, the primary antibody's characteristics, and the detection system. The table below summarizes the properties of common protein-based blocking buffers to guide your selection.
Comparison of Common Protein-Based Blocking Buffers
| Blocking Buffer | Typical Concentration | Key Benefits | Key Limitations & Considerations | Ideal Use Cases in Stem Cell Research |
|---|---|---|---|---|
| Bovine Serum Albumin (BSA) | 2-5% [29] | - Low in immunoglobulins and biotin [29]- Compatible with biotin-streptavidin detection systems [31]- Preferred for phosphoprotein detection [29] [32] | - Generally a weaker blocker than milk, which can result in more non-specific binding [29]- Various grades of purity can impact performance | - Detecting phosphoproteins (e.g., pAKT, pSTAT) [29]- Experiments using biotin-streptavidin amplification- Storing and reusing antibodies [29] |
| Normal Serum | 1-5% [4] | - Contains antibodies that bind to reactive sites, preventing secondary antibody cross-reactivity [4]- Rich in albumin and other blocking proteins | - Must be from the same species as the secondary antibody [4]- Can be more expensive than other options | - Immunohistochemistry/IHC [4]- Immunofluorescence/IF [33] |
| Non-Fat Dry Milk | 2-5% [29] | - Inexpensive and readily available [29] [31]- Effective at reducing background in many standard protocols | - Contains casein and other phosphoproteins that interfere with anti-phosphoprotein antibodies [29] [32]- Contains biotin, which interferes with streptavidin systems [29] [31] | - Routine detection of non-phosphorylated, high-abundance proteins- Chemiluminescent detection where cost is a primary factor |
| Purified Casein | 1-2% [29] | - Single-protein buffer reduces chance of cross-reaction [29]- Excellent performance as a milk alternative without inherent biotin | - More expensive than non-fat dry milk [29] | - When milk provides high background but a milk-like block is desired- General-purpose blocking for medium- to high-abundance targets [29] |
Detailed Experimental Protocols
Standard Blocking Protocol for Western Blotting
This protocol is used after protein transfer to a PVDF or nitrocellulose membrane to prevent non-specific binding of detection antibodies [29] [31].
- Post-Transfer: Immediately following protein transfer, place the membrane in a clean container with the chosen blocking buffer.
- Blocking Incubation: Incubate the membrane with 5-10 mL of blocking buffer (e.g., 5% BSA, 5% non-fat dry milk, or a commercial casein-based blocker) for 1 hour at room temperature with gentle agitation. Note: Maximum blocking time should not exceed 2 hours at room temperature, as proteins can be exchanged from the membrane with longer incubations [31].
- Washing: Briefly rinse the membrane with 1X Tris-Buffered Saline with Tween (TBST) or 1X Phosphate-Buffered Saline with Tween (PBST). Tip: For fluorescent Western blotting, filter buffers to avoid fluorescent artifacts [29].
- Antibody Incubation: Proceed to incubate with the primary antibody diluted in the same blocking buffer used in step 2.
Standard Blocking Protocol for Immunofluorescence/Immunohistochemistry
This protocol is performed on fixed cells or tissue sections just prior to incubation with the primary antibody [4] [33].
- Fixation and Permeabilization: After fixing cells or tissues (e.g., with 4% formaldehyde for 15 minutes) and rinsing with PBS, permeabilize cells if detecting an intracellular antigen [33].
- Blocking Incubation: Prepare a blocking buffer such as 1X PBS containing 5% normal serum from the secondary antibody host species and 0.3% Triton X-100 [33]. Cover the sample with this buffer and incubate for 60 minutes at room temperature. Blocking can also be performed for 30 minutes to overnight at 4°C for specific applications [4].
- Preparation: While blocking, dilute the primary antibody in an antibody dilution buffer (e.g., 1X PBS with 1% BSA and 0.3% Triton X-100) [33].
- Antibody Application: Aspirate the blocking solution and immediately apply the diluted primary antibody. Note: Many researchers omit a wash step after blocking and apply the primary antibody directly to avoid any risk of exposing unblocked sites [4].
The following diagram illustrates the experimental workflow and the mechanism of blocking.
Troubleshooting Common Blocking Issues
Problem: High Background Signal
- Cause: Inadequate blocking or too high antibody concentration [32].
- Solutions:
- Increase the concentration of your blocking agent (e.g., from 2% to 5%) [29] [32].
- Extend the blocking time (up to 2 hours for Western blot) or try blocking overnight at 4°C for IHC [4] [31].
- Include a mild detergent like 0.05%-0.2% Tween-20 in your blocking and wash buffers [29]. Caution: Too much detergent can wash away weak-binding antibodies [29].
- Re-titer your primary and secondary antibodies to ensure you are not using an excessive amount [32].
Problem: Weak or No Specific Signal
- Cause: The blocking agent may be masking the antigen or interfering with antibody-antigen binding [29] [34].
- Solutions:
- Empirically test a different blocking buffer. For example, switch from non-fat milk to BSA or a purified single-protein blocker like casein [29].
- Ensure you are not "over-blocking." Try reducing the blocking time or concentration.
- For phosphorylated proteins, always use BSA instead of milk, as milk phosphoproteins cause interference [29] [32].
Problem: Non-Specific Bands (Western Blot)
- Cause: Often related to antibody specificity, but insufficient blocking can be a contributing factor [32].
- Solutions:
Essential Research Reagent Solutions
A successful blocking experiment relies on high-quality reagents. The table below lists key materials and their functions.
| Reagent/Item | Function in Blocking & Immunodetection |
|---|---|
| Bovine Serum Albumin (BSA) | A purified single protein used to block non-specific binding, especially critical for phosphoprotein detection and biotin-based systems [29] [31]. |
| Normal Serum | Serum from the host species of the secondary antibody, used to block charge-based and hydrophobic interactions in IHC/IF [4]. |
| Non-Fat Dry Milk | A cost-effective protein mixture for general blocking in Western blotting; not suitable for phosphoprotein or biotin-based work [29] [35]. |
| Tween-20 | A mild detergent added to blocking and wash buffers (0.05-0.2%) to reduce hydrophobic interactions and lower background [29]. |
| Tris-Buffered Saline (TBS) | The recommended buffer salt for blocking when using Alkaline Phosphatase (AP)-conjugated antibodies, as PBS interferes with AP activity [29] [34]. |
| Commercial Blockers | Pre-formulated, optimized buffers (e.g., single-protein, protein-free, or fluorescent-compatible) that offer consistency, long shelf life, and often faster blocking times [29] [4]. |
Frequently Asked Questions (FAQs)
Q1: Why is it crucial to use serum from the secondary antibody species for blocking in IHC? A: Using serum from the secondary antibody species (e.g., goat serum if using a goat anti-rabbit secondary) ensures that any antibodies present in the serum will bind to non-specific sites. The secondary antibody will then not recognize these already-bound antibodies, preventing universal background staining [4].
Q2: Can I use the same blocking buffer for both Western blot and immunofluorescence? A: While some principles overlap, optimal buffers can differ. For fluorescent Western blotting, it is critical to use high-quality, filtered buffers to avoid particulate fluorescent artifacts, and to limit detergents that can auto-fluoresce [29]. For IF, buffers often contain serum and Triton X-100 for permeabilization [33]. Empirical testing is recommended.
Q3: My blocking buffer with non-fat milk works for my standard Western blots. Why would I switch to a more expensive commercial blocker? A: Commercial blockers are often highly purified single proteins or proprietary formulations. They can provide superior performance by reducing cross-reactivity, offering greater lot-to-lot consistency, and blocking faster (sometimes in 10-15 minutes). They are ideal when optimizing a new system or when traditional blockers like milk or BSA give high background or mask your antigen [29].
Q4: How does blocking relate specifically to stem cell research? A: In stem cell research, accurately characterizing cell surface markers (e.g., MHC expression [30]), pluripotency factors, and differentiation markers is essential. Effective blocking ensures that signals from these critical antigens are not obscured by background noise, which is vital for assessing the quality of stem cell lines, tracking differentiation efficiency, and validating the phenotype of engineered cells like hypoimmune ICAM-1 knockout pluripotent stem cells [30].
Troubleshooting Guides and FAQs
Frequently Encountered Problems & Solutions
Problem: High Background/Non-Specific Binding in Cell Staining
- Potential Cause 1: Fc receptor-mediated binding on cells.
- Solution: Use F(ab')₂ fragments instead of whole antibodies. The lack of an Fc region prevents binding to Fc receptors, a significant source of non-specific signal [36] [3].
- Potential Cause 2: Over-concentration of the primary antibody.
- Solution: Titrate the F(ab')₂ or Fab fragment to find the optimal working concentration. Fragments often require different concentrations than intact IgG.
Problem: Poor Tissue Penetration in Staining
- Potential Cause: The large size of intact IgG (≈150 kDa) limits diffusion.
- Solution: Switch to smaller fragments. Fab fragments (≈50 kDa) offer significantly deeper and more uniform penetration into tissue sections and cell clusters [36] [37].
Problem: Unwanted Immune Effector Functions (e.g., Complement Activation)
- Potential Cause: The Fc region of intact IgG is triggering downstream effects.
- Solution: Employ Fab or F(ab')₂ fragments. These fragments are devoid of the Fc region and thus do not fix complement or interact with Fc receptors to elicit ADCC or CDC [36] [38].
Problem: Low Conjugation Efficiency
- Potential Cause: Attempting to conjugate via amines (e.g., lysines) can damage the antigen-binding site.
- Solution: For F(ab')₂ fragments, mild reduction yields Fab' fragments with free sulfhydryl groups in the hinge region. These thiol groups can be targeted for site-specific conjugation, ensuring the binding site remains unhindered [36] [39].
FAQ: Core Concepts for Stem Cell Research
Q1: Why should I use antibody fragments instead of whole antibodies in my stem cell research? Antibody fragments provide critical advantages for stem cell research, primarily by eliminating Fc-mediated non-specific binding to cells that express Fc receptors [36] [3]. Furthermore, their smaller size enables improved penetration into dense stem cell clusters or organoids, providing more accurate staining and targeting [36] [37]. They also allow you to study antigen binding in isolation, without interference from Fc-mediated effector functions like complement activation [36].
Q2: What is the fundamental difference between Fab, F(ab')₂, and Fab' fragments? The differences lie in their structure, size, and valency. The table below summarizes the key characteristics:
| Fragment | Molecular Weight (approx.) | Structure & Valency | Key Features & Production |
|---|---|---|---|
| Fab | 50,000 Da [36] | Monovalent (one binding site) [36] | Produced by papain digestion of IgG; results in a single antigen-binding arm and the loss of the Fc region [36]. |
| F(ab')₂ | 110,000 Da [36] | Divalent (two binding sites) [36] | Produced by pepsin digestion of IgG; contains two Fab arms linked by disulfide bonds in the hinge, offering higher avidity [36]. |
| Fab' | 55,000 Da [36] | Monovalent (one binding site) [36] | Produced by mild reduction of F(ab')₂; contains a free sulfhydryl group in the hinge, ideal for site-specific conjugation [36]. |
Q3: How do I choose between Fab and F(ab')₂ for my experiment? Your choice depends on the experimental goal:
- Use F(ab')₂ when you need high avidity due to bivalent binding and want to avoid the Fc region. This is ideal for most immunoassays and staining procedures where high background is an issue [36] [3].
- Use Fab or Fab' when you require monovalent binding, for example, to block a receptor without causing cross-linking or aggregation. Fab' is specifically chosen when you plan to perform conjugation via its hinge-region thiol group [36] [39].
Q4: Can antibody fragments be used in therapeutic applications for regenerative medicine? Yes, absolutely. Engineered antibody fragments are a rapidly growing class of therapeutics. Their small size and customizable valency are being explored for targeted therapies. For instance, engineered multivalent fragments have shown promise in the antibody-mediated removal of undifferentiated human embryonic stem cells (hESCs) from differentiated cultures, a critical safety step in cell therapy [37]. Fragments like single-chain variable fragments (scFvs) are also used to build bispecific engagers and other advanced modalities [39].
Experimental Protocols
Protocol 1: Generating F(ab')₂ Fragments via Pepsin Digestion
This protocol is ideal for producing fragments to reduce Fc-mediated non-specificity [36] [3].
- Principle: Pepsin cleaves IgG at the C-terminal side of the hinge disulfide bonds, resulting in one large F(ab')₂ fragment and multiple small peptides from the Fc region.
Materials:
- Purified IgG antibody (≥ 1 mg recommended)
- Immobilized Pepsin resin (or soluble pepsin)
- Digestion Buffer (e.g., 0.1 M Sodium Acetate, pH 3.5-4.5)
- Neutralization Buffer (e.g., 1.5 M Tris-HCl, pH 8.8)
- Chromatography system (e.g., Gel Filtration, Protein A)
Step-by-Step Method:
- Prepare the IgG: Dialyze the purified IgG into the digestion buffer.
- Digestion: Incubate the IgG with immobilized pepsin resin at a 20:1 to 50:1 (w/w) ratio of antibody to enzyme. Perform digestion for 2-8 hours at 37°C with gentle agitation. Note: Conditions must be optimized for each antibody.
- Separate Enzyme: Centrifuge or filter the mixture to remove the immobilized pepsin resin. If using soluble pepsin, this step requires different purification.
- Neutralize: Add neutralization buffer to the supernatant to adjust the pH to ~7-8.
- Purify F(ab')₂: Apply the mixture to a Protein A or Protein G column. The F(ab')₂ fragment will flow through, as it does not bind, while any undigested IgG and Fc fragments will be retained. Further purification by gel filtration chromatography may be used to remove small Fc peptides [36] [3].
- Verify: Analyze the final product by SDS-PAGE (non-reducing and reducing) and size-exclusion chromatography.
Protocol 2: Generating Fab Fragments via Papain Digestion
This protocol produces monovalent Fab fragments [36] [3].
- Principle: Papain cleaves IgG on the N-terminal side of the hinge disulfide bonds, producing two separate Fab fragments and one intact Fc fragment.
Materials:
- Purified IgG antibody
- Immobilized Papain resin
- Digestion Buffer (e.g., 20 mM Sodium Phosphate, 10 mM EDTA, 20 mM Cysteine, pH 6.5-7.0)
- Chromatography system (e.g., Protein A or Antigen-affinity)
Step-by-Step Method:
- Activate Enzyme: Equilibrate the immobilized papain resin in digestion buffer containing a reducing agent like cysteine, which is essential for papain activity [36].
- Digestion: Incubate the IgG with the activated resin at 37°C for 2-4 hours.
- Separate Enzyme: Remove the resin by centrifugation or filtration.
- Purify Fab: Pass the digest over a Protein A or Protein G column. The Fc fragment and any intact IgG will bind, while the Fab fragments will be collected in the flow-through. For higher purity, antigen-affinity chromatography can be used to isolate specific Fab fragments [36].
- Verify: Analyze by SDS-PAGE under reducing conditions.
Workflow and Pathway Visualizations
Antibody Fragmentation and Application Workflow
Troubleshooting Non-Specific Binding Pathway
The Scientist's Toolkit: Research Reagent Solutions
| Reagent / Material | Function in Antibody Fragment Work | Key Considerations |
|---|---|---|
| Immobilized Papain | Enzyme for digesting IgG to produce Fab and Fc fragments [36]. | Immobilized form allows easy removal, preventing over-digestion and simplifying purification [36]. |
| Immobilized Pepsin | Enzyme for digesting IgG to produce F(ab')₂ fragments [36]. | Works at low pH (optimum ~pH 4.5); digestion must be performed in appropriate acidic buffer [36]. |
| 2-Mercaptoethylamine (2-MEA) | A mild reducing agent used to reduce F(ab')₂ into two Fab' fragments [36]. | Preferred over stronger agents like DTT as it selectively reduces hinge disulfides without affecting intra-chain bonds [36]. |
| Protein A / Protein G Resin | Affinity chromatography media for separating Fc-containing fragments (IgG, Fc) from Fab or F(ab')₂ fragments [36]. | F(ab')₂ and Fab from most species do not bind, making this an excellent purification step post-digestion [36]. |
| N-Ethylmaleimide (NEM) | Alkylating agent used to block free sulfhydryl groups on Fab' fragments, preventing re-oxidation [36]. | Used if the free thiol on Fab' is not needed for conjugation but should be capped to prevent disulfide scrambling. |
FAQs: Core Principles and Applications
1. What is competitive blocking with an immunizing peptide, and why is it used?
Competitive blocking, or a peptide blocking assay, is a method used to confirm an antibody's specificity by pre-incubating it with the specific peptide sequence (the epitope) it was designed to recognize [15] [40]. This binding "neutralizes" the antibody, preventing it from attaching to the target protein in your sample [41]. This method is essential for validating antibody specificity, reducing background signal, and ensuring accurate data interpretation in experiments like western blotting and immunohistochemistry [15] [42]. In the context of stem cell research, where accurately identifying pluripotency markers or differentiation status is critical, this validation is a fundamental step to ensure research integrity.
2. How do I know if my antibody is specific after running the assay?
After performing the experiment with both the neutralized ("blocked") antibody and the regular ("control") antibody on identical samples, you compare the results [15] [40]. A specific antibody binding is indicated by a significant reduction or complete absence of signal in the sample stained with the blocked antibody [15] [40]. The staining or bands that disappear are the specific signals. A lack of change in signal intensity suggests the antibody binding is non-specific [42].
3. My staining didn't completely disappear with the blocked antibody. What does this mean?
A partial reduction in signal can occur. It often indicates that the antibody is specific, but the blocking conditions may need optimization. Consider the following troubleshooting steps:
- Insufficient Peptide: Ensure you are using a sufficient molar excess of the blocking peptide. The standard is a 5:1 to 10:1 weight ratio of peptide to antibody [15].
- Incomplete Incubation: Extend the incubation time of the antibody with the peptide to ensure complete binding. Overnight incubation at 4°C can be more effective than 30 minutes at room temperature [15].
- Non-Specific Binding: The remaining signal might be due to non-specific binding of the antibody to other proteins. This highlights the importance of using this assay alongside other validation strategies [42].
Step-by-Step Experimental Protocol
Materials and Reagents
- Blocking Buffer (e.g., TBST with 5% non-fat dry milk for WB, or PBS with 1% BSA for IHC) [15]
- Primary Antibody
- Immunizing/Blocking Peptide
- Two tubes for preparing antibody solutions
- Two identical samples (e.g., western blot membrane with two identical lanes, two cell slides)
Method
Determine Antibody Concentration: Identify the optimal concentration of your antibody that gives a clear, positive signal in your chosen application [15].
Prepare Antibody Solution: Dilute the primary antibody in your blocking buffer to the final working concentration. Prepare enough volume for two identical experiments [15].
Neutralize the Antibody: Divide the antibody solution equally into two tubes.
Incubate: Incubate both tubes with agitation for 30 minutes at room temperature or overnight at 4°C [15].
Perform Staining: Use the two antibody solutions on your identical samples following your standard staining protocol (e.g., western blot, IHC, ICC) [15].
Compare and Analyze: Compare the signals between the control and the blocked samples. The specific signal will be absent or greatly diminished in the sample treated with the blocked antibody [15].
Key Experimental Parameters Table
The following table summarizes the critical quantitative data for setting up the experiment.
| Parameter | Recommended Condition | Notes |
|---|---|---|
| Peptide to Antibody Ratio | 5:1 to 10:1 (by weight) [15] | A 5:1 ratio is standard; increase if blocking is incomplete. |
| Incubation Time & Temperature | 30 min at room temperature or overnight at 4°C [15] | Overnight incubation can lead to more complete blocking. |
| Buffer (Western Blot) | TBST with 5% non-fat dry milk or 3% BSA [15] | BSA is preferred for detecting phosphorylated proteins. |
| Buffer (IHC/ICC) | PBS with 1% BSA [15] |
Troubleshooting Common Issues
| Problem | Possible Cause | Solution |
|---|---|---|
| No signal reduction with blocked antibody | Antibody binding is non-specific [42]. | Use the antibody in a different application or obtain a new, validated batch. |
| The blocking peptide is incorrect or inactive. | Verify the peptide sequence and source. | |
| High background in both control and blocked samples | Antibody concentration is too high. | Titrate the antibody to find the optimal dilution. |
| Inadequate blocking of the membrane/sample. | Ensure the blocking buffer is fresh and use a longer blocking step. | |
| Partial signal reduction | Insufficient blocking peptide or incubation time [15]. | Increase the peptide:antibody ratio (e.g., to 10:1) and/or incubate overnight at 4°C. |
The Scientist's Toolkit: Essential Research Reagents
| Item | Function in Experiment |
|---|---|
| Immunizing/Blocking Peptide | A short amino acid sequence corresponding to the antibody's epitope. It specifically binds to and neutralizes the antibody [40] [41]. |
| Blocking Buffer (e.g., with BSA or Milk) | A protein-rich solution used to cover unused binding sites on the membrane or sample, preventing non-specific attachment of the antibody [15]. |
| Primary Antibody | The antibody whose specificity is being tested and validated. |
| Species-Matched Secondary Antibody | An antibody conjugated to a detection molecule (e.g., HRP) that binds to the primary antibody, allowing for signal detection. |
Experimental Workflow Visualization
The following diagram illustrates the logical workflow and core principle of the competitive blocking assay.
Key Considerations for Stem Cell Research
In stem cell research, where the precise identification of pluripotency markers (like OCT4, SOX2, NANOG) and lineage-specific proteins is paramount, validating your antibodies with this method is non-negotiable. It adds a critical layer of confidence, ensuring that your experimental conclusions about cell state and differentiation are based on specific antibody binding and not experimental artifact. This practice aligns with the core principles of research integrity, rigor, and transparency advocated by organizations like the International Society for Stem Cell Research (ISSCR) [43]. Always integrate peptide blocking data with other validation hallmarks, such as using genetically modified controls or comparing expression patterns across known positive and negative cell lines, to build a robust case for your antibody's specificity [42].
This technical support center provides targeted troubleshooting guides and FAQs to help researchers prevent nonspecific antibody binding in stem cell research.
Troubleshooting Guide: Addressing Nonspecific Binding
FAQ 1: How does ionic strength in a buffer reduce nonspecific antibody binding?
Adjusting the ionic strength of your buffer is a primary method for mitigating nonspecific staining caused by ionic interactions. These unwanted attractions can occur when the antibody and non-target tissue components have net opposite charges, leading to high background [1].
- Mechanism of Action: Increasing the ionic strength of the antibody diluent or rinse buffer shields these weak, non-specific electrostatic interactions, such as those between carboxyl and amino groups or Van der Waals forces, without significantly disrupting the specific, high-affinity binding between the antibody and its target epitope [1].
- Important Consideration: Note that epitope-antibody binding itself often relies on ionic forces. Therefore, excessive ionic strength can potentially impair the specific signal, particularly when using monoclonal antibodies due to their single-epitope specificity. Optimization is crucial [1].
FAQ 2: When should I use detergents, and how do I choose the right one?
Detergents are essential for reducing nonspecific hydrophobic interactions and for permeabilizing cells to allow antibody access to intracellular targets in stem cell research [1] [44].
- Reducing Hydrophobic Binding: To minimize nonspecific hydrophobic binding of antibodies to serum proteins or tissue, non-ionic detergents like Triton X-100 or Tween 20 are commonly added to blocking buffers and wash buffers at concentrations typically ranging from 0.01% to 0.5% [45] [1] [44].
- Permeabilization for Intracellular Targets: The choice of detergent for permeabilization depends on the localization of your target antigen.
- Mild Detergents (e.g., Digitonin, Saponin): Recommended for accessing cytosolic targets without severely disrupting cellular membranes. A typical stock concentration is 0.5 to 1 mg/mL in DMSO [44].
- Stronger Non-ionic Detergents (e.g., Triton X-100 at 0.1%-0.2%): Necessary for staining targets within interior membranes, such as the nucleus or mitochondria, as they more effectively dissolve membrane structures [44].
The table below summarizes the key reagents for preventing nonspecific binding:
Table 1: Research Reagent Solutions for Preventing Nonspecific Binding
| Reagent | Primary Function | Recommended Working Concentration |
|---|---|---|
| Tween 20 | Non-ionic detergent; reduces hydrophobic interactions in wash/blocking buffers [45] [1] | 0.01% - 0.2% [45] [1] |
| Triton X-100 | Non-ionic detergent; used for permeabilization and reducing hydrophobic binding [1] [44] | 0.1% - 0.5% [1] [44] |
| Bovine Serum Albumin (BSA) | Blocking agent; reduces nonspecific binding by occupying protein-binding sites [45] [1] | 0.2% - 5% [45] [1] |
| Normal Serum | Blocking agent; provides species-specific proteins to reduce nonspecific secondary antibody binding [1] | 1% - 5% [1] |
| Sodium Chloride (NaCl) | Ionic strength modifier; shields non-specific ionic interactions [1] | Varies (requires optimization) [1] |
FAQ 3: What is a systematic approach to optimizing my buffer conditions?
A step-by-step protocol ensures methodical optimization of your buffer system to achieve the best signal-to-noise ratio in your stem cell experiments.
Table 2: Experimental Protocol for Buffer Optimization
| Step | Action | Key Parameters & Tips |
|---|---|---|
| 1. Baseline Assessment | Run your assay with your current buffer formulation and note the level of background staining. | Include controls stained only with the secondary antibody to establish background levels [44]. |
| 2. Blocking Optimization | Incorporate a blocking step with protein (e.g., BSA or serum) and a mild detergent. | Use serum from a species unrelated to your primary/secondary antibodies. A 1-hour incubation at room temperature is typical [1] [44]. |
| 3. Ionic Strength Titration | Systematically increase the salt concentration (e.g., NaCl) in your antibody diluent and wash buffer. | Start with a low salt concentration and increase incrementally. Monitor for loss of specific signal, indicating the optimal concentration has been exceeded [1]. |
| 4. Detergent Titration | Titrate the concentration of detergent (e.g., Tween 20) in your wash buffer. | Begin at 0.01% and increase if background remains high. For permeabilization, test Triton X-100 from 0.05% to 0.3% [1] [44]. |
| 5. Validation | Re-run the assay with the optimized buffer conditions and compare the results to your baseline. | The optimal condition should show a clear specific signal with minimal background [46]. |
The following workflow diagrams the logical relationship and sequence for the optimization process:
Stem Cell-Specific Considerations for CD34+ Enumeration and Other Applications
FAQs: CD34+ Enumeration and Flow Cytometry
Q1: What is the current gold standard protocol for CD34+ hematopoietic stem cell enumeration?
The International Society of Hematotherapy and Graft Engineering (ISHAGE) protocol is the recognized gold standard for CD34+ cell determination and viability assessment. This flow cytometry-based method utilizes a single-platform approach with counting beads, two colors (typically CD45 FITC and CD34 PE), and the cell death marker 7-AAD (7-amino actinomycin D) for viability assessment [47].
Q2: Why is there a need for expanded flow cytometric panels beyond the standard ISHAGE protocol?
While the ISHAGE protocol is excellent for stem cell enumeration and viability, it does not include T cell enumeration, which is now mandatory for characterizing standard allogeneic grafts and various advanced therapy medicinal products (ATMPs). Newer, more comprehensive panels also allow for quantification of B cells (CD19) and T cells (CD3), providing a more complete characterization of the cellular product under release testing conditions [47].
Q3: What are the primary causes of non-specific antibody binding in flow cytometry experiments?
Non-specific antibody binding occurs due to several factors [2]:
- Excess antibody: When antibody concentrations are too high, binding to lower affinity targets occurs
- Fc receptor binding: Fc regions of antibodies bind to Fc-receptors on immune cells (neutrophils, monocytes, macrophages, B-cells, NK cells, some T-cells)
- Non-viable cells: Dead cells are "sticky" due to exposed DNA from damaged membranes
- Lack of protein in solutions: Absence of protein in washing/staining solutions causes antibodies to bind non-specifically
- Artifactual antibody interactions: Particularly with mouse IgG2 antibodies mediated by plasma complement protein C1q
Troubleshooting Guides
Common Issues in CD34+ Enumeration and Resolution Strategies
| Problem | Possible Causes | Recommended Solutions |
|---|---|---|
| High Background Fluorescence | - Lack of protein in buffers- Excessive antibody concentration- Non-viable cells present- Fc receptor binding | - Add BSA or FBS to washing/staining solutions- Optimize antibody concentration via titration- Include viability dye (7-AAD, PI)- Use Fc blocking reagent [2] |
| Low Cell Viability | - Cryopreservation damage- Sample processing delays- Mechanical stress during handling | - Optimize thawing protocols- Reduce processing time- Use gentle pipetting techniques- Include viability assessment with 7-AAD [47] |
| Poor Linearity & Accuracy | - Improper instrument calibration- Insufficient cell numbers- Sample aggregation | - Regular cytometer calibration with standards- Ensure adequate cell concentration- Filter samples to remove clumps [47] |
| Inconsistent CD34+ Counts | - Protocol variations between operators- Non-standardized gating strategies- Reagent lot variability | - Implement standardized operating procedures- Use pre-formulated dried antibody panels- Regular inter-operator training [47] |
Validation Parameters for CD34+ Enumeration Assays
| Parameter | Acceptance Criteria | Purpose & Importance |
|---|---|---|
| Linearity | Coefficient of determination (r²) ≥0.95 [47] | Ensures measured cell concentrations are directly proportional to expected values across the measurement range |
| Sensitivity | Detection of CD34+ cells at low frequencies (0.01-0.02%) [48] | Critical for accurate enumeration, particularly in samples with low stem cell content |
| Accuracy | Comparison with established reference methods [47] | Verifies that the new method provides comparable results to validated standard methods |
| Inter-operator Variation | <10% coefficient of variation [47] | Ensures consistency and reliability of results across different technicians |
Experimental Protocols
Standardized CD34+ Enumeration Using Expanded Panel
Principle: This protocol expands upon the ISHAGE method by incorporating T-cell (CD3) and B-cell (CD19) enumeration alongside traditional CD34+ stem cell quantification using a pre-formulated dried antibody format for enhanced reliability [47].
Reagents:
- Pre-formulated dried antibody panel: CD45 FITC, CD34 PE, CD3 Pacific Blue, CD19 APC
- 7-AAD viability dye
- Counting beads
- Phosphate-buffered saline (PBS) with protein (BSA or FBS)
- Fc receptor blocking reagent (optional)
- Lysing solution (if using whole blood)
Procedure:
- Sample Preparation:
- Obtain leukapheresis product, peripheral blood, or bone marrow sample
- For whole blood, lyse red blood cells using NH₄Cl or commercial lysing solution
- Wash cells with PBS containing protein (0.5-1% BSA or 1-5% FBS)
- Adjust cell concentration to 1-5×10⁶ cells/mL
Staining Protocol:
- Add 100μL of cell suspension to tube containing pre-formulated dried antibodies
- Add 20μL of 7-AAD viability dye
- Include counting beads according to manufacturer's instructions
- Incubate for 15-20 minutes in the dark at room temperature
- Add 2mL of wash buffer, centrifuge at 300×g for 5 minutes
- Decant supernatant and resuspend in 0.5mL of wash buffer for acquisition
Flow Cytometry Acquisition:
- Calibrate flow cytometer using calibration beads
- Set up compensation using single-stained controls
- Acquire a minimum of 50,000 events in the lymphocyte gate
- For rare event analysis (CD34+ cells), acquire 100,000-500,000 total events
Data Analysis:
- Gate on viable cells using forward/side scatter and 7-AAD exclusion
- Identify CD45+ leukocyte population
- Within CD45+ cells, gate on CD34+ population with low side scatter
- Use counting beads for absolute count determination
- Analyze CD3+ T-cells and CD19+ B-cells within the viable population
Prevention of Non-Specific Antibody Binding
Principle: Minimize background staining and improve signal-to-noise ratio by addressing common causes of non-specific antibody binding [2].
Procedure:
- Antibody Titration:
- Perform titration study for each new antibody lot
- Test 2-3-fold serial dilutions around manufacturer's recommendation
- Select concentration providing optimal signal-to-background ratio
Fc Receptor Blocking:
- Add Fc blocking reagent (recombinant protein derived from immunoglobulin)
- Incubate for 10-15 minutes prior to antibody addition
- Alternatively, use antibodies without Fc segments when available
Viability Assessment:
- Include viability dye (7-AAD or propidium iodide) in staining panel
- Gate out non-viable cells during analysis
- Alternatively, incubate specimen at 37°C for 30 minutes prior to staining to reduce surface protein-mediated binding
Protein Supplementation:
- Add 0.5-1% BSA or 1-5% FBS to all washing and staining solutions
- Ensure protein is present in sample resuspension buffer
Plasma Protein Interference Reduction:
- Remove plasma by repeated washing or pre-lysis with NH₄Cl
- Follow with single PBS wash before staining
- Avoid using mouse IgG2 antibodies when possible to prevent C1q-mediated interactions
Signaling Pathways and Workflows
CD34+ Cell Enumeration Workflow
Non-Specific Binding Mechanisms and Prevention
The Scientist's Toolkit: Research Reagent Solutions
Essential Reagents for CD34+ Enumeration
| Reagent | Function | Application Notes |
|---|---|---|
| Pre-formulated Dried Antibody Panels [47] | Multi-parameter staining with lot-to-lot consistency | Contains CD45, CD34, CD3, CD19 in predefined ratios; increases assay reliability |
| 7-AAD Viability Dye [47] [2] | Discrimination of viable/non-viable cells | Critical for accurate enumeration; excluded from viable cell gate |
| Counting Beads [47] | Absolute cell count determination | Enables single-platform quantification without separate cell counting |
| Fc Blocking Reagent [2] | Prevents non-specific Fc receptor binding | Essential when working with immune cells expressing Fc receptors |
| BSA or FBS [2] | Reduces non-specific binding in buffers | Added to washing and staining solutions (0.5-1% BSA or 1-5% FBS) |
| CD34 Isotype Control [47] | Determines non-specific background staining | Used during assay validation and troubleshooting |
Advanced Troubleshooting: Systematic Problem-Solving for Complex Stem Cell Assays
FAQs and Troubleshooting Guides
This guide addresses common challenges in antibody titration for stem cell research, where preventing nonspecific binding is critical for accurate data.
FAQ 1: Why is antibody titration necessary if my vendor provides a recommended dilution?
Vendor-recommended dilutions are a starting point, but optimal concentration depends on your specific experimental conditions [49] [50]. Titration determines the concentration that provides the brightest specific signal with the lowest background for your assay [50]. Using the wrong concentration can lead to false positives or negatives, compromising data integrity [49].
FAQ 2: How does antibody titration help prevent nonspecific binding in stem cell research?
Excessive antibody concentrations cause binding to low-affinity, off-target epitopes, increasing background noise [50]. Titration finds the concentration where antibody binds only to high-affinity intended targets, which is crucial for accurately characterizing rare stem cell populations [50] [51].
FAQ 3: What are the common signs of poor antibody titration in my flow cytometry data?
The table below summarizes key indicators and their impacts on data interpretation.
| Observation | Implication | Underlying Cause |
|---|---|---|
| Negative population appears positive [49] | False-positive results; overestimation of target population [49] | Antibody concentration too high, leading to excessive non-specific binding [49] |
| Positive population appears negative or dim [49] | False-negative results; underestimation of target population [49] | Antibody concentration too low, failing to saturate all target epitopes [49] |
| Low Stain Index [50] [52] | Poor separation between positive and negative populations; reduced assay sensitivity [50] | Suboptimal signal-to-noise ratio, often from high background [50] |
| High background fluorescence [51] | Reduced signal-to-noise ratio; difficult gating and data analysis [51] | Non-specific binding or antibody cross-reactivity [2] [51] |
| Unacceptable variability between replicates [51] | Poor reproducibility and unreliable data [51] | Inconsistent staining, potentially from edge-of-plateau antibody concentrations [49] |
FAQ 4: My titration curve has no clear saturation plateau. What does this mean?
A titration curve without a clear plateau suggests the antibody has low affinity for its target [49]. This makes determining an optimal concentration difficult and the experiment prone to both false-negative and false-positive results [49]. If possible, consider validating your results with an alternative antibody or method [53].
FAQ 5: Beyond titration, what other strategies can reduce nonspecific binding?
Antibody titration is one key method within a broader strategy. The table below lists other essential techniques.
| Strategy | Function | Key Reagents & Notes |
|---|---|---|
| Fc Receptor Blocking [54] [2] | Prevents antibodies from binding to Fc receptors on immune cells via non-specific Fc interactions [54] [2] | Use sera from the host species of your antibodies [54] or commercial Fc blocking reagents [2]. |
| Protein Blocking [2] [55] | Blocks non-specific binding sites on cells and plastic surfaces [2] [51]. | BSA or serum albumin [2]. Note: Milk is not recommended for phosphoprotein detection [55]. |
| Using Viability Dyes [2] | Identifies and allows for the exclusion of "sticky" dead cells that cause non-specific binding [2]. | DNA-binding dyes like 7-AAD or propidium iodide (PI) [2]. |
| Tandem Dye Stabilization [54] | Prevents degradation of tandem dyes, which can cause erroneous fluorescence spillover [54]. | Commercial tandem dye stabilizer [54]. |
| Brilliant Stain Buffer [54] | Prevents dye-dye interactions between polymer ("Brilliant") dyes that can create artifactual signals [54]. | Essential for panels containing these dyes; can also reduce other non-specific binding [54]. |
Experimental Protocol: Establishing Optimal Antibody Concentration
This protocol outlines how to perform a serial antibody titration for flow cytometry to establish the optimal signal-to-background ratio.
Materials and Reagents
- Antibody of interest, conjugated to a fluorochrome [49]
- Staining buffer (e.g., PBS containing 1% BSA) [49]
- Cell suspension containing a mix of positive and negative cells for the target epitope [49] [50]
- Viability dye [50]
- Round-bottom tubes or a 96-well plate [49]
- Centrifuge and flow cytometer
Step-by-Step Procedure
Prepare Antibody Serial Dilutions [49]:
- Label 7-9 tubes. Add 50 µL of staining buffer to each tube.
- In the first tube, add 50 µL of antibody at a concentration higher than the vendor's recommendation (e.g., 4x).
- Mix thoroughly and transfer 50 µL from tube 1 to tube 2. Continue this serial dilution until the second-to-last tube, discarding 50 µL from this tube. The last tube is a negative control with no antibody.
Stain Cells [49]:
- Add 100 µL of your cell suspension (containing 1–5 × 10^6 cells/mL) to each tube.
- Incubate for 30 minutes at room temperature in the dark.
- Wash cells by adding 2 mL of staining buffer, centrifuging at 300 × g for 5 minutes, and discarding the supernatant. Repeat twice.
Acquire and Analyze Data [50]:
- Resuspend cells in buffer and acquire data on a flow cytometer.
- For each dilution, gate on single, live cells and identify the positive and negative populations.
- Record the Median Fluorescence Intensity (MFI) of both the positive (MedPos) and negative (MedNeg) populations.
- Calculate the right SD (rSD) of the negative population: rSD = (84th percentile of the negative population - MedNeg) [50].
- Calculate the Stain Index (SI) for each dilution using the formula [50] [52]:
SI = (MedPos - MedNeg) / (2 × rSD)
Data Interpretation and Optimization
Plot the Stain Index against the antibody concentration. The optimal concentration is at the point where the SI is maximized [50]. At higher concentrations, the SI decreases due to increased background, while at lower concentrations, it decreases due to loss of specific signal [50].
Critical Considerations for Stem Cell Research
- Cell Scarcity: When working with rare stem cell populations, halve staining volumes and use low-retention tubes to conserve sample [54] [51].
- Re-titration: Titrate antibodies whenever you change a key parameter, including cell type, fixation method, staining buffer, or instrument configuration [50].
- Advanced Method: For multicolor panels, use combinatorial titrations by titrating multiple non-overlapping antibodies simultaneously to save time and reagents [52].
The Scientist's Toolkit: Essential Research Reagent Solutions
| Reagent | Function in Preventing Non-Specific Binding | Application Notes |
|---|---|---|
| Normal Sera (e.g., Rat, Mouse) [54] | Blocks Fc receptors on cells when sourced from the antibody host species [54]. | Use at a 1:3.3 dilution in blocking buffer; do not use if staining for immunoglobulins from the same species [54]. |
| Bovine Serum Albumin (BSA) [2] | General blocking agent that occupies non-specific protein binding sites on cells and plastic [2]. | Commonly used at 1-5% in washing and staining buffers [2]. |
| Fc Blocking Recombinant Protein [2] | Specifically binds to and blocks Fc receptors with high affinity [2]. | More specific than serum; recommended for complex immune cell samples [2]. |
| Brilliant Stain Buffer [54] | Prevents polymer dye interactions that cause non-specific fluorescence spillover [54]. | Essential for panels containing >1 "Brilliant" type dye; use up to 30% (v/v) in stain mix [54]. |
| Tandem Dye Stabilizer [54] | Prevents breakdown of tandem dye conjugates, which causes erroneous signal detection [54]. | Add to staining buffer and final resuspension buffer at a 1:1000 dilution [54]. |
| Sodium Azide [54] | Preservative that prevents microbial growth in buffers and antibody stocks [54]. | Warning: Highly toxic; avoid if using HRP-conjugated antibodies for detection (e.g., western blot) as it inhibits HRP [54] [55]. |
| Immunizing/Blocking Peptide [15] [53] | Validates antibody specificity by competing for the binding site; its use eliminates specific signal [15]. | Incubate a 5x weight excess of peptide with antibody before staining [15]. A positive control for nonspecific binding. |
Frequently Asked Questions (FAQs)
Why is it critical to exclude dead cells in flow cytometry experiments, particularly in stem cell research?
Dead cells must be excluded because they can compromise data integrity through several mechanisms. They exhibit non-specific antibody binding, have higher autofluorescence compared to living cells, and can cause cell clumping due to the release of DNA [56]. In stem cell research, where accurately identifying low-abundance cell populations is crucial, this non-specific binding can lead to inaccurate data and misinterpretation of results [2] [56].
What are the primary causes of non-specific antibody binding in cell samples?
Non-specific binding has several common causes [2]:
- Excess antibody concentration, which can cause binding to low-affinity targets.
- Interaction with Fc receptors on immune cells like neutrophils, monocytes, and macrophages.
- The presence of non-viable, "sticky" cells with damaged membranes.
- A lack of protein in washing and staining buffers, leading to antibodies binding non-specifically to cells.
My cell sample has a high background despite using a DNA-binding dye. What could be wrong?
High background is frequently linked to issues with your staining protocol or sample preparation [2] [57]:
- Insufficient washing of cells prior to staining.
- Inadequate protein in your staining or washing buffers. Adding BSA or fetal bovine serum (FBS) can mitigate this [2].
- The dye concentration may be too high. Titrate your dye to find the optimal signal-to-background ratio [2].
- The sample contains too many dead cells, overwhelming the dye's capacity. For samples with low viability, increasing the number of washing steps or using a viability gate in forward/side scatter can help [2].
Can I use Propidium Iodide (PI) or 7-AAD in experiments that require intracellular staining?
No. PI and 7-AAD are not compatible with protocols involving cell permeabilization for intracellular staining [57]. Because these dyes rely on intact membrane integrity in live cells, the permeabilization process would allow them to enter all cells, making it impossible to distinguish between live and dead populations. For such experiments, you should use fixable viability dyes, which covalently bind to amines and remain stable after fixation and permeabilization [56] [57] [58].
Troubleshooting Guides
Problem: Poor Distinction Between Live and Dead Cell Populations
Possible Causes and Solutions:
- Cause 1: Incorrect dye concentration.
- Solution: Perform a dye titration to determine the optimal concentration for your specific cell type. An excess of dye can increase background in the live population [2].
- Cause 2: Incubation time is too short or too long.
- Cause 3: Analysis was delayed.
- Solution: Analyze samples immediately after staining (within 4 hours) to prevent deterioration of cell viability and staining quality [57].
Problem: High Levels of Non-Specific Antibody Binding Persist After Viability Staining
Possible Causes and Solutions:
- Cause 1: Fc receptor-mediated binding.
- Cause 2: Non-viable cells are still present in the analysis.
- Solution: Ensure your flow cytometry gating strategy correctly excludes the viability dye-positive population. Using a viability dye in the same tube as your antibodies is required for some rigorous assays [2].
- Cause 3: Artifactual antibody interactions.
- Solution: Be cautious when using antibodies of the mouse IgG2 class, as they can interact via the complement protein C1q. Where possible, avoid this subclass or remove plasma from the sample by washing prior to staining [2].
DNA-Binding Viability Dyes: A Comparison
The table below summarizes key properties of common DNA-binding viability dyes to help you select the right one for your panel.
| Dye Name | Excitation (nm) | Emission (nm) | Laser (Common) | Fixable? | Key Feature |
|---|---|---|---|---|---|
| Propidium Iodide (PI) | 488 [60] | 617 [60] | Blue (488 nm) [56] | No [58] | Binds dsDNA via intercalation; cost-effective [60]. |
| 7-AAD | 488 [59] | 647 [59] | Blue (488 nm) [56] | No [58] | Binds to GC-rich dsDNA regions; good for FITC/PE panels [56]. |
| DAPI | 358 [56] | 461 [56] | Violet (405 nm) [56] | No [58] | Binds to AT-rich regions; also binds RNA [56]. |
| DRAQ7 | 599 / 644 [58] | 678 / 697 [58] | Blue (488 nm) [58] | No [58] | Far-red emission; can be used in live-cell imaging [58]. |
Experimental Protocols
Principle: PI is a membrane-impermeant dye that enters cells with compromised membranes, intercalates into double-stranded DNA/RNA, and fluoresces red.
Reagents:
- PI Staining Solution (e.g., 10 μg/mL in PBS) [60]
- Flow Cytometry Staining Buffer (with BSA and azide)
- Phosphate-Buffered Saline (PBS)
Procedure:
- Prepare Cells: Harvest and wash cells 1-2 times with PBS. After staining for cell surface antigens, centrifuge at 300-600 x g for 5 minutes and decant supernatant [60].
- Resuspend: Resuspend cell pellet in an appropriate volume of Flow Cytometry Staining Buffer (e.g., 100 μL for up to 1x10⁶ cells) [60].
- Stain: Add 5 μL of PI Staining Solution per 100 μL of cells [57].
- Incubate: Incubate for 5-15 minutes on ice or at room temperature, protected from light. Do not wash the cells after adding PI [57].
- Analyze: Analyze samples by flow cytometry immediately (within 4 hours). Collect PI fluorescence in the FL-2 or FL-3 channel [60].
Principle: 7-AAD is a membrane-impermeant dye that enters dead cells and intercalates into GC-rich regions of double-stranded DNA.
Reagents:
- 7-AAD Staining Solution (e.g., 1 mg/mL in PBS) [59]
- Flow Cytometry Staining Buffer
- PBS or Hank’s Balanced Salt Solution (HBSS)
Procedure:
- Prepare and Wash Cells: Harvest and aliquot up to 1x10⁶ cells per tube. Wash cells twice with 2 mL of PBS or HBSS, centrifuging at 300 x g for 5 minutes each time [59].
- Resuspend: Resuspend the cell pellet in 100 μL of Flow Cytometry Staining Buffer [59].
- Stain: Add 5-10 μL of 7-AAD staining solution to the cell suspension [59].
- Incubate: Incubate for 30 minutes at 4°C in the dark. Do not wash cells after staining [59].
- Analyze: Analyze by flow cytometry. Use the FL-3 channel if the cells have also been stained with FITC- and/or PE-conjugated antibodies [59].
The Scientist's Toolkit: Key Research Reagents
| Reagent / Material | Function | Example Use Case |
|---|---|---|
| Fc Receptor Blocker | Blocks Fc receptors on immune cells to prevent non-specific antibody binding [2] [6]. | Essential for staining samples rich in monocytes, macrophages, or neutrophils [2]. |
| BSA or FBS | Added to staining and washing buffers as a source of protein to minimize non-specific antibody binding to cells [2]. | A standard component of flow cytometry staining buffers to reduce background fluorescence [2]. |
| Viability Dye (e.g., PI, 7-AAD) | Distinguishes live cells from dead cells based on membrane integrity [56] [58]. | Used in almost every flow cytometry experiment to gate out dead cells and improve data accuracy [56]. |
| Fixable Viability Dyes | Amine-reactive dyes that covalently label dead cells; remain stable after fixation/permeabilization [56] [57]. | The only choice for experiments requiring intracellular staining or sample fixation [57]. |
Workflow and Mechanism Diagrams
DNA-Binding Dye Workflow
Mechanism of DNA-Binding Dyes
Fixation and Permeabilization Optimization for Intracellular Targets
Troubleshooting Common Challenges
Problem: Weak or No Signal from Intracellular Target
| Possible Cause | Recommended Solution |
|---|---|
| Insufficient fixation/permeabilization [61] | Ensure the correct fixation and permeabilization protocol is used for your specific target. For phosphorylation sites, formaldehyde fixation is often recommended, while methanol can be better for other epitopes [61] [62]. |
| Fixation denatures the epitope [62] | If formaldehyde denatures the target, try milder permeabilization with saponin or consider an unfixed saponin protocol, especially for DNA content measurement [62]. |
| Fluorochrome incompatibility [63] | Avoid protein-based fluorophores (e.g., APC, PE) with methanol permeabilization, as it denatures them. Use methanol-resistant fluorochromes instead [64] [63]. |
| Loss of antigenicity from over-fixation [65] | Reduce fixation duration or use antigen retrieval methods to unmask the epitope [65]. |
Problem: High Background or Non-Specific Staining
| Possible Cause | Recommended Solution |
|---|---|
| Non-specific Fc receptor binding [2] | Use an Fc receptor blocking reagent prior to antibody staining to minimize non-specific binding [2]. |
| Antibody concentration too high [61] [2] | Optimize antibody concentration via a titration study to improve the signal-to-background ratio [2]. |
| Presence of dead cells [61] [2] | Include a viability dye (e.g., 7-AAD, propidium iodide) to gate out dead cells, which are sticky and cause non-specific binding [2]. |
| Insufficient protein in buffers [2] | Include bovine serum albumin (BSA) or fetal bovine serum (FBS) in washing and staining solutions to prevent non-specific antibody binding [2]. |
| Endogenous biotin activity [61] | When using a biotin-streptavidin detection system, perform a biotin block by incubating samples with avidin followed by biotin if working with tissues high in endogenous biotin (e.g., kidney, liver) [65]. |
Frequently Asked Questions (FAQs)
Q1: My panel includes both surface markers and intracellular targets. In what order should I stain? A sequential staining protocol often yields the best results. First, stain live cells for surface markers. Then, fix and permeabilize the cells before proceeding with intracellular antibody staining [62]. This order is crucial because the fixation and permeabilization steps required for intracellular access can damage the epitopes of many surface markers or denature protein-based fluorophores like PE and APC [64] [62].
Q2: I am working with phospho-specific antibodies. What fixation method should I use? Crosslinking fixatives like 4% Paraformaldehyde (PFA) are generally preferable for studying intracellular signaling, such as phosphorylation, because they better preserve post-translational modifications. Alcohol-based fixation (e.g., methanol) can cause poor detection for some phospho-targets [61] [62]. However, ice-cold methanol can also be used to "unmask" certain epitopes, like phospho-STAT proteins [62]. Always consult the antibody datasheet for the recommended protocol.
Q3: How can I definitively confirm that my antibody binding is specific? Perform a peptide blocking experiment. Pre-incubate your primary antibody with a five-fold excess (by weight) of the immunizing peptide that corresponds to its epitope. Then, use this "blocked" antibody alongside the normal antibody on identical samples. The specific staining will disappear in the sample stained with the blocked antibody, confirming the antibody's specificity [15].
Q4: What is a solution for measuring fragile markers that are destroyed by permeabilization? A novel technique called multi-pass flow cytometry can address this. It uses optical cell barcoding to analyze the same cells sequentially. Chemically fragile markers (e.g., many surface proteins or fluorescent proteins) are measured first on live cells. The cells are then fixed and permeabilized using harsh methods for intracellular staining. Data from both passes are combined using the unique barcode for each cell [64].
Experimental Workflow for Optimal Staining
The following diagram illustrates a robust workflow for sequential surface and intracellular staining, incorporating key controls and optimization steps.
Guide to Fixation and Permeabilization Methods
Selecting the right combination of fixation and permeabilization methods is critical for successfully staining intracellular targets. The table below summarizes common reagents and their optimal use cases.
| Method | Primary Use | Key Considerations & Tips |
|---|---|---|
| Methanol [62] | Standalone fixative and permeabilization agent; good for DNA analysis and some phospho-proteins. | Denatures protein-based fluorophores (e.g., PE, APC); ensure methanol is ice-cold and add drop-wise while vortexing to prevent hypotonic shock [61] [62]. |
| Formaldehyde (PFA) + Triton X-100 [62] | Standard combination for accessing most intracellular targets after crosslinking fixation. | Strong detergent that creates pores in membranes; good for use with protein-based fluorophores; use fresh reagents [62] [66]. |
| Formaldehyde (PFA) + Saponin [62] | Milder, reversible permeabilization; good when harsher detergents damage the epitope. | Permeabilization is reversible—saponin must be included in all subsequent wash and antibody buffers [62]. |
| Unfixed Saponin [62] | Alternative when fixation denatures the intracellular antigen; good for measuring DNA content. | Light scatter properties are affected, which can impact gating; analysis should be performed immediately [62]. |
The Scientist's Toolkit: Essential Reagent Solutions
| Reagent | Function in Intracellular Staining |
|---|---|
| Paraformaldehyde (PFA) [61] [62] | A crosslinking fixative that stabilizes cellular structures by creating covalent bonds between proteins, "locking" them in place. |
| Methanol [62] | An alcohol-based fixative and permeabilizer that dehydrates and precipitates macromolecules in situ; can unmask some epitopes. |
| Saponin [62] | A mild detergent that permeabilizes cell membranes by complexing with cholesterol; its effect is reversible. |
| Triton X-100 [62] | A strong non-ionic detergent that dissolves lipid membranes, creating pores for antibody access to the intracellular space. |
| Fc Blocking Reagent [2] | A recombinant protein that binds to Fc receptors on immune cells, preventing non-specific antibody binding and reducing background. |
| Bovine Serum Albumin (BSA) [2] | A protein used in buffer solutions to block non-specific binding sites on cells and tubes, lowering background signal. |
| Viability Dye (e.g., 7-AAD) [2] | A DNA-binding dye that is excluded from live cells, allowing for the identification and gating of dead cells that cause non-specific staining. |
| Immunizing/Blocking Peptide [15] | A short peptide sequence corresponding to the antibody's epitope, used to confirm antibody specificity in a blocking experiment. |
Eliminating Endogenous Enzyme Interference (Peroxidase, Alkaline Phosphatase)
In stem cell research, accurate detection of specific biomarkers via techniques like immunohistochemistry (IHC), immunocytochemistry (ICC), and western blot is paramount. However, endogenous enzymes, particularly peroxidase and alkaline phosphatase (ALP), present significant challenges by causing high background staining and false-positive results. This interference is especially problematic in stem cell studies where ALP serves as a key pluripotency marker [67]. In mesenchymal stem cell (MSC) research, for instance, ALP activity is a documented characteristic that requires careful management during immunostaining procedures [68]. Similarly, peroxidase activity can compromise detection systems reliant on horseradish peroxidase (HRP). This guide provides comprehensive troubleshooting strategies to eliminate such interference, ensuring data integrity and experimental reproducibility.
Frequently Asked Questions (FAQs)
Q1: Why is endogenous enzyme interference a particularly critical issue in stem cell research?
Endogenous enzyme interference is especially problematic in stem cell research because many of these enzymes are natural markers of stemness and differentiation. For example, high alkaline phosphatase (ALP) activity is a well-established characteristic of pluripotent stem cells, including embryonic stem cells (ESCs) [67]. When using ALP-based detection systems to identify other biomarkers, this inherent high activity creates intense background staining that obscures specific signals. Similarly, endogenous peroxidases can be active in various cell types used in co-culture systems. Failure to adequately block these enzymes can lead to misinterpretation of protein localization and expression levels, ultimately compromising data validity in sensitive assays like tracking differentiation status or characterizing novel stem cell lines.
Q2: What are the primary causes of non-specific antibody binding in immunoassays?
Non-specific antibody binding, a major source of background noise, arises from several factors [2]:
- Excessive Antibody Concentration: Using too high a concentration of primary or secondary antibodies can cause binding to low-affinity, off-target sites.
- Fc Receptor Interactions: Immune cells (e.g., macrophages, neutrophils) and some stem cell derivatives express Fc receptors that bind the constant region (Fc) of antibodies, leading to non-specific uptake. This is a key consideration when working with differentiated or co-cultured immune cells.
- Non-viable Cells: Dead or dying cells have permeable membranes and exposed DNA, making them "sticky" and prone to non-specific antibody adherence.
- Insufficient Protein in Buffers: The absence of inert proteins (e.g., BSA) in washing and staining solutions allows antibodies to bind non-specifically to surfaces and cells.
Q3: How can I validate that my signal is specific after implementing blocking protocols?
The gold standard for confirming antibody specificity is a blocking experiment with the immunizing peptide [15]. This involves pre-incubating your primary antibody with a molar excess of the specific peptide against which it was raised. This peptide "neutralizes" the antibody's binding sites. You then apply this blocked antibody to your sample in parallel with the normal antibody.
- Specific Signal: Staining that disappears in the sample treated with the neutralized antibody is considered specific.
- Non-Specific Signal: Staining that remains present in both samples is non-specific and requires further troubleshooting of your assay conditions [15].
Troubleshooting Guides
Alkaline Phosphatase (ALP) Interference
ALP is highly active in pluripotent stem cells and can be a significant source of background in detection systems using alkaline phosphatase conjugates [67].
Table 1: Troubleshooting ALP Interference
| Problem | Possible Cause | Solution | Protocol Tip |
|---|---|---|---|
| High background in ALP-based detection on stem cells | Endogenous ALP activity in pluripotent stem cells [67] | Use a commercially available ALP inhibition reagent or levamisole. | Add levamisole (1-5 mM) directly to the substrate solution just before use. |
| Persistent background after chemical inhibition | Inadequate inhibition or outdated substrate. | Optimize inhibitor concentration; prepare fresh substrate solution. | Titrate the inhibitor using a known ALP-positive cell sample (like ESCs) to find the optimal concentration that quenches background without affecting the signal. |
| Non-specific signal in fluorescence detection | ALP activity interfering with other detection systems. | Utilize alternative detection systems (e.g., HRP-based) for non-ALP targets. | If ALP is not your target, consider switching to an HRP-based detection system and blocking endogenous peroxidase instead. |
Detailed Protocol: Chemical Inhibition of ALP with Levamisole
- Prepare Subolution: Prepare your BCIP/NBT or other ALP substrate solution according to the manufacturer's instructions.
- Add Inhibitor: Immediately before use, add levamisole to a final concentration of 1-5 mM. Levamisole is a competitive inhibitor of intestinal-type ALP, which is commonly expressed in stem cells.
- Apply Solution: Apply the substrate-inhibitor mixture to your cells or tissue sections as usual.
- Monitor Development: Monitor the color reaction closely. The background development from endogenous ALP should be significantly reduced.
- Stop Reaction: Stop the reaction according to your standard protocol once the specific signal is clear.
Peroxidase Interference
Endogenous peroxidase activity is common in red blood cells, granulocytes, and some tissue macrophages, which may be present in primary cell cultures or in vivo samples.
Table 2: Troubleshooting Peroxidase Interference
| Problem | Possible Cause | Solution | Protocol Tip |
|---|---|---|---|
| High background in HRP-based detection | Endogenous peroxidase activity in cells. | Block with 0.3-3% hydrogen peroxide (H₂O₂). | Incubate fixed samples with 3% H₂O₂ in methanol for 10-15 minutes at room temperature. |
| Loss of antigenicity after H₂O₂ treatment | Over-fixation or excessive H₂O₂ concentration/duration. | Titrate H₂O₂ concentration and reduce incubation time. | Test a range of H₂O₂ concentrations (0.3% to 3%) for the shortest effective time on a control sample. |
| Background persists after blocking | Incomplete blocking or endogenous peroxidase is too robust. | Use sodium azide (0.1%) or multiple blocking steps. | Caution: Sodium azide inhibits HRP. Use it only if your detection system does not rely on HRP. Alternatively, try a longer blocking time (e.g., 30 minutes). |
Detailed Protocol: Hydrogen Peroxide Blocking of Endogenous Peroxidase
- Fix and Permeabilize: Complete your cell fixation and permeabilization steps as usual.
- Prepare Blocking Solution: Prepare a fresh solution of 3% H₂O₂ in absolute methanol. (Note: For some sensitive antigens, using H₂O₂ in PBS or TBS may be preferable to avoid over-fixation.)
- Incubate: Cover the sample with the H₂O₂ solution and incubate for 10-15 minutes at room temperature, protected from light.
- Rinse: Rinse the sample thoroughly 3-5 times with your chosen buffer (e.g., PBS or TBS).
- Proceed: Continue with the rest of your immunostaining protocol (e.g., primary antibody application).
General Non-Specific Binding
Table 3: Addressing General Non-Specific Binding
| Problem | Possible Cause | Solution | Protocol Tip |
|---|---|---|---|
| High background across all channels | Non-specific antibody binding or dead cells [2]. | Include a viability dye and use a protein-based block. | Add a viability dye (e.g., 7-AAD, propidium iodide) to exclude dead cells during flow cytometry. Use 2-5% BSA or normal serum for blocking. |
| Specific bands not visible on western blot | Antibody concentration too low, or epitope masked. | Perform antibody titration and include antigen retrieval if needed. | Use a positive control lysate. Validate specificity with a peptide blocking experiment [15]. |
| Clumping of cells in suspension | Cell aggregation, often due to dead cells [2]. | Filter cells through a mesh strainer; use a viability dye. | Pre-warm culture medium and use a 37°C incubation step to encourage endocytosis and reduce surface "stickiness" [2]. |
The Scientist's Toolkit: Research Reagent Solutions
Table 4: Essential Reagents for Eliminating Non-Specific Signals
| Reagent | Function | Example Application in Stem Cell Research |
|---|---|---|
| Levamisole | Inhibits intestinal-like Alkaline Phosphatase (ALP) [67]. | Blocking endogenous ALP in pluripotent stem cell immunostaining to reduce background. |
| Hydrogen Peroxide (H₂O₂) | Quenches endogenous peroxidase activity. | Blocking peroxidase activity in samples containing hematopoietic cells or erythrocytes. |
| Bovine Serum Albumin (BSA) / Normal Serum | Inert proteins that block non-specific binding sites on cells and tissue [2]. | Used in blocking buffers (1-5%) and antibody dilution buffers to reduce hydrophobic and ionic non-specific binding. |
| Fc Receptor Blocking Reagent | Blocks Fc receptors on immune cells to prevent non-specific antibody binding [2]. | Essential when staining mixed cell populations containing macrophages, NK cells, or other immune cells derived from stem cells. |
| Viability Dye (e.g., 7-AAD, PI) | Labels dead cells with compromised membranes, allowing for their exclusion during analysis [2]. | Critical for flow cytometry analysis of stem cell cultures to gate out dead, "sticky" cells that cause high background. |
| Immunizing/Blocking Peptide | Validates antibody specificity by competing for the antigen-binding site [15]. | The definitive control experiment to confirm that an observed band or staining pattern is specific to the target antigen. |
Experimental Workflows and Visualization
The following diagrams outline logical workflows for troubleshooting and validating your experiments.
Experimental Troubleshooting Workflow
Antibody Specificity Validation Workflow
Controlling for Heterophilic Antibodies and Serum Factors
Frequently Asked Questions
What are heterophile antibodies and how do they interfere with immunoassays? Heterophile antibodies are naturally occurring human antibodies that can bind nonspecifically to animal-derived monoclonal antibodies used in immunoassays. This interference is a major cause of false-positive results, particularly in sandwich immunoassays, and can complicate clinical interpretation [69].
How can I confirm if heterophile antibody interference is affecting my results? A practical method is to retest the sample after pretreatment with a Heterophile Blocking Tube (HBT). A significant reduction in reactivity or a change in status from positive to negative strongly suggests heterophile interference. For example, one study showed HBT pretreatment reduced EBV VCA IgM reactivity from 32.2 ± 35.8 U/mL to 12.8 ± 15.6 U/mL and cut the positivity rate from 20.5% to 2.7% [69].
Why is serum a challenge for transfecting stem cells, and how can it be overcome? Cationic transfection carriers often absorb serum proteins, forming a "protein corona" that leads to transfection failure. A serum-tolerant strategy involves decorating polymeric complexes with apolipoproteins (APOs). The APOs corona provides steric hindrance against serum proteins and enhances cell membrane affinity. One such tool, APOs@BP, achieved 10.4-fold higher transfection efficiency in serum-containing medium compared to conventional polycationic transfectants [70].
What are the critical controls for a co-immunoprecipitation (co-IP) experiment to ensure specificity? To troubleshoot low signal or non-specific binding in co-IP, include these key controls [71]:
- Input Lysate Control: Confirms the target protein is expressed and detectable.
- Bead-Only Control: Identifies non-specific protein binding to the beads.
- Isotype Control: Rules out non-specific binding to the IgG of the IP antibody.
- IP Protein Blot: Verifies successful pull-down of the primary target protein.
Troubleshooting Guides
Guide 1: Resolving Heterophile Antibody Interference in Serological Assays
Problem: Inconsistent or false-positive results in IgM immunoassays.
| Possible Cause | Diagnostic Signs | Recommended Solution |
|---|---|---|
| Heterophile Antibody Interference | Isolated IgM positivity without clinical correlation; discrepant results across different assay platforms [69]. | Pretreat specimen with a Heterophile Blocking Tube (HBT) before running the assay. |
| Cross-reactivity | Positive results in assays for multiple, unrelated pathogens [69]. | Use a confirmatory assay with a different principle (e.g., PCR) or retest after HBT treatment. |
Step-by-Step Protocol: Using Heterophile Blocking Tubes (HBT)
- Sample Preparation: Collect and process serum sample according to standard laboratory procedures.
- HBT Pretreatment: Incubate the required volume of patient serum in the Heterophile Blocking Tube for the manufacturer-specified duration (e.g., 30-60 minutes at room temperature).
- Reanalysis: Run the pretreated sample on the original immunoassay platform.
- Interpretation: Compare the results before and after HBT treatment. A significant reduction in signal or a change from positive/equivocal to negative confirms heterophile antibody interference [69].
Guide 2: Mitigating Serum Interference in Stem Cell Transfection
Problem: Low transfection efficiency and poor cell viability when transfecting sensitive cells like MSCs in serum-containing media.
| Possible Cause | Diagnostic Signs | Recommended Solution |
|---|---|---|
| Serum Protein Corona | High transfection efficiency in serum-free conditions, but sharp decline with the addition of serum; formation of large aggregates [70]. | Use serum-tolerant transfection reagents (e.g., APO-decorated polymers). |
| Nutrient Depletion & Cell Stress | Reduced cell viability and proliferation post-transfection in serum-free or low-serum conditions [72]. | Maintain a minimum level of serum (e.g., 5% FBS) supplemented with a defined factor cocktail to support cell health [72] [70]. |
Step-by-Step Protocol: Serum-Tolerant Transfection with APO-decorated Complexes This protocol is based on the use of a boronated polyethyleneimine (BP) core with an apolipoprotein (APO) corona (APOs@BP) [70].
- Complex Formation: Mix the BP polymer with your nucleic acid (e.g., miRNA) at an optimal N/P ratio in a neutral buffer. Incubate for 15-30 minutes to form the BP/nucleic acid complex.
- APO Decoration: Incubate the formed complexes with APOs to create the final serum-tolerant transfection complex (APOs@BPmiRNA).
- Cell Preparation: Culture MSCs to 60-80% confluency in complete medium containing serum (e.g., 10% FBS). Do not switch to serum-free medium.
- Transfection: Add the APOs@BPmiRNA complexes directly to the cells in the serum-containing medium.
- Post-transfection: Incubate as per standard protocol. Change medium if required after 4-24 hours.
Table 1: Efficacy of Heterophile Blocking Tube (HBT) Pretreatment on IgM Assays [69]
| Pathogen (IgM Assay) | Pretreatment Status (Reactivity & Positivity) | Post-HBT Pretreatment (Reactivity & Positivity) |
|---|---|---|
| EBV VCA | 32.2 ± 35.8 U/mL; 38/185 (20.5%) | 12.8 ± 15.6 U/mL; 5/185 (2.7%) |
| HSV | 1.4 ± 1.0 index; 92/185 (49.7%) | 0.6 ± 0.4 index; 5/185 (2.7%) |
Table 2: Performance of Serum-Tolerant APOs@BP in MSC Transfection [70]
| Transfection Reagent | Serum Condition | Transfection Efficiency (Positive Cells) | Relative Cell Viability |
|---|---|---|---|
| APOs@BPmiRNA | With 10% FBS | ~73.9% | ~14.4% higher than serum-free |
| BPmiRNA | With 10% FBS | Sharply diminished | N/A |
| 25KPEI | With 10% FBS | Noticeable decrease | N/A |
The Scientist's Toolkit
Table 3: Essential Research Reagents for Controlling Interference
| Reagent | Function & Application |
|---|---|
| Heterophile Blocking Tubes (HBT) | Contains blocking agents to neutralize heterophile antibodies in patient serum, used to confirm interference in immunoassays [69]. |
| Apolipoprotein (APO) Corona | Decorates transfection complexes to resist serum protein adsorption and enhance cell membrane affinity, enabling efficient transfection in serum-containing media [70]. |
| Boronated Polyethyleneimine (BP) Core | A modified polymer that provides a positive charge for efficient nucleic acid compression and a site for loading small molecule drugs [70]. |
| Proliferation Synergy Factor Cocktail (PSFC) | A defined mixture of factors (e.g., IGF-1, bFGF, TGF-β, IL-6, G-CSF) used in low-serum (e.g., 5% FBS) conditions to sustain robust cell proliferation and maintain differentiation potential [72]. |
| Cell Lysis Buffer (#9803) | A non-denaturing lysis buffer recommended for co-IP experiments to preserve native protein-protein interactions, which can be disrupted by stronger buffers like RIPA [71]. |
| Phosphatase Inhibitor Cocktail | Essential additive to lysis buffers to maintain the phosphorylation state of proteins during analysis of post-translational modifications [71]. |
Experimental Workflow Diagrams
In stem cell research, achieving specific antibody binding is critical for accurate phenotyping, sorting, and functional analysis. Non-specific antibody binding can lead to misinterpreted data, compromised experimental outcomes, and costly delays. This technical support guide provides detailed troubleshooting and FAQs on optimizing wash stringency—encompassing buffer composition, duration, and frequency—to effectively prevent non-specific binding in your stem cell workflows.
Frequently Asked Questions (FAQs)
1. What is the primary cause of non-specific antibody binding in stem cell research? Non-specific binding occurs when antibodies interact with cells or surfaces through non-immunological means, such as hydrophobic interactions, ionic interactions, or Fc receptor binding. In stem cell research, this is particularly problematic due to the sensitive nature of the cells and the critical need for precise identification. Using wash buffers that contain a blocking agent like recombinant Human Serum Albumin (rHSA) is a proven strategy to mitigate this by occupying non-specific binding sites on cells and equipment surfaces [73].
2. How does the composition of a wash buffer reduce non-specific binding? A well-composed wash buffer addresses the different forces that cause non-specific adsorption. Key components include:
- Buffering Salts (e.g., PBS): Maintain a stable ionic strength and pH, preventing ionic-based non-specific interactions.
- Blocking Proteins (e.g., BSA or rHSA): Act as a sacrificial protein that adsorbs to hydrophobic surfaces and charged sites on cells, tubing, and vessels, thereby preventing your antibodies from doing the same [73].
- Detergents (e.g., Tween-20): Disrupt hydrophobic interactions. The concentration can be tuned to adjust the stringency of the wash.
3. My high-abundance protein signal is strong, but my low-abundance signal is weak. Could my washes be too harsh? Yes, this is a common dilemma. Overly stringent washes can elute specifically bound antibodies, especially those with lower affinity or against low-abundance targets. If you are dealing with a sensitive or low-abundance protein, you should start with milder wash conditions—shorter durations, lower detergent concentrations, and fewer wash cycles—and gradually increase stringency as needed [74].
4. How do I choose between mild and harsh stripping if I need to reprobe a blot? The choice depends on the nature of your protein and the antibodies used.
- Mild Stripping: Uses low-pH glycine buffers or non-ionic detergents. It is the preferred first choice as it better preserves protein integrity, especially for high molecular weight or low-abundance proteins [74].
- Harsh Stripping: Employs SDS and heat (e.g., 50°C). It is more effective at removing stubborn, high-affinity antibodies but carries a greater risk of protein loss or denaturation from the membrane [74].
Troubleshooting Guide
| Problem | Potential Cause | Recommended Solution |
|---|---|---|
| High background signal in flow cytometry/imaging | Inadequate blocking or non-specific antibody binding [75]. | Optimize blocking conditions; increase BSA/rHSA concentration to 1-5% [73]; add a detergent like 0.1% Tween-20; increase wash volume/frequency. |
| Weak or no specific signal | Overly stringent wash conditions; target antigen loss [74]. | Reduce wash stringency (shorter duration, fewer cycles, lower detergent concentration); validate with a positive control. |
| Inconsistent results between replicates | Variable wash buffer composition or manual handling. | Prepare a large, single batch of wash buffer; automate wash steps using a plate washer for consistency. |
| Cell loss or poor viability during washes | Shear stress from centrifugation; cell adhesion to tubes [73]. | Incorporate 0.5-2% rHSA or BSA in wash buffer to protect cells [73]; use low-binding tubes; gentle centrifugation. |
Optimizing Wash Parameters: A Quantitative Guide
The table below summarizes key parameters to test when optimizing your wash protocol. Begin with standard conditions and adjust one parameter at a time to systematically identify the optimal stringency for your specific application.
Table 1: Wash Stringency Parameters for Optimization
| Parameter | Standard Starting Point | Low Stringency (if signal is weak) | High Stringency (if background is high) |
|---|---|---|---|
| Buffer Composition | PBS + 0.5-1% BSA/rHSA | PBS + 1-2% BSA/rHSA | PBS + 0.1% BSA + 0.1% Tween-20 |
| Detergent Concentration | 0.05% Tween-20 | None or 0.01% Tween-20 | 0.1% - 0.5% Tween-20 |
| Wash Duration (per wash) | 5 minutes | 2-3 minutes | 10-15 minutes |
| Number of Wash Cycles | 3 | 2 | 4-5 |
| Wash Volume (relative to sample) | 10x | 5x | 20x |
Experimental Protocols for Optimization
Protocol 1: Systematic Titration of Wash Stringency for Cell Staining
This protocol provides a method to empirically determine the optimal wash conditions for immunostaining stem cells.
Key Research Reagent Solutions:
- Recombinant HSA (e.g., Exbumin): A defined, animal-origin-free blocking protein that prevents non-specific binding and protects cells from shear stress [73].
- Tween-20: A non-ionic detergent used to disrupt hydrophobic interactions in wash buffers.
- Phosphate-Buffered Saline (PBS): Provides a stable ionic and pH environment for washing.
Methodology:
- Prepare Wash Buffers: Create a series of wash buffers with increasing stringency. For example:
- Buffer A: PBS + 2% rHSA
- Buffer B: PBS + 1% rHSA + 0.05% Tween-20
- Buffer C: PBS + 0.1% rHSA + 0.1% Tween-20
- Stain Cells: Aliquot your stem cells and perform the primary and secondary antibody staining steps as usual.
- Wash Groups: Divide the stained cells into groups. Wash each group with a different buffer (A, B, or C). Keep the wash volume (10x), duration (5 min), and number of cycles (3) constant for this test.
- Analyze: Analyze the cells via flow cytometry or microscopy. Compare the signal-to-noise ratio (specific signal vs. background) for each group. The buffer that yields the highest specific signal with the lowest background is the optimal composition.
- Refine Duration/Frequency: Using the best buffer, repeat the experiment by varying the number of wash cycles (2, 3, 4, 5) or the duration of each wash (2, 5, 10 min) to further optimize.
Protocol 2: Validating Antibody Removal in Western Blot Stripping
This protocol ensures effective removal of antibodies during membrane stripping without significant loss of your target protein.
Methodology:
- Initial Probing: Perform your standard western blot procedure with your primary and secondary antibodies, develop, and image the membrane.
- Mild Stripping: Incubate the membrane in a mild stripping buffer (e.g., 15 g/L glycine, 1% SDS, 1% Tween-20, pH 2.2) for 10-30 minutes at room temperature with agitation [74].
- Wash: Thoroughly wash the membrane with PBS or TBS to remove residual stripping buffer.
- Validate Stripping: Incubate the membrane with only the chemiluminescent substrate and re-image. A clean background confirms successful antibody removal. If signal remains, proceed to harsher conditions.
- Harsh Stripping (if needed): Incubate the membrane in a harsh stripping buffer (e.g., 2% SDS, 62.5 mM Tris-HCl, pH 6.8, with 100 mM β-mercaptoethanol) for 30-45 minutes at 50°C with agitation [74].
- Re-probe and Assess: Wash the membrane thoroughly, re-block, and probe with antibodies for a housekeeping protein (e.g., GAPDH). A strong, clear band for the housekeeping protein indicates successful stripping and retention of protein on the membrane.
Workflow and Decision Pathways
The following diagram illustrates the logical workflow for developing and optimizing a wash protocol, from initial setup to troubleshooting common problems.
Validation Frameworks: Ensuring Specificity Through Controls and New Technologies
In stem cell research, accurate identification and isolation of specific cell populations are crucial. Antibodies used in techniques like flow cytometry or immunohistochemistry can bind non-specifically, leading to false positive results and misinterpretation of data. This technical guide explains how secondary-only and isotype controls function as essential negative controls to distinguish specific antibody staining from non-specific background, ensuring the validity of your experimental findings.
FAQ: Understanding Your Negative Controls
What is a secondary-only control, and why is it necessary?
A secondary-only control is a sample that is stained only with the secondary antibody, omitting the primary incubation step.
- Purpose: It identifies background staining caused by the secondary antibody itself. This includes non-specific binding of the secondary antibody to cellular components or, critically, to endogenous immunoglobulins within the tissue or cells [76].
- When to Use: It is required whenever you use a secondary antibody for detection (e.g., in immunofluorescence, IHC, or flow cytometry). This control is the only way to verify that your staining signal is not an artifact of the secondary reagent.
- Interpretation: If the secondary-only control shows staining, your secondary antibody is causing background. You may need to optimize your blocking steps, switch to a more specific secondary antibody, or use a polymer-based detection system to eliminate this issue [76].
What is an isotype control, and how does it differ from a secondary-only control?
An isotype control is an antibody that serves as a negative control and should match the host species, immunoglobulin class (e.g., IgG), and subclass (e.g., IgG2b) of your primary antibody. It is also conjugated to the same fluorophore or enzyme but lacks specificity for the target antigen [77] [78] [79].
- Purpose: It controls for non-specific binding caused by the primary antibody. This includes interactions through the Fc region with Fc receptors (FcRs) on cells—a common issue in immunology and stem cell research—as well as low-affinity, non-specific interactions with other proteins or lipids [77] [2] [79].
- When to Use: It is used in direct staining methods (where the primary antibody is conjugated) or alongside your primary-secondary antibody combination. It is particularly critical for flow cytometry and IHC experiments [78] [79].
- Key Difference: While a secondary-only control identifies issues with the secondary reagent, an isotype control identifies issues inherent to the primary antibody. A well-designed experiment often includes both.
How do I choose the right isotype control?
Selecting the correct isotype control is critical for a meaningful result. The control must be a perfect match for your primary antibody in the following aspects [77] [78]:
- Same host species (e.g., both from rabbit)
- Same immunoglobulin class and subclass (e.g., both Mouse IgG2b)
- Same conjugation (e.g., both conjugated to FITC)
- Used at the same concentration as the primary antibody
For example, if your primary antibody is a mouse IgG2b antibody conjugated to FITC, you must select a mouse IgG2b isotype control antibody also conjugated to FITC.
What are the common causes of non-specific antibody binding?
Non-specific binding can compromise your experiment in several ways. The table below summarizes the common causes and their solutions.
Table: Troubleshooting Non-Specific Antibody Binding
| Cause of Background | Description | Solution |
|---|---|---|
| Fc Receptor Binding | Fc receptors on immune cells (e.g., macrophages, neutrophils) bind the constant (Fc) region of antibodies. | Use an Fc receptor blocking reagent or normal serum from the secondary antibody host species prior to antibody staining [2] [6]. |
| Excessive Antibody Concentration | High antibody concentrations can drive binding to low-affinity, off-target sites. | Perform an antibody titration study to determine the optimal signal-to-background concentration [2]. |
| Insufficient Blocking | Non-specific proteins or charged molecules on the sample can bind antibodies. | Ensure adequate blocking with reagents like BSA, fetal bovine serum (FBS), or normal serum prior to primary antibody incubation [2] [80]. |
| Dead Cells | Non-viable cells have exposed DNA and sticky membranes, leading to high antibody adherence. | Include a viability dye (e.g., 7-AAD, propidium iodide) in your flow cytometry panel to exclude dead cells from analysis [2]. |
| Secondary Antibody Cross-Reactivity | The secondary antibody may bind to endogenous immunoglobulins in the sample. | Use a well-absorbed secondary antibody and include a secondary-only control to identify this issue [80] [76]. |
My controls look good, but I still have high background in IHC. What should I check?
High background in immunohistochemistry (IHC) often requires troubleshooting specific steps in your protocol.
- Check Your Blocking Step: Ensure you are using an adequate blocking solution (e.g., 5% normal serum from the secondary antibody host species) for a sufficient time (e.g., 30 minutes) [76].
- Titer Your Antibodies: The most common cause of high background is using too high a concentration of the primary or secondary antibody. Perform a titration to find the optimal dilution [80] [76].
- Optimize Washes: Inadequate washing after antibody incubations is a frequent culprit. Wash slides thoroughly 3 times for 5 minutes with an appropriate buffer like TBST [76].
- Address Endogenous Enzymes: If using an HRP-based detection system, quench endogenous peroxidase activity with a 3% H2O2 solution. For alkaline phosphatase (AP) systems, use a specific inhibitor like levamisole [76].
- Consider Detection Method: Biotin-based detection systems can cause high background in tissues with high endogenous biotin (e.g., liver, kidney). Switching to a polymer-based detection system can resolve this [76].
Experimental Protocols
Protocol 1: Implementing Controls for Flow Cytometry of Stem Cells
This protocol outlines the steps for staining a population of human mesenchymal stem cells (MSCs) for a surface marker (e.g., CD90) using a direct method, including the necessary controls.
Reagents Needed:
- Cell sample (e.g., human MSCs)
- Staining buffer (PBS with 1% BSA or FBS)
- Fc Receptor Blocking Reagent (e.g., anti-human CD16/CD32)
- Primary antibody: Anti-human CD90 conjugated to FITC
- Isotype control: Mouse IgG1 conjugated to FITC
- Viability dye (e.g., 7-AAD)
Procedure:
- Prepare Cells: Harvest and count cells. Aliquot approximately 1x10⁶ cells into three tubes (unstained, isotype control, stained).
- Viability Staining: Resuspend cells in staining buffer containing the viability dye. Incubate for 10-20 minutes at 4°C, protected from light.
- Wash: Add 2 mL of staining buffer, centrifuge, and decant supernatant.
- Fc Receptor Blocking: Resuspend cell pellets in an appropriate FcR blocking reagent. Incubate for 10-15 minutes on ice [6].
- Antibody Staining:
- Tube 1 (Unstained): Add only staining buffer.
- Tube 2 (Isotype Control): Add the mouse IgG1-FITC isotype control antibody at the same concentration as the primary antibody.
- Tube 3 (Stained): Add the anti-human CD90-FITC primary antibody.
- Mix gently and incubate for 30 minutes on ice, protected from light.
- Wash: Add 2 mL of staining buffer to each tube, centrifuge, and decant the supernatant. Repeat this wash step once more.
- Resuspend and Acquire: Resuspend cells in an appropriate volume of staining buffer and analyze by flow cytometry.
Data Interpretation:
- First, gate on live, single cells using the viability dye and forward/side scatter properties.
- On the fluorescence histogram, the unstained control sets the baseline autofluorescence.
- The isotype control establishes the level of non-specific antibody binding. Set your positive gate so that less than 1-2% of the isotype control cells fall within it.
- True positive staining for CD90 is identified as a signal that is brighter than the isotype control.
Protocol 2: Implementing Controls for Immunohistochemistry (IHC)
This protocol describes how to include essential controls when staining stem cell pellets or tissue sections for a specific marker.
Reagents Needed:
- Tissue sections (e.g., formalin-fixed, paraffin-embedded stem cell pellet)
- Primary antibody (e.g., Rabbit anti-OCT4)
- Matched isotype control (e.g., Rabbit IgG, same concentration)
- Secondary antibody (e.g., Anti-Rabbit HRP)
- Appropriate antigen retrieval solution
- Blocking solution (e.g., TBST with 5% normal goat serum)
Procedure:
- Deparaffinization and Antigen Retrieval: Process slides according to standard IHC protocols, including deparaffinization and a validated antigen retrieval method.
- Blocking: Block sections for 30 minutes at room temperature with a blocking solution that includes protein (e.g., 5% normal goat serum) to minimize non-specific binding [76].
- Control and Antibody Incubation:
- Section A (Test): Apply the specific Rabbit anti-OCT4 primary antibody.
- Section B (Isotype Control): Apply the Rabbit IgG isotype control at the same concentration as the primary antibody.
- Section C (Secondary-Only Control): Apply only antibody diluent (no primary, no isotype).
- Incubate all sections as per the primary antibody protocol (often overnight at 4°C).
- Wash: Wash slides 3 times for 5 minutes with TBST [76].
- Detection: Apply the polymer-based or secondary antibody detection system (e.g., Anti-Rabbit HRP) to ALL sections, including the secondary-only control.
- Develop and Counterstain: Develop with DAB substrate, counterstain with hematoxylin, and mount.
Data Interpretation:
- The secondary-only control should show no staining. Any signal here indicates non-specific binding of the detection system.
- The isotype control should show no specific staining. Any signal that appears in the test section but is absent in the isotype control can be attributed to specific binding of the primary antibody to its target.
The Scientist's Toolkit: Key Research Reagent Solutions
The following table lists essential reagents for setting up robust control experiments in antibody-based applications.
Table: Essential Reagents for Control Experiments
| Reagent | Function | Key Considerations |
|---|---|---|
| Isotype Control Antibodies | Negative control for non-specific binding of the primary antibody. | Must match the species, Ig class/subclass, and conjugation of the primary antibody exactly [77] [78]. |
| Fc Receptor Blocking Reagent | Blocks FcRs on cells to prevent non-specific antibody binding. | Can be species-specific antibodies (e.g., anti-CD16/32) or normal serum from the host species of the primary antibody [2] [6]. |
| Viability Dye | Distinguishes live from dead cells to exclude the latter from analysis. | Dead cells bind antibodies non-specifically. Dyes like 7-AAD or propidium iodide are common for flow cytometry [2]. |
| BSA or Serum | Used as a protein source in blocking buffers and staining solutions. | Prevents antibodies from sticking non-specifically to tubes, plates, and cells by saturating charged surfaces [2] [80]. |
| Validated Primary Antibodies | The key reagent for specifically detecting the target antigen. | Always use antibodies that have been validated for your specific application (e.g., flow cytometry, IHC). |
| Absorbed Secondary Antibodies | For detection of unconjugated primary antibodies. | Secondary antibodies should be cross-absorbed against immunoglobulins of other species to minimize cross-reactivity [80]. |
Control Experiment Workflow and Decision Diagram
The following diagram illustrates the logical workflow for setting up and interpreting secondary-only and isotype controls in a flow cytometry experiment.
Flow Cytometry Control Setup and Analysis Workflow
This workflow demonstrates how the three key samples (unstained, isotype control, and test antibody) are processed in parallel. The logic for data analysis shows how to use the controls to distinguish non-specific background from specific signal, ensuring accurate interpretation of your stem cell staining experiment.
In stem cell research, where the accuracy of cellular markers is paramount, nonspecific antibody binding can lead to flawed data and misinterpreted results. Genetic validation using Knockout (KO) and Knockdown (KD) controls provides a powerful method to confirm antibody specificity. This guide details the use of CRISPR and RNAi technologies to create these essential controls, offering troubleshooting and best practices to ensure your antibodies bind only their intended targets.
FAQs: Core Concepts of Genetic Controls
1. What is the fundamental difference between a knockout and a knockdown?
The primary difference lies in the level and permanence of gene silencing. Knockout (KO), typically achieved with CRISPR-Cas9, creates permanent, heritable disruptions in the DNA sequence, leading to the complete and irreversible loss of protein expression [81]. In contrast, Knockdown (KD), achieved with RNAi (siRNA or shRNA), reduces gene expression at the mRNA level, resulting in a transient, often partial, reduction of protein levels [81].
2. Why are knockout controls considered the gold standard for antibody validation?
Knockout controls, especially those generated using CRISPR-Cas9, are considered the most robust method because they provide a true genetic negative control. By creating a cell line where the gene encoding the target protein is entirely disrupted, you can definitively test antibody specificity. A loss of signal in the KO cell line, compared to the wild-type control, provides high-confidence evidence that the antibody is specific for its intended target [82] [83]. This method avoids potential pitfalls of knockdowns, such as incomplete protein reduction due to long protein half-lives.
3. When should I use a knockdown control instead of a knockout?
Knockdown controls are advantageous in several scenarios:
- When studying essential genes, where a complete knockout would be lethal to the cells [81].
- When you need to study the gradual effects of reducing protein levels to different extents.
- When a transient, reversible gene silencing is desired for the experiment [81].
- When you need results more quickly, as knockdown experiments (often 72-96 hours) are typically faster than generating a clonal knockout cell line (which can take over 8 weeks) [82].
4. What are the common causes of high background or nonspecific staining even after using a control?
Even with a genetic control, nonspecific signals can persist. This is often related to antibody optimization issues, not the control itself. Key factors to troubleshoot include [82]:
- Sample preparation: The choice of cell lysis buffer or fixative can mask or expose epitopes.
- Blocking solution: The type of block (e.g., 5% milk vs. 3% BSA) needs to strike a balance between masking non-specific epitopes and leaving the specific epitope accessible.
- Antibody concentration: Too high a concentration can increase off-target binding.
- Insufficient washing: Inadequate washing can leave unbound antibody, causing high background.
Troubleshooting Guides
Troubleshooting CRISPR Knockout Controls
| Problem | Possible Cause | Solution |
|---|---|---|
| No protein loss detected in KO line | Incomplete knockout; clonal selection issues | Sequence the target site to confirm frameshift mutations. Re-clone cells or use a second, independent sgRNA [84]. |
| Low editing efficiency | Poor sgRNA design or delivery | Use validated sgRNA design tools. Switch to Ribonucleoprotein (RNP) delivery for higher efficiency [81]. |
| Large loss of sgRNAs in screen | Before screening: Insufficient initial library coverage. After screening: Excessive selection pressure [84]. | Re-establish library cell pool with adequate coverage. Reduce selection pressure in the experiment. |
| Unexpected phenotypic effects | Off-target editing | Use bioinformatics tools to design sgRNAs with minimal off-target risk. Use chemically modified sgRNAs to enhance specificity [81]. |
Troubleshooting RNAi Knockdown Controls
| Problem | Possible Cause | Solution |
|---|---|---|
| No reduction in mRNA or protein | Inefficient siRNA/shRNA; poor transfection | Use a positive control siRNA to confirm transfection efficiency. Test multiple siRNAs (3-4) targeting the same gene [85] [84]. |
| High cell death/toxicity | Transfection reagent toxicity; off-target effects | Optimize transfection conditions (cell density, reagent/siRNA concentration). Use a lower siRNA concentration (e.g., 5-20 nM) [85]. |
| Inconsistent knockdown between replicates | Low reproducibility between transfections | Ensure highly reproducible transfection protocols. If reproducibility is low (Pearson correlation <0.8), perform pairwise analyses and identify overlapping hits [84]. |
| Protein persists despite mRNA knockdown | Slow protein turnover rate | Extend the time course post-transfection before analysis to allow for protein degradation [85]. |
Experimental Protocols
Protocol 1: Validating Antibody Specificity via CRISPR-Cas9 Knockout
This protocol outlines the creation of a knockout cell line to serve as a definitive negative control for antibody validation [83].
Workflow Overview
Materials & Reagents
- sgRNA: Designed to target the gene of interest.
- Cas9 Nuclease: Purified protein or encoded in a plasmid.
- Appropriate Cell Line: For stem cell research, use your relevant stem cell line.
- Transfection Reagent: Compatible with your cell type.
- Selection Antibiotic: e.g., Puromycin, if using plasmid-based systems.
- Validated Primary Antibody: The antibody being tested.
- Lysis Buffer: For Western blot analysis.
Step-by-Step Method
- Design and Obtain sgRNAs: Use state-of-the-art design tools to create at least 3-4 sgRNAs per gene to mitigate variability [84] [81].
- Deliver CRISPR Components: Transfect cells with the sgRNA and Cas9 nuclease. The ribonucleoprotein (RNP) complex format is preferred for high editing efficiency and reduced off-target effects [81].
- Select and Clone: Allow time for editing, then apply selection pressure if needed. Single-cell clone isolation is critical for a pure population.
- Screen Clones: Expand clonal populations and screen for loss of target protein using Western blot (for denatured conditions) or immunofluorescence (for native conditions) with the antibody you are validating.
- Sequence Validation: Confirm the presence of insertion/deletion (indel) mutations at the DNA target site in clones that show protein loss.
- Use as Control: The validated KO clone serves as your negative control in subsequent experiments (e.g., Western blot, ICC/IHC). Compare signal intensity to the wild-type (positive) control line.
Protocol 2: Validating Antibody Specificity via RNAi Knockdown
This protocol uses siRNA to transiently knock down a target gene, providing a faster method to check antibody specificity [83].
Workflow Overview
Materials & Reagents
- siRNA/shRNA: A pool of 3-4 pre-designed siRNAs or shRNAs targeting your gene of interest is recommended [84] [85].
- Non-Targeting Scrambled siRNA: Critical negative control for the transfection itself.
- Positive Control siRNA: e.g., targeting a housekeeping gene like GAPDH, to confirm transfection efficiency [85].
- Transfection Reagent: Optimized for your stem cell line.
- qRT-PCR Reagents: To measure mRNA knockdown.
- Cell Lysis Buffer & Western Blot Supplies.
Step-by-Step Method
- Transfect Cells: Plate cells and transfect with the target-specific siRNA pool, a non-targeting control siRNA, and a positive control siRNA. Optimize conditions (typically 5-100 nM siRNA) to minimize toxicity [85].
- Incubate: Incubate cells for 24-96 hours. The peak knockdown for mRNA is often around 48 hours post-transfection [85].
- Confirm Knockdown: Harvest cells and confirm knockdown efficiency at the mRNA level using quantitative RT-PCR (qRT-PCR).
- Validate Antibody: Analyze protein levels from the same samples using Western blotting or immunocytochemistry (ICC) with the antibody under validation.
- Interpret Results: A concomitant reduction in protein signal corresponding to the mRNA knockdown confirms antibody specificity. The non-targeting control should show no reduction.
Quantitative Data Comparison
The table below summarizes key performance characteristics of CRISPR and RNAi based on experimental data.
Table 1: Comparative Analysis of CRISPR vs. RNAi for Genetic Controls
| Feature | CRISPR Knockout | RNAi Knockdown |
|---|---|---|
| Molecular Level of Action | DNA [81] | mRNA [81] |
| Effect on Protein | Complete and permanent loss (knockout) [81] | Partial and transient reduction (knockdown) [81] |
| Typical Timeline for Control | 4-8 weeks [82] | 3-5 days [82] |
| Key Advantage | High specificity; gold standard for validation [83] | Suitable for essential genes; reversible [81] |
| Primary Limitation | Time-consuming; can be lethal for essential genes | High off-target effects; incomplete protein loss [81] |
| Reported Overlap in Deregulated Transcripts with Negative Control | ~70% [86] | ~10% [86] |
The Scientist's Toolkit: Essential Research Reagents
Table 2: Key Reagents for Genetic Validation Experiments
| Reagent | Function in Experiment | Considerations for Stem Cell Research |
|---|---|---|
| Validated Control siRNAs | Confirms transfection efficiency and protocol functionality [85]. | Ensure the target (e.g., GAPDH) is expressed and relevant in your stem cell model. |
| Non-Targeting siRNA | Controls for non-sequence-specific effects of the transfection and RNAi machinery [85]. | Crucial for distinguishing true knockdown effects from cellular stress responses. |
| CRISPR sgRNA | Guides the Cas9 nuclease to the specific genomic locus for cutting. | Design multiple sgRNAs per gene. Test for editing efficiency in your specific cell type [84]. |
| Cas9 Nuclease | Creates double-strand breaks in the DNA at the site specified by the sgRNA. | Delivery method (plasmid, mRNA, RNP) must be optimized for stem cells to maintain viability and pluripotency. |
| Selection Antibiotics | Enriches for cells that have integrated CRISPR plasmids or shRNA vectors. | Determine the optimal kill curve for your stem cell line, as sensitivity can vary. |
| Isogenic Control Cell Lines | Genetically identical positive and negative controls, providing the highest confidence in validation [82]. | Can be generated by creating a knockout in a cell line that endogenously expresses your target protein. |
Peptide competition assays (PCA) serve as a critical tool for confirming antibody specificity, particularly in complex research environments like stem cell biology. When investigating stem cell markers, signaling pathways, or differentiation states, researchers frequently encounter the challenge of nonspecific antibody binding that can compromise data interpretation. This technical guide addresses how PCA can be implemented to validate antibody specificity and provides troubleshooting advice for common experimental challenges. Within stem cell research, where precise identification of cell populations and their functional states is paramount, employing rigorous validation techniques like PCA is essential for generating reproducible and reliable data, ultimately helping to prevent misinterpretation stemming from nonspecific antibody interactions [87].
Troubleshooting Guides and FAQs
Frequently Asked Questions
1. What constitutes a successful peptide competition assay result? A successful PCA demonstrates complete or significant loss of the specific band signal when the antibody is pre-incubated with the immunizing peptide, while the no-peptide control shows the expected binding pattern. For phospho-specific antibodies, pre-incubation with the phosphorylated peptide should abolish specific band reactivity, while the non-phosphorylated version should have minimal effect on antibody binding [88]. The result is only considered valid when the control (no peptide) shows the expected maximum signal [88].
2. Why might my peptide competition assay show only partial inhibition? Partial inhibition often indicates insufficient peptide concentration to fully block all antibody binding sites. The recommended starting point is a 200- to 500-fold molar excess of peptide relative to antibody [88]. If partial inhibition occurs, systematically increase the peptide concentration while maintaining constant antibody concentration. Additionally, consider extending incubation times or adjusting incubation temperatures, as some antibody-peptide combinations require extended incubation (1-2 hours at 37°C or 2-24 hours at 4°C) for optimal complex formation [88].
3. Can peptide competition assays distinguish between specific and nonspecific bands in western blotting? Yes, this is a primary application of PCA. When multiple bands appear on immunoblots, PCA helps identify which band represents the specific antigen-antibody interaction. The band that disappears when the antibody is pre-incubated with the immunizing peptide is considered specific, while bands that persist despite peptide competition likely represent nonspecific binding [88]. This is particularly valuable when characterizing stem cell markers where multiple protein isoforms or modified forms may be present.
4. How does peptide competition relate to other antibody validation methods? PCA should be considered one component of a comprehensive validation strategy rather than a standalone method. As noted by Cell Signaling Technology, "peptide competition should never be considered validation in isolation, because a peptide antigen will block antibody binding to all proteins to which the antibody binds, even those that bind nonspecifically" [87]. For thorough antibody validation, combine PCA with other approaches such as genetic knockdown/knockout controls, orthogonal methods using different antibody epitopes, and functional assays where possible.
5. What are common sources of high background in PCA? High background staining often results from insufficient centrifugation after antibody-peptide incubation. The protocol should include centrifugation for 15 minutes at 4°C (10,000-15,000 rpm) to pellet immune complexes [88]. Other common causes include inadequate blocking, incorrect antibody concentrations, or insufficient washing steps. In stem cell research, where samples may be precious and limited, optimizing these parameters using readily available cell lines before proceeding to primary stem cell samples is advisable.
Troubleshooting Common Issues
| Problem | Possible Causes | Solutions |
|---|---|---|
| No competition observed | Insufficient peptide concentration; Incorrect peptide sequence; Inadequate incubation conditions | Increase peptide molar excess (200-500X); Verify peptide sequence and quality; Extend incubation time or adjust temperature [88] |
| High background staining | Incomplete removal of immune complexes; Non-specific antibody binding | Centrifuge samples after incubation (15 min, 4°C); Optimize blocking conditions; Include detergents in buffers [88] [1] |
| Partial inhibition | Suboptimal peptide:antibody ratio; Low-affinity antibody | Titrate peptide concentration while fixing antibody; Extend incubation time to 2-24 hours [88] |
| Unexpected band disappearance | Non-specific peptide binding; Cross-reactive antibodies | Include control with non-phosphorylated peptide; Validate with alternative methods [87] |
| Weak or no signal in controls | Antibody degradation; Improper protein transfer | Verify antibody activity with positive control; Confirm efficient protein transfer to membrane [17] |
Quantitative Data in Peptide Competition Assays
Key Experimental Parameters
Table 1 summarizes the quantitative parameters essential for designing and interpreting peptide competition assays effectively.
Table 1: Key Quantitative Parameters for Peptide Competition Assays
| Parameter | Typical Range | Application Notes |
|---|---|---|
| Peptide Excess | 200-500-fold molar excess | Based on IgG molar mass of 150,000 Da; No significant difference between 200X and 500X in practice [88] |
| Antibody Concentration | 1 µg/mL (typical starting point) | Should be optimized for each antibody-antigen pair prior to PCA [88] |
| Incubation Time | 30 minutes (minimum) | Can extend to 1-2 hours at 37°C or 2-24 hours at 4°C for difficult pairs [88] |
| Total Reaction Volume | 2 mL (example provided) | Scalable based on experimental needs [88] |
| Peptide Stock Concentration | 100 µM (after reconstitution) | Molecular weight-dependent; Example: 100 µg peptide with MW 1500 in 0.67 mL water [88] |
Experimental Protocols
Standard Peptide Competition Assay Protocol
The following protocol adapts the Rockland PCA method for general application in stem cell research:
Reagents Required:
- Blocking Buffer
- HRP and ALP Substrates
- Whole Cell Lysates (from relevant stem cell populations)
- Primary antibody of interest
- Immunizing peptide (phosphorylated and non-phosphorylated forms for phospho-specific antibodies)
- Appropriate secondary antibodies
- Dilution buffer (with protein carrier such as BSA)
Procedure:
Prior Optimization: Before performing PCA, optimize immunoblotting conditions including amount of lysate, antibody dilutions, buffer conditions, and blocking parameters. These optimized conditions should remain constant throughout the PCA [88].
Sample Preparation: Transfer and immobilize antigen on nitrocellulose or PVDF membrane. Prepare three identical test samples for analysis. For non-phospho-specific antibodies, only two samples are needed (no-peptide control and peptide competition) [88].
Antibody and Peptide Preparation:
Experimental Setup:
Competition Incubation:
Clearing Step:
Immunoblotting:
Addressing Non-Specific Binding in Stem Cell Research
Beyond PCA, several strategies can mitigate nonspecific antibody binding in stem cell applications:
Fc Receptor Blocking: For flow cytometry or immunocytochemistry on stem cells expressing Fc receptors, use Fc blocking reagents containing recombinant proteins derived from immunoglobulin to minimize nonspecific binding [2].
Viability Gating: Include viability dyes (7-AAD, propidium iodide) to exclude dead cells, which are "sticky" due to exposed DNA from damaged membranes and contribute significantly to nonspecific binding [2].
Protein Carriers: Ensure washing and staining solutions contain protein (BSA or FBS) to prevent nonspecific antibody binding to cells and surfaces [2].
Antibody Titration: Perform careful antibody titration studies to identify optimal concentrations that maximize signal-to-background ratio, as excess antibody is a common cause of nonspecific binding [2].
Research Reagent Solutions
Table 2: Essential Research Reagents for Peptide Competition Assays
| Reagent | Function | Application Notes |
|---|---|---|
| Immunizing Peptide | Competes with native antigen for antibody binding | Should match exact immunogen sequence; Available in phosphorylated and non-phosphorylated forms [88] |
| Fc Blocking Reagent | Reduces non-specific binding to Fc receptors | Critical for hematopoietic stem cells and immune cells expressing Fc receptors [2] |
| Viability Dyes | Identifies and excludes dead cells | 7-AAD or propidium iodide for flow cytometry; Reduces background from "sticky" dead cells [2] |
| Protein Carriers | Reduces non-specific surface binding | BSA or FBS in buffers prevents non-specific antibody attachment [2] |
| Normal Serum | Blocks non-specific hydrophobic interactions | Source should not interfere with primary/secondary antibodies [1] |
| Detergents | Reduces hydrophobic interactions | Triton X-100 or Tween 20 at 0.3% concentration [1] |
Experimental Workflow and Signaling Pathways
Peptide Competition Assay Workflow
Antibody Binding Specificity Decision Pathway
Peptide competition assays represent a powerful, yet often misunderstood, tool for addressing antibody specificity challenges in stem cell research. When properly implemented with appropriate controls and optimized conditions, PCA can effectively distinguish specific from nonspecific antibody binding, thereby strengthening experimental conclusions. However, researchers must recognize that PCA alone cannot establish absolute antibody specificity and should be integrated within a comprehensive validation framework that includes multiple complementary approaches. As the field advances toward increasingly precise characterization of stem cell populations and their molecular signatures, rigorous antibody validation through techniques like PCA becomes ever more critical for generating reliable, reproducible data that moves the stem cell field forward.
Comparative Analysis Across Multiple Cell Lines and Stem Cell States
FAQs on Preventing Nonspecific Antibody Binding in Stem Cell Research
What causes nonspecific antibody binding and how can it be prevented?
Nonspecific antibody binding occurs when an antibody binds to cellular components other than its intended target epitope. The most common causes and their solutions are summarized in the table below.
| Cause of Nonspecific Binding | Prevention Strategy | Key Reagents & Protocols |
|---|---|---|
| Excess antibody [2] | Optimize antibody concentration via titration study [2] | Perform serial dilution of antibody to determine optimal signal-to-background ratio [2] |
| Fc receptor binding [2] [3] | Use Fc blocking reagents or antibody fragments without Fc region [2] [3] | Pre-incubate cells with Fc block; Use F(ab') or Fab fragments (e.g., via pepsin or papain digestion) [3] |
| Non-viable (dead) cells [2] | Exclude dead cells using viability dyes [2] | Include 7-AAD or propidium iodide (PI) in staining protocol; Gate out dead cells in flow cytometry [2] |
| Low protein content in buffers [2] [1] | Add protein to washing and staining solutions [2] [1] | Use buffers containing 0.1-5% BSA or fetal bovine serum (FBS) [2] [1] |
| Hydrophobic interactions [1] | Include detergents in buffers [1] | Add 0.3% Triton X-100 or Tween-20 to antibody diluents [1] |
| Artifactual antibody interactions [2] | Avoid specific antibody classes or remove plasma [2] | Avoid using mouse IgG2 antibodies; Wash samples with PBS or pre-lyse with NH4Cl [2] |
| Endogenous enzyme activity [1] | Block endogenous enzymes in chromogenic detection [1] | Use 3% H2O2 to block peroxidases; Use Levamisole to block alkaline phosphatase [1] |
| Endogenous biotin [1] | Block endogenous biotin before streptavidin detection [1] | Sequential incubation with avidin then biotin prior to primary antibody staining [1] |
How do I troubleshoot high background staining in flow cytometry of pluripotent stem cells?
High background fluorescence in stem cell analysis often results from non-viable cells and Fc receptor binding. For pluripotent stem cells (hESCs and hiPSCs), which can be particularly sensitive, implement these specific protocols:
- Viability Staining Protocol: Add 7-AAD or propidium iodide to your antibody mixture at a final concentration of 1-5 µg/mL and incubate for 5-10 minutes at 4°C before analysis. This is crucial as dead cells exhibit increased "stickiness" [2].
- Fc Blocking Protocol: Incubate cells with Fc blocking reagent for 10-15 minutes at 4°C before adding your primary antibody. Alternatively, use 2% normal serum from the same species as your secondary antibody [2] [1].
- Pre-incubation Protocol: For particularly challenging samples, incubate cells at 37°C for 30 minutes prior to antibody addition to promote endocytosis of surface proteins [2].
Why do I get different staining results between hESC and hiPSC lines even when using the same protocol?
Quantitative proteomic studies reveal that while hESCs and hiPSCs express a nearly identical set of proteins, they show consistent differences in expression levels of specific protein subsets. hiPSCs have been shown to possess >50% higher total protein content and increased abundance of cytoplasmic and mitochondrial proteins [89]. These intrinsic molecular differences can affect antibody accessibility and binding.
Experimental Consideration: When comparing across multiple cell lines, always include:
- Lineage-specific controls: Use validated positive and negative control cell lines
- Antibody titration: Titrate antibodies separately for each cell type
- Normalization: Account for differences in total protein content during data analysis [89]
How can I validate antibody specificity in stem cell differentiation models?
Antibody validation is critical when working with complex stem cell differentiation systems. The case of CFTR antibodies demonstrates how nonspecific binding can lead to erroneous conclusions [90].
Validation Protocol:
- Use multiple antibodies targeting different epitopes on the same protein
- Include genetic controls: Use knockout cells (CRISPR/Cas9) or cells from patients with Class I mutations that prevent protein expression [90]
- Peptide blocking: Pre-incubate antibody with the target peptide - specific binding should be dramatically reduced [90]
- Correlate with mRNA data: Compare protein detection with mRNA expression data from single-cell RNA sequencing when possible [90]
Quantitative Assessment of Nonspecific Binding
Nonspecificity Scoring for Clinical-Stage Antibodies
Recent microfluidic technologies enable quantitative measurement of nonspecific interactions. The table below shows nonspecificity scores for various clinical-stage antibodies, which can guide antibody selection for stem cell research [91].
| Antibody (Fv-SIA) | Clinical Status | Reported Flags (PSR/CIC/ELISA) | Nonspecificity Flags |
|---|---|---|---|
| Briakinumab | Discontinued | 3/3 flags | 8 flags [91] |
| Atezolizumab | Approved | 1/3 flags | 7 flags [91] |
| Bococizumab | Discontinued | 3/3 flags | 7 flags [91] |
| Lenzilumab | In clinical trials | 3/3 flags | 7 flags [91] |
| Adalimumab | Approved | 0/3 flags | 0 flags [91] |
| Tovetumab | Discontinued | 0/3 flags | 0 flags [91] |
Key: PSR = poly-specificity reagent; CIC = cross-interaction chromatography [91]
Electrostatic Contributions to Nonspecific Binding
Electrostatic interactions are a major driver of nonspecific binding. Research shows that avidity can increase apparent affinity by two orders of magnitude for charge-complementary interactions [91]. This is particularly relevant for stem cell research where charged extracellular matrix components are abundant.
The Scientist's Toolkit: Essential Reagents for Preventing Nonspecific Binding
| Reagent Category | Specific Examples | Function & Application Notes |
|---|---|---|
| Fc Blocking Reagents | Recombinant Fc blockers, normal serum | Bind to Fc receptors on cells before antibody application; essential for immune cells and stem cells expressing Fc receptors [2] |
| Viability Dyes | 7-AAD, Propidium Iodide (PI) | Distinguish live from dead cells; dead cells bind antibodies nonspecifically [2] |
| Protein Additives | BSA, FBS, non-fat dry milk | Occupy nonspecific binding sites on cells and plastic surfaces [2] [1] |
| Detergents | Tween-20, Triton X-100 | Reduce hydrophobic interactions; typically used at 0.1-0.3% concentration [1] |
| Enzyme Blockers | H2O2, Levamisole | Block endogenous peroxidase and alkaline phosphatase activity in chromogenic detection [1] |
| Biotin Blockers | Avidin/Biotin blocking kits | Sequester endogenous biotin; critical when using streptavidin-based detection systems [1] |
| Fab Fragment Antibodies | F(ab')2, Fab fragments | Eliminate Fc-mediated binding; generated via pepsin or papain digestion [3] |
Experimental Workflows for Quality Control
Antibody Validation Workflow for Stem Cell Research
Multifactorial Causes of Nonspecific Binding
Case Study: Learning from Published Examples
CFTR Antibody Cross-Reactivity in Airway Epithelium
A significant example of nonspecific binding was documented with common CFTR antibodies in ciliated cells of human airway epithelium. Researchers discovered that monoclonal CFTR antibodies (596, 528, 769) showed similar apical fluorescence in cells completely lacking CFTR due to Class I mutations [90]. This nonspecific binding was traced to cross-reactivity with the ciliary protein rootletin X1, which shares a similar amino acid sequence with the CFTR epitope [90].
Key Lesson for Stem Cell Researchers:
- Always include appropriate negative controls (genetic knockouts if possible)
- Be cautious when interpreting staining patterns that don't align with mRNA expression data
- Validate antibodies in your specific stem cell differentiation model, not just in standard cell lines
This case highlights why the antibody validation workflow above is essential for rigorous stem cell research.
FAQs: Core Concepts and Application
Q1: What is orthogonal validation, and why is it critical in stem cell research? Orthogonal validation uses two or more distinct methods to confirm the specificity of your antibody and the validity of your experimental results [92]. In stem cell research, where characterizing unique cell surface markers and intracellular proteins is routine, this practice is essential. It prevents misinterpretation caused by nonspecific antibody binding, ensuring that your data on stem cell identity, differentiation status, and purity are reliable [92] [93].
Q2: My flow cytometry data shows strong positive staining, but my Western blot has no signal. What is the most likely cause? This common discrepancy often stems from the fundamental difference in how the target protein is presented in each assay. Flow cytometry typically detects native, folded proteins on the cell surface or inside permeabilized cells. In contrast, Western blot detects denatured, linearized proteins after SDS-PAGE separation [92]. The most probable cause is that your antibody recognizes a conformational epitope—a specific three-dimensional structure that is destroyed during the denaturation process of Western blotting [92]. To confirm, check your antibody's datasheet to ensure it is validated for Western blot (which requires recognition of a linear epitope).
Q3: How can I confirm that a band on my Western blot is specific, especially when working with stem cell lysates? The gold standard for confirming antibody specificity in Western blot is the knockout (KO) validation [93]. This involves comparing the blot signal from wild-type stem cells to that from stem cells where the gene encoding your target protein has been knocked out (e.g., via CRISPR-Cas9). A specific antibody will show a band in the wild-type lane and no band in the KO lane [93]. An alternative method is a peptide blocking experiment, where pre-incubating the antibody with its immunizing peptide antigen competitively inhibits binding, causing the specific band to disappear [15].
Q4: When should I use ELISA over Western blot for protein quantification? Choose ELISA when your primary goal is accurate quantification of a soluble protein (like a secreted cytokine or a hormone in cell culture supernatant) and you need high throughput [92] [94]. Choose Western blot when you need to confirm the specificity of an antibody based on the protein's molecular weight, detect specific isoforms, or investigate post-translational modifications like phosphorylation [92] [95]. For quantifying a cell surface marker on stem cells, flow cytometry is the most appropriate technique.
Q5: What are the key experimental controls for ensuring data correlation across these platforms?
- For all techniques: Include a positive control (a known sample expressing the target) and a negative control (lacking the target, like an isotype control for flow or a KO lysate for Western) [55] [96].
- For Flow Cytometry: Use an unstained control and a fluorescence-minus-one (FMO) control to set gates correctly [96].
- For Western Blot: Use a loading control (e.g., a housekeeping protein like GAPDH or, preferably, a total protein stain) to normalize for sample loading variations [97].
- For ELISA: Include a standard curve with known concentrations of the analyte for accurate quantification [94] [98].
Troubleshooting Guides
Troubleshooting Flow Cytometry and Western Blot Correlation
This table addresses common issues when correlating data between flow cytometry (detecting native protein) and Western blot (detecting denatured protein).
| Problem | Possible Cause | Solution |
|---|---|---|
| Strong flow signal but no Western blot band | Antibody recognizes a conformational epitope destroyed by denaturation [92]. | Verify antibody is validated for Western blot. Use an antibody raised against a linear peptide epitope. |
| Failed transfer during Western blotting, especially for high or low molecular weight proteins [55] [99]. | Stain gel with Coomassie post-transfer to check transfer efficiency. Optimize transfer time and buffer conditions [55]. | |
| Multiple non-specific bands on Western blot | Antibody cross-reactivity with off-target proteins [55] [99]. | Perform knockout validation [93] or a peptide blocking experiment [15] to confirm specificity. Titrate antibody to optimal concentration. |
| Protein degradation in the sample [95]. | Always prepare lysates on ice with fresh protease and phosphatase inhibitors [95]. | |
| Unexpected molecular weight on Western blot | Post-translational modifications (e.g., glycosylation, phosphorylation) altering protein migration [95]. | Check literature for known PTMs. Treat sample with glycosidases or phosphatases to see if band shifts. |
| High background in flow cytometry | Non-specific antibody binding or insufficient blocking [96]. | Include Fc receptor blocking step. Titrate antibody. Use a viability dye to exclude dead cells [96]. |
Troubleshooting ELISA and Western Blot Correlation
This table helps resolve discrepancies between ELISA (often detecting soluble antigen) and Western blot (detecting proteins separated by size).
| Problem | Possible Cause | Solution |
|---|---|---|
| Strong ELISA signal but weak/no Western signal | Different antigen sources: ELISA may detect a soluble, secreted form; Western detects the cellular form [92]. | Analyze cell lysates by ELISA if possible. Ensure your lysis buffer is compatible with your target protein [95]. |
| The target protein is of very low abundance and is detectable by the amplified ELISA signal but not Western [92]. | Concentrate your lysate or load more protein for Western. Use a high-sensitivity chemiluminescent substrate [55] [99]. | |
| Discrepancies in quantification | Poor normalization in Western blot [97]. | Move away from housekeeping proteins (HKPs) to Total Protein Normalization (TPN), which is more accurate and increasingly required for publication [97]. |
| Matrix effects in the sample interfering with the ELISA readout [98]. | Perform a spike-and-recovery experiment to assess matrix effects. Dilute samples in a compatible buffer [98]. | |
| High background in ELISA | Non-specific binding to the plate wells [98]. | Optimize blocking conditions (e.g., use BSA or normal serum). Ensure antibodies are diluted in a protein-based buffer. Wash plates thoroughly [98]. |
Experimental Protocols
Protocol: Blocking Peptide Experiment for Antibody Specificity
This protocol is used to confirm that a signal (band in Western blot, staining in flow/IHC) is specific by competing it away with the peptide used to generate the antibody [15].
Materials and Reagents:
- Blocking buffer (e.g., TBST with 3% BSA for Western blot)
- Immunizing (blocking) peptide
- Primary antibody
- Two identical sample preparations (e.g., two Western blot membranes with the same lysate)
Method:
- Determine Antibody Amount: Calculate the amount of antibody needed for your standard experiment at the optimized concentration. You will need this amount for two identical samples [15].
- Prepare Antibody Solutions: Dilute the required amount of antibody in blocking buffer and split it equally into two tubes.
- Control Tube: Add only buffer.
- Blocked Tube: Add a 5-fold excess (by weight) of blocking peptide to the antibody solution [15].
- Pre-incubate: Incubate both tubes for 30 minutes at room temperature (or overnight at 4°C) with gentle agitation [15].
- Proceed with Staining: Use the "control" antibody solution on one sample and the "blocked" antibody solution on the identical second sample. Complete the rest of your staining or blotting protocol as normal.
- Interpret Results: Specific binding is indicated by the signal that is present in the "control" sample but is absent or significantly reduced in the "blocked" sample [15].
Workflow Diagram: Orthogonal Antibody Validation
Research Reagent Solutions
Essential materials and reagents for successful orthogonal antibody validation.
| Reagent / Solution | Function in Experiment | Key Considerations |
|---|---|---|
| Protease/Phosphatase Inhibitors [95] | Preserves protein integrity in lysates by preventing degradation and dephosphorylation. | Use fresh cocktails. Perform lysis on ice. Critical for labile proteins in stem cells. |
| Cross-Adsorbed Secondary Antibodies [98] | Minimizes background by reducing cross-reactivity with non-target species proteins. | Essential for assays with multiple species' components (e.g., block with goat serum, use anti-goat secondary). |
| Total Protein Normalization (TPN) Reagents [97] | Provides superior loading control for Western blot vs. traditional housekeeping proteins (HKPs). | Increasingly required for publication. More accurate as HKP expression can vary in stem cells. |
| Immunizing/Blocking Peptide [15] | Confirms antibody specificity via competitive binding in peptide blocking experiments. | A 5:1 peptide-to-antibody mass ratio is standard. The specific signal should disappear upon blocking. |
| BSA (IgG- and Protease-Free) [98] | A high-quality blocking agent to reduce nonspecific binding in ELISA and Western blot. | Avoids background caused by contaminating IgGs in standard BSA preparations. |
| Viability Dye [96] | Distinguishes live from dead cells in flow cytometry. Dead cells cause nonspecific antibody binding. | Gating out dead cells is crucial for accurate quantification of surface markers in stem cell populations. |
FAQs: Addressing Key Challenges in Reagent Validation
What are the main causes of non-specific binding in cell staining experiments, and how can they be prevented?
Non-specific binding is a common issue that can compromise experimental results by creating high background signals or false positives. The most frequent causes and their solutions are [2]:
- Excess Antibody/Aptamer: When reagent concentrations are too high, they can bind to lower-affinity, off-target sites. Solution: Perform a titration study to determine the optimal concentration that maximizes signal-to-background ratio [2].
- Fc Receptor Binding: Immune cells such as macrophages, B cells, and NK cells express Fc receptors that can bind the Fc region of antibodies, leading to non-specific staining. Solution: Use an Fc blocking reagent prior to staining or use F(ab) fragment antibodies, which lack the Fc region [2] [100].
- Non-viable Cells: Dead cells are "sticky" due to exposed DNA from damaged membranes, leading to cell clumping and non-specific binding. Solution: Include a viability dye (e.g., 7-AAD or propidium iodide) to identify and exclude dead cells during analysis [2].
- Low Protein in Solutions: A lack of protein in washing and staining buffers can cause antibodies to non-specifically adhere to cells and surfaces. Solution: Include a blocking protein like Bovine Serum Albumin (BSA) or fetal bovine serum (FBS) in all buffers [2].
How does the validation of recombinant antibodies differ from traditional monoclonal antibodies?
Recombinant antibodies offer significant advantages in consistency and specificity due to fundamental differences in their production and validation. Unlike traditional monoclonals produced in hybridomas, which can suffer from genetic drift, recombinant antibodies are produced in vitro from a known DNA sequence [101]. This allows for a more rigorous and standardized validation process [102]:
- Batch-to-Batch Consistency: The sequence is defined and reproducible, eliminating lot-to-lot variability common in hybridoma-derived antibodies [101].
- Rigorous Application Screening: Clones are screened across multiple applications (e.g., Western blot, ICC/IHC, flow cytometry) early in development [102].
- Biophysical Characterization: Techniques like Liquid Chromatography-Mass Spectrometry (LC-MS) are used to confirm sequence identity and integrity, ensuring molecular-level consistency [102].
- Knockout Validation: A critical step where antibodies are tested on cell lines where the target gene has been knocked out, providing definitive evidence of specificity [102].
Why might a cell-targeting aptamer fail in vivo even after demonstrating good in vitro binding?
There can be a significant disconnect between in vitro and in vivo performance. An aptamer may bind its target in cell culture but fail to localize to tumors in a living organism for several reasons [103]:
- Differences in Target Accessibility: The target epitope may not be as accessible in the complex in vivo environment as it is on cultured cells.
- Stability and Clearance: Aptamers are small and can be rapidly cleared from the bloodstream unless modified (e.g., with PEG or cholesterol) to increase their circulation time [103].
- Non-Specific Uptake: As polyanions, aptamers can interact non-specifically with various proteins or lipids in the body, diverting them from the target site [103].
- Unexpected Specificity Profiles: A standardized study found that only 5 out of 15 tested aptamers demonstrated receptor-specific activity in vitro, and only one successfully localized to tumors in vivo, highlighting the need for thorough validation [103].
Troubleshooting Guides
Guide 1: Troubleshooting High Background in Flow Cytometry
| Symptom | Possible Cause | Solution |
|---|---|---|
| High fluorescence across all channels | Non-viable cells in sample | Incorporate a viability dye and gate out dead cells during analysis [2]. |
| High background in specific channels with conjugated reagents | Fc receptor-mediated binding | Block Fc receptors prior to staining or switch to F(ab) fragment antibodies [2] [100]. |
| Consistently high background | Antibody/aptamer concentration is too high | Titrate the reagent to find the optimal working concentration [2]. |
| High background and non-specific staining | Lack of protein in buffers | Add BSA (1-5%) or serum to staining and wash buffers [2]. |
Guide 2: Validating a New Aptamer for Cell Surface Targeting
Aptamers represent a promising alternative to antibodies but require rigorous, standardized validation. The following workflow and table outline key experiments to confirm specificity and functionality [103].
Key Validation Experiments Table
| Experiment | Protocol Summary | Key Controls | Interpretation of Positive Result |
|---|---|---|---|
| Initial Binding Screen | Incubate aptamer with a panel of relevant cell lines. Analyze binding via flow cytometry under standardized conditions (concentration, buffer, time) [103]. | A non-targeting scrambled sequence aptamer; Target-negative cell line [103]. | Significant shift in fluorescence on target-positive cells compared to controls. |
| Target Correlation | Stain the same cell panel with a well-validated antibody against the aptamer's reported target. Compare binding patterns [103]. | Isotype control antibody. | Aptamer binding positively correlates with antibody binding across the cell line panel. |
| Specificity Confirmation (Knockdown) | Use siRNA or CRISPR to knock down the expression of the purported target protein. Measure aptamer binding in knockdown vs. control cells [103]. | Non-targeting siRNA; Western blot to confirm protein knockdown. | Significant reduction in aptamer binding is observed in knockdown cells. |
| In Vivo Localization | Administer the aptamer intravenously in an animal model (e.g., tumor xenograft). Use imaging (e.g., NIR) to assess target site accumulation [103]. | A non-binding control aptamer. | Specific accumulation of the aptamer at the target site (e.g., tumor) compared to control. |
The Scientist's Toolkit: Key Research Reagent Solutions
| Item | Function & Rationale |
|---|---|
| Recombinant Antibodies | Defined sequence ensures batch-to-batch reproducibility and high specificity. Ideal for long-term studies [102] [101]. |
| F(ab) Fragments | Antibody fragments lacking the Fc region; essential for eliminating Fc receptor-mediated non-specific binding on immune cells [100]. |
| Fc Blocking Reagent | A recombinant protein that binds to Fc receptors, blocking non-specific antibody binding before staining [2]. |
| Viability Dye (e.g., 7-AAD) | A DNA-binding dye used to identify and exclude dead cells during flow cytometry analysis, reducing false positives [2]. |
| Knockout Cell Lines | Cell lines with the target gene knocked out via CRISPR. The gold standard control for confirming antibody or aptamer specificity [102]. |
| Chemically-Modified Aptamers | Aptamers with 2'-fluoro or 2'-O-methyl ribose modifications improve stability against nucleases for in vivo applications [103]. |
Conclusion
Preventing nonspecific antibody binding in stem cell research requires a multifaceted approach combining foundational understanding of binding mechanisms with rigorous methodological optimization and comprehensive validation. By systematically addressing Fc receptor interactions, optimizing blocking conditions, implementing appropriate controls, and employing genetic validation strategies, researchers can significantly enhance data reliability. Future directions include the development of stem cell-specific validation standards, engineering of minimal-binding antibody fragments, and integration of computational prediction tools. These advances will be crucial for accelerating stem cell research translation into robust clinical diagnostics and therapeutics, ultimately improving reproducibility across the field.
References
- 1. ICC/IHC Non-Specific Binding / Staining Prevention Protocol [https://www.rndsystems.com/resources/protocols/preventing-non-specific-staining]
- 2. What causes non-specific antibody binding and how can it ... [https://www.cytometry.org/web/q_view.php?id=153&filter=Analysis%20Techniques]
- 3. How to reduce non-specific reactions [https://www.mblbio.com/bio/g/support/method/nonspecific-reaction-reduction.html]
- 4. Blocking Strategies for IHC [https://www.thermofisher.com/us/en/home/life-science/protein-biology/protein-biology-learning-center/protein-biology-resource-library/pierce-protein-methods/blocking-strategies-ihc.html]
- 5. Mitigating the non-specific uptake of immunomagnetic ... [https://www.nature.com/articles/s42003-021-02732-8]
- 6. Importance of Using an FcR Blocker During Cell ... [https://www.stemcell.com/importance-of-using-an-fcr-blocker-during-cell-separation-procedures.html]
- 7. Main causes of non-specific reactions of antibodies [https://www.mblbio.com/bio/g/support/method/nonspecific-reaction.html]
- 8. alginate hydrogels: directing the behavior of mesenchymal ... [https://pmc.ncbi.nlm.nih.gov/articles/PMC6028859/]
- 9. Surface potential and charges impact on cell responses ... [https://www.sciencedirect.com/science/article/abs/pii/S0928493119304576]
- 10. Non-specific binding of antibodies in immunohistochemistry [https://pmc.ncbi.nlm.nih.gov/articles/PMC3216515/]
- 11. Non-Specific Binding, a Limitation of the ... [https://pmc.ncbi.nlm.nih.gov/articles/PMC8145419/]
- 12. Cancer stem cells: landscape, challenges and emerging ... [https://www.nature.com/articles/s41392-025-02360-2]
- 13. Immunohistochemistry (IHC) Troubleshooting Guide & the ... [https://www.cellsignal.com/learn-and-support/troubleshooting/ihc-troubleshooting-guide?srsltid=AfmBOoq4uYPg1nJKc3_zUFNCLsc4bTp0NJbF4rwWDfbEDeHarVSTM2xY]
- 14. Stem Cell Culture Support—Troubleshooting [https://www.thermofisher.com/us/en/home/technical-resources/technical-reference-library/cell-culture-support-center/stem-cell-culture-support/stem-cell-culture-support-troubleshooting.html]
- 15. Blocking with immunizing peptide protocol [https://www.abcam.com/en-us/technical-resources/protocols/blocking-with-immunizing-peptides]
- 16. Ultimate IHC Troubleshooting Guide: Fix Weak Staining & ... [https://www.atlasantibodies.com/knowledge-hub/blog/the-ultimate-ihc-troubleshooting-guide-from-weak-staining-to-high-background/]
- 17. Guidelines on antibody use in physiology research - PMC [https://pmc.ncbi.nlm.nih.gov/articles/PMC11208033/]
- 18. Section 5: Reporting [https://www.isscr.org/basic-research-standards/reporting]
- 19. Immunoprecipitation Troubleshooting Guide [https://www.cellsignal.com/learn-and-support/troubleshooting/ip-troubleshooting-guide?srsltid=AfmBOorp6CF3F0_CqxKm5hCZFAdJD46qLI_TYjVA3qzX-TmoLmnWI74F]
- 20. Advancements in the conservation of the conformational ... [https://pmc.ncbi.nlm.nih.gov/articles/PMC11906443/]
- 21. Protocols & Troubleshooting Guides [https://www.rndsystems.com/resources/protocols-troubleshooting-guides]
- 22. Report Modulation of B cell receptor activation by antibody ... [https://www.sciencedirect.com/science/article/pii/S2211124725007156]
- 23. BD Fc Block™ Reagents [https://www.bdbiosciences.com/en-us/products/reagents/flow-cytometry-reagents/research-reagents/fc-block-reagents]
- 24. Uses of Fc Block [https://www.bdbiosciences.com/en-us/resources/protocols/uses-of-fc-block]
- 25. Blocking of FC-Receptor Binding [https://cyto.med.ucla.edu/lab-information/lab-protocols/blocking-of-fc-receptor-binding]
- 26. Human Fc Receptor Blocking Solution #58948 [https://www.cellsignal.com/products/buffers-dyes/human-fc-receptor-blocking-solution/58948?srsltid=AfmBOoqwhGYsmqSGwHwd5DLH9HfZImi9KSjz-ti6Ym2g7_EW-9RtEHTh]
- 27. Flow Cytometry Troubleshooting Guide [https://www.cellsignal.com/learn-and-support/troubleshooting/flow-cytometry-troubleshooting-guide?srsltid=AfmBOooNfBqljd6IZ-QXg6h22X0QFW5J6PFd71qtrfXd7joqOl0yZR4f]
- 28. Flow Cytometry Troubleshooting Guide [https://www.bio-techne.com/applications/flow-cytometry/flow-cytometry-troubleshooting-guide]
- 29. Blocking Buffers for Western Blot and ELISA [https://www.thermofisher.com/us/en/home/life-science/protein-biology/protein-biology-learning-center/protein-biology-resource-library/pierce-protein-methods/blocking-buffers-western-blot-elisa.html]
- 30. Diminished immune cell adhesion in hypoimmune ICAM-1 ... [https://www.nature.com/articles/s41467-025-62568-2]
- 31. Getting Rid of the Noise: Western Blot Blocking [https://azurebiosystems.com/blog/getting-rid-of-the-noise-western-blot-blocking/]
- 32. Optimizing Protein Transfer and Detection in Western Blotting [https://www.labx.com/resources/optimizing-protein-transfer-and-detection-in-western-blotting/5568]
- 33. Immunofluorescence Protocol with Formaldehyde Fixation [https://www.cellsignal.com/learn-and-support/protocols/protocol-if?srsltid=AfmBOopj4Z5rXMZe3sekN0J31ihGPsVQA_8X6d19tSh9x9uptI8ijAbp]
- 34. IHC Blocking Non-Specific Binding [https://www.bio-techne.com/applications/imaging/immunohistochemistry/blocking-non-specific-binding]
- 35. Nonfat Dry Milk #9999 [https://www.cellsignal.com/products/buffers-dyes/nonfat-dry-milk/9999?srsltid=AfmBOopQOWFxCLSc9W14IzhxLBPNNRWvyexYYHuerPfui1m93SB0LQiO]
- 36. Antibody Fragmentation | Thermo Fisher Scientific - US [https://www.thermofisher.com/us/en/home/life-science/antibodies/antibodies-learning-center/antibodies-resource-library/antibody-methods/antibody-fragmentation.html]
- 37. Antibody engineering of a cytotoxic monoclonal ... [https://www.sciencedirect.com/science/article/pii/S0168165616316662]
- 38. Antibody Structure and Function: The Basis for Engineering ... [https://pmc.ncbi.nlm.nih.gov/articles/PMC6963682/]
- 39. Antibody fragments | Fastest Imaging CRO | TRACER [https://www.tracercro.com/resources/blogs/antibody-fragments/]
- 40. Peptide Blocking [https://www.novusbio.com/support/blocking-with-immunizing-peptide?srsltid=AfmBOoodNUPycgKr677pPLNzmci5fQGk0EY_beKFKZsKPPwBCc-iy51Q]
- 41. Blocking Peptides Antigen [https://www.creative-diagnostics.com/Blocking-Peptides.htm]
- 42. Hallmarks of Antibody Validation: Complementary Strategies [https://www.cellsignal.com/about-us/approach-validation-principles/complementary-assay?srsltid=AfmBOop7gZrE5PP_yZ7i7w5YP1f87n1-bWN7kZ4_c6ilUY0I4418ZsQs]
- 43. Guidelines — International Society for Stem Cell Research [https://www.isscr.org/guidelines]
- 44. 9 Tips to optimize your IF experiments [https://www.ptglab.com/news/blog/9-tips-to-optimize-your-if-experiments/?srsltid=AfmBOorm3VsyjpA3Dfuz1aTvtGGa2Mqt8eSwiyOBtTojVbbx0ddVBzBJ]
- 45. IHC Immunodetection (Staining) [https://www.thermofisher.com/us/en/home/life-science/protein-biology/protein-biology-learning-center/protein-biology-resource-library/pierce-protein-methods/ihc-immunodetection.html]
- 46. HTS Assay Validation - NCBI [https://www.ncbi.nlm.nih.gov/books/NBK83783/]
- 47. Widely applicable, extended flow cytometric stem cell ... [https://www.nature.com/articles/s41598-022-22339-1]
- 48. An Update on Flow Cytometry Analysis of Hematological ... [https://pmc.ncbi.nlm.nih.gov/articles/PMC12190783/]
- 49. Why is it Important to Consider Antibody Titration ... [https://www.bdbiosciences.com/en-sg/learn/science-thought-leadership/blogs/why-antibody-titration]
- 50. Importance of Antibody Titration in Flow cytometry [https://bitesizebio.com/22374/importance-of-antibody-titration-in-flow-cytometry/]
- 51. Optimization | Cytometry [https://cytometry.mlsascp.com/optimization.html]
- 52. Combinatorial Antibody Titrations - UChicago Voices [https://voices.uchicago.edu/ucflow/2024/02/27/combinatorial-antibody-titrations/]
- 53. Hallmarks of Antibody Validation: Complementary Strategies [https://www.cellsignal.com/about-us/approach-validation-principles/complementary-assay?srsltid=AfmBOoq1ypd2MD0gHqgLeOK4r1EwiGVn8YNg8PcCRhvl3g48gQ_0gEed]
- 54. Optimization of the Blocking and Signal Preservation ... [https://pmc.ncbi.nlm.nih.gov/articles/PMC12462741/]
- 55. The 8 Western Blot Failures and How to Prevent Them (2025 ... [https://wildtypeone.substack.com/p/the-8-western-blot-failures-and-how?utm_campaign=post&triedRedirect=true]
- 56. To dye or not to dye? Understanding the different viability ... [https://www.ptglab.com/news/blog/to-dye-or-not-to-dye-understanding-the-different-viability-dyes-available-for-flow-cytometry/?srsltid=AfmBOorYNtuxwxSIdlu0uTKTpHaylIlKvCIV9l1T7lotKJYPJLwZz6m3]
- 57. BestProtocols: Viability Staining Protocol for Flow Cytometry [https://www.thermofisher.com/us/en/home/references/protocols/cell-and-tissue-analysis/protocols/viability-staining-flow-cytometry.html]
- 58. Cell viability dyes for flow cytometry [https://www.abcam.com/en-us/products/selection-guides/cell-viability-dyes-for-flow-cytometry]
- 59. 7-Amino Actinomycin D Flow Cytometry Protocol [https://www.rndsystems.com/resources/protocols/analysis-cell-viability-using-7-amino-actinomycin-d-7-aad]
- 60. Propidium Iodide Cell Viability Flow Cytometry Protocol [https://www.rndsystems.com/resources/protocols/flow-cytometry-protocol-analysis-cell-viability-using-propidium-iodide]
- 61. Flow Cytometry Troubleshooting Guide [https://www.cellsignal.com/learn-and-support/troubleshooting/flow-cytometry-troubleshooting-guide?srsltid=AfmBOoq9MNUhra6P15cHOPfKj7BNZdHXV58LYFhLCP2Ob3E1J2HBvs_u]
- 62. Intracellular Flow Cytometry Staining Protocol [https://www.ptglab.com/news/blog/intracellular-flow-cytometry-staining-protocol/?srsltid=AfmBOoqx3MDNkErq8IyPeYovUcCVvo0BwzG6amSJle7kcbywtXo4XuBv]
- 63. PrimeFlow™ Fixation/Permeabilization Buffer Set - FAQs [https://www.thermofisher.com/order/catalog/product/88-17000-210/faqs]
- 64. Overcoming fixation and permeabilization challenges in ... [https://pmc.ncbi.nlm.nih.gov/articles/PMC11343140/]
- 65. Immunohistochemistry Troubleshooting | Tips & Tricks [https://www.stressmarq.com/support/technical-support/troubleshooting/immunohistochemistry-troubleshooting/?srsltid=AfmBOoqmSU-1m0HLMB0XDosoYUhIcsWPjxZ5PiIX26Wbp79hbzRti2hu]
- 66. Successful Immunofluorescence: Fixation & Permeabilization [https://blog.cellsignal.com/successful-immunofluorescence-fixation-and-permeabilization]
- 67. SMARCAD1 ATPase activity is required to silence ... [https://www.nature.com/articles/s41467-019-09078-0]
- 68. Mesenchymal stem cells enhanced with SeNPs protection ... [https://pmc.ncbi.nlm.nih.gov/articles/PMC12446014/]
- 69. Resolving Heterophile Antibody Interference in Viral ... [https://pmc.ncbi.nlm.nih.gov/articles/PMC12558593/]
- 70. Serum-tolerant polymeric complex for stem-cell transfection ... [https://pmc.ncbi.nlm.nih.gov/articles/PMC11868408/]
- 71. Immunoprecipitation Troubleshooting Guide [https://www.cellsignal.com/learn-and-support/troubleshooting/ip-troubleshooting-guide?srsltid=AfmBOorhet2OC-YHRQdmrW2NEx4w1QlW8ZTk2pIGhuUBm_4dNNgcwYAl]
- 72. A novel proliferation synergy factor cocktail maintains ... [https://www.frontiersin.org/journals/cell-and-developmental-biology/articles/10.3389/fcell.2025.1680263/full]
- 73. High-Quality Recombinant Human Serum Albumin (rHSA) ... [https://invitria.com/resources/high-quality-recombinant-human-serum-albumin-rhsa-exbumin-for-improved-cell-wash-buffer-preparation/]
- 74. Western blot stripping: Techniques and advantages [https://www.abcam.com/en-us/knowledge-center/western-blot/western-blot-stripping]
- 75. Non-specific adsorption of protein to microfluidic materials [https://www.sciencedirect.com/science/article/abs/pii/S0927776521005828]
- 76. Immunohistochemistry (IHC) Troubleshooting Guide & the ... [https://www.cellsignal.com/learn-and-support/troubleshooting/ihc-troubleshooting-guide?srsltid=AfmBOoo7_rkA7wbTeSNrUZq1nK5A2EO9Ntaejj4IWgszMx6mKBhdEXfN]
- 77. Isotype Controls - What is it and why use it? Find it out [https://www.lubio.ch/blog/antibody-isotype-controls]
- 78. Isotype Control [https://www.ptglab.com/products/isotype-control/?srsltid=AfmBOooVivFv17rrSZE9dckqAme7PVtNUAOZGRHpDpA3X1mmqVpvHTPh]
- 79. Why to Use Isotype Control Antibodies [https://blog.crownbio.com/why-isotype-control-antibodies]
- 80. Troubleshooting Guide: Immunohistochemistry [https://www.rndsystems.com/resources/technical/troubleshooting-guide-immunohistochemistry]
- 81. RNAi vs. CRISPR: Guide to Selecting the Best Gene ... [https://www.synthego.com/blog/rnai-vs-crispr-guide/]
- 82. Antibody Validation - why is it important? [https://horizondiscovery.com/en/applications/cell-lines-by-research-area/antibody-validation]
- 83. Knockout and Knockdown Antibody Validation [https://www.thermofisher.com/us/en/home/life-science/antibodies/invitrogen-antibody-validation/knockout-knockdown-antibody-validation.html]
- 84. CRISPR Screen Analysis: Expert Troubleshooting Q&A [https://www.ubigene.us/application/crispr-screening-data-analytics-faq.html]
- 85. RNAi Synthetics Support—Troubleshooting [https://www.thermofisher.com/us/en/home/technical-resources/technical-reference-library/rnai-support-center/rnai-synthetics-support/rnai-synthetics-support-troubleshooting.html]
- 86. Comparative analysis of antibody-mediated loss ... [https://www.sciencedirect.com/science/article/pii/S2472555225000760]
- 87. Hallmarks of Antibody Validation... | Cell Signaling Technology [https://www.cellsignal.com/about-us/approach-validation-principles/complementary-assay]
- 88. (PCA) Protocol | Rockland Peptide Competition Assay [https://www.rockland.com/resources/peptide-competition-assay-protocol/]
- 89. Proteomic and functional comparison between human ... [https://elifesciences.org/reviewed-preprints/92025v1/pdf]
- 90. Nonspecific binding of common anti-CFTR antibodies in ... [https://www.nature.com/articles/s41598-021-02420-x]
- 91. Nonspecificity fingerprints for clinical-stage antibodies in ... [https://pmc.ncbi.nlm.nih.gov/articles/PMC10756282/]
- 92. ELISA, Flow, Western: Choosing the Right Assay for Your ... [https://precisionantibody.com/elisa-flow-western-choosing-the-right-assay-for-your-antibody/]
- 93. Antibody Applications and Validation [https://www.antibodies.com/antibody-basics/applications-validation]
- 94. An overview of ELISA: a review and update on best laboratory ... [https://pmc.ncbi.nlm.nih.gov/articles/PMC11808753/]
- 95. Western Blot: The Complete Guide [https://www.antibodies.com/applications/western-blotting]
- 96. Troubleshooting Flow Cytometry Issues [https://www.bosterbio.com/protocol-and-troubleshooting/flow-cytometry-troubleshooting?srsltid=AfmBOor-lVLgieMp0EXNybN755VaotD-qHIEl54pFlSMhzbNF0Cgc7RM]
- 97. 2024 Guide to Quantitative Western Blot Publication [https://www.thermofisher.com/blog/life-in-the-lab/2023-guide-to-quantitative-western-blot-publication/]
- 98. ELISA Guide; Part 2: The ELISA Protocol [https://www.jacksonimmuno.com/secondary-antibody-resource/immuno-techniques/elisa-guide-part-2/]
- 99. Western Blot Troubleshooting [https://www.thermofisher.com/us/en/home/life-science/protein-biology/protein-biology-learning-center/protein-gel-electrophoresis-information/western-blot-troubleshooting.html]
- 100. Secondary Antibodies: FAQs [https://www.bio-techne.com/reagents/antibodies/secondary-antibodies/faqs]
- 101. The Complete Guide to Recombinant Antibody Production [https://www.neobiotechnologies.com/resources/recombinant-antibody-production/?srsltid=AfmBOopnbcwyPcLGnoS9g4mRWgjh3wmlPBYZfAczssAwhByi3fVp1Vt_]
- 102. How we validate our recombinant antibodies [https://www.abcam.com/en-us/stories/articles/how-we-validate-our-recombinant-antibodies]
- 103. A comparative analysis of cell surface targeting aptamers [https://pmc.ncbi.nlm.nih.gov/articles/PMC8560833/]