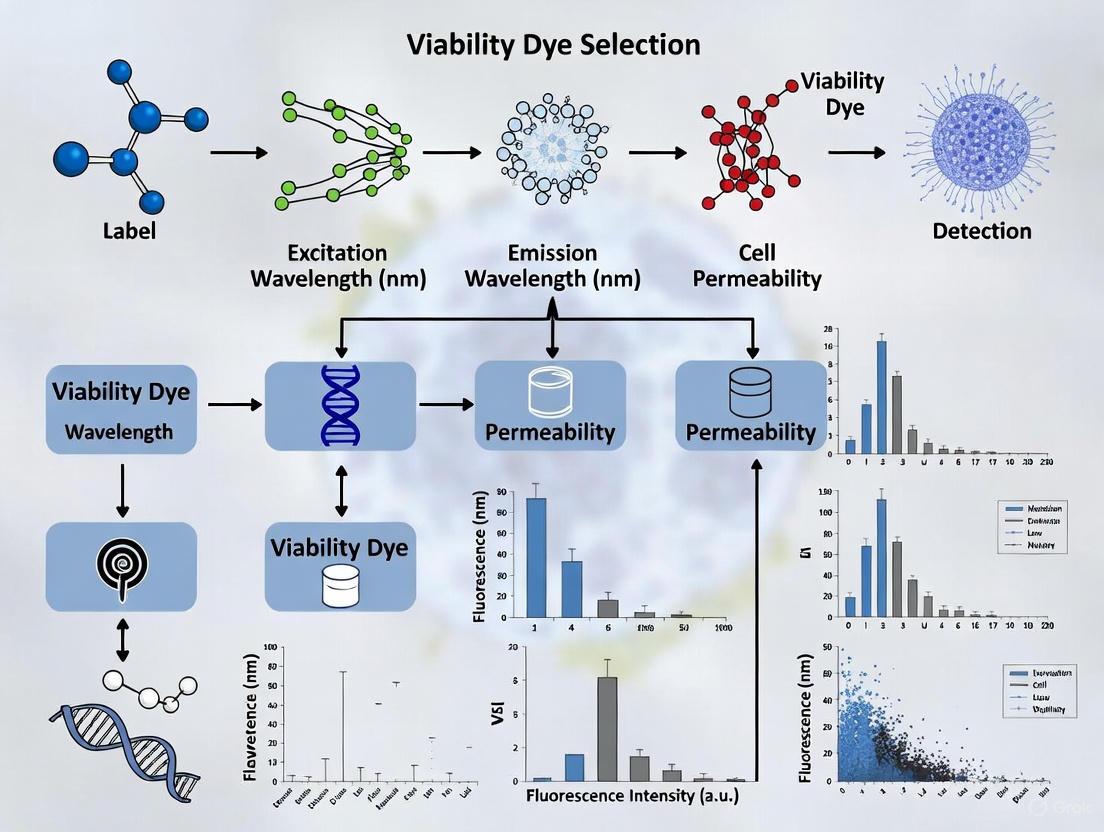
A Strategic Guide to Viability Dye Selection for Accurate Stem Cell Flow Cytometry
Accurate viability assessment is a critical quality attribute in stem cell research and therapy development.
A Strategic Guide to Viability Dye Selection for Accurate Stem Cell Flow Cytometry
Abstract
Accurate viability assessment is a critical quality attribute in stem cell research and therapy development. This article provides a comprehensive framework for researchers and drug development professionals to navigate the selection, application, and troubleshooting of viability dyes in flow cytometry. It covers foundational principles of dye mechanisms, practical methodological protocols for fresh and cryopreserved stem cell products, strategies to overcome common experimental challenges, and a comparative analysis of dye performance to ensure data reliability and reproducibility in preclinical and clinical workflows.
The 'Why' and 'How': Understanding Viability Dye Mechanisms in Stem Cell Analysis
The Critical Role of Viability Assessment in Stem Cell Product Quality and Safety
In stem cell-based therapies, cell viability is not just a number—it is a critical quality attribute that directly impacts product safety and efficacy. Assessing viability is essential for ensuring that administered cells will survive, function as intended, and not cause adverse effects. Low viability can lead to poor engraftment, reduced therapeutic potential, and potential safety risks including unintended immune responses or clearance of dead cells that burdens the recipient. Rigorous viability assessment throughout product development and manufacturing is therefore fundamental to the biosafety framework for cell therapy, which must also evaluate toxicity, tumorigenicity, and immunogenicity [1] [2].
This technical support center provides practical guidance for researchers navigating the complexities of viability assessment in stem cell flow cytometry, with a specific focus on dye selection and troubleshooting.
Troubleshooting Guides
Guide 1: Addressing Poor Correlation Between Viability Methods
Problem: Discrepancies in viability readings between different assessment methods (e.g., flow cytometry vs. fluorescence microscopy).
| Observation | Potential Cause | Recommended Solution |
|---|---|---|
| Flow cytometry (FCM) reports significantly lower viability than fluorescence microscopy (FM) [3]. | FCM's higher sensitivity detects early apoptotic cells that FM misses. | Use multiparametric FCM staining (e.g., Annexin V, Hoechst, DiIC1, PI) to distinguish viable, early/late apoptotic, and necrotic populations [3]. |
| High background "viability" in negative controls. | Autofluorescence from biomaterials or cell debris [3]. | Include unstained controls. Use viability dyes with emission spectra outside the autofluorescence range. |
| Inconsistent results between technical replicates. | Particulate biomaterials causing flow cytometer clogging or inconsistent fluidics [3]. | Filter samples through a cell strainer before loading on the cytometer to remove large aggregates. |
Guide 2: Optimizing Viability Staining for Flow Cytometry
Problem: Weak or inconsistent viability dye signal in flow cytometry experiments.
| Observation | Potential Cause | Recommended Solution |
|---|---|---|
| Dim staining across all samples, including positives. | Incorrect dye concentration or over-fixation of cells. | Perform a dye titration to determine the optimal concentration. Avoid fixing cells before viability staining unless necessary. |
| Poor separation of live/dead populations. | Spectral overlap between viability dye and other fluorophores in the panel. | Re-design panel to minimize spillover. Choose bright viability dyes (e.g., PI, 7-AAD) and assign them to highly sensitive detectors [4]. |
| Staining pattern does not match expected biological state. | Dye toxicity or prolonged staining time affecting cell health. | Follow manufacturer's recommended incubation times. Acquire data shortly after staining. |
Frequently Asked Questions (FAQs)
Q1: Why can't I rely on a single viability assay during my stem cell research?
Different assays operate on distinct principles. Dye exclusion assays (e.g., Trypan blue) only identify cells with compromised membranes, missing early-stage apoptotic cells that still have membrane integrity. Metabolic activity assays can be influenced by cell type and growth conditions. Using a single method provides an incomplete picture. A combination of methods, such as flow cytometry (for high-throughput, quantitative data) and fluorescence microscopy (for visual confirmation), offers a more robust assessment [5] [3]. For critical lot-release tests, a validated flow cytometry method is often preferred for its precision and ability to analyze thousands of cells [3].
Q2: How does viability assessment fit into the broader regulatory requirements for cell therapy products?
Regulatory agencies require comprehensive characterization of cell-based products, including identity, potency, purity, sterility, and viability. Viability is a key part of the "product quality" assessment within the overall biosafety framework [1] [2] [6]. Demonstrating high and consistent viability is essential for proving that the product is manufactured in a controlled process and is suitable for clinical use. It is directly linked to the product's safety profile, as low viability can trigger unintended immune responses or lead to therapeutic failure.
Q3: I am using a 10-color flow panel. What are the critical considerations for incorporating a viability dye?
When adding a viability dye to a multicolor panel, consider these factors:
- Laser and Detector Availability: Ensure your cytometer has a laser that excites the dye and a free filter to detect its emission.
- Spectral Overlap: Choose a viability dye with minimal spectral overlap with other fluorophores in your panel. Use fluorescence compensation to correct for any spillover [4].
- Antigen Expression: Pair dim viability dyes with highly expressed antigens, and bright dyes (like PE or APC-conjugated viability markers) with low-abundance or rare cell population markers [4].
- Validation: Always run single-stained controls (viability dye only) to set up compensation correctly.
Q4: My human pluripotent stem cell (hPSC) cultures show high differentiation rates after passaging. Could this be linked to low viability?
Yes, low viability during passaging can significantly increase differentiation. If a large number of cells die during dissociation, the resulting cellular stress can prompt the surviving cells to differentiate spontaneously. To mitigate this:
- Optimize your passaging protocol to be as gentle as possible. Reduce enzymatic incubation time if your cell line is sensitive [7].
- Ensure cell aggregates after passaging are evenly sized (aim for 50-200 μm) to promote uniform growth and survival [7].
- Avoid leaving culture plates out of the incubator for extended periods during handling [7].
Experimental Protocols
Detailed Protocol: Multiparametric Viability Assessment via Flow Cytometry
This protocol uses a combination of stains to provide a detailed breakdown of cell health, distinguishing viable, apoptotic, and necrotic populations [3].
1. Reagent Preparation:
- Prepare staining buffer (e.g., PBS with 1% BSA).
- Reconstitute and dilute fluorescent dyes as per manufacturer instructions: Hoechst 33342 (nuclear stain), DiIC1(5) (membrane potential indicator for live cells), Annexin V-FITC (for phosphatidylserine exposure in early apoptosis), Propidium Iodide (PI, for late apoptosis/necrosis).
2. Cell Staining:
- Harvest cells and wash twice with cold staining buffer.
- Resuspend cell pellet at a concentration of 1x10^6 cells/mL in staining buffer.
- Add Hoechst 33342 and DiIC1(5) to the cell suspension. Incubate for 15-20 minutes at 37°C in the dark.
- Add Annexin V-FITC and incubate for a further 15 minutes at room temperature in the dark.
- Add PI just before acquisition on the flow cytometer.
- Note: Include single-stain controls for each fluorophore for compensation.
3. Flow Cytometry Acquisition & Analysis:
- Use a flow cytometer equipped with blue (488 nm), red (633 nm), and violet (405 nm) lasers.
- Acquire a minimum of 10,000 events per sample.
- Analyze data by gating on single cells using FSC-A vs. FSC-H.
- Identify populations:
- Viable: Hoechst⁺, DiIC1(5)⁺, Annexin V⁻, PI⁻
- Early Apoptotic: Hoechst⁺, DiIC1(5)⁻, Annexin V⁺, PI⁻
- Late Apoptotic/Necrotic: Hoechst⁺, DiIC1(5)⁻, Annexin V⁺, PI⁺
Viability Assessment Workflow
The Scientist's Toolkit: Research Reagent Solutions
Essential Materials for Stem Cell Viability Assessment
| Item | Function & Application |
|---|---|
| Propidium Iodide (PI) | DNA-binding dye excluded by live cells; stains necrotic and late apoptotic cells. Common in flow cytometry and microscopy [3]. |
| Annexin V (FITC conjugate) | Binds to phosphatidylserine exposed on the outer leaflet of the cell membrane during early apoptosis. Used with PI to distinguish early vs. late apoptosis [3]. |
| 7-Aminoactinomycin D (7-AAD) | DNA-binding dye similar to PI but with different spectral properties (emits in far-red). Ideal for multicolor flow panels needing a red viability marker [6]. |
| Hoechst 33342 | Cell-permeant nuclear stain that labels all nucleated cells. Used to identify the total cell population in a sample [3]. |
| DiIC1(5) | Carbocyanine dye that accumulates in mitochondria with active membrane potential; labels metabolically active live cells [3]. |
| Trypan Blue | Classic dye exclusion stain for a rapid, microscopy-based viability count using an automated cell counter or hemocytometer [6]. |
| Compensation Beads | Uniform particles used to set fluorescence compensation on a flow cytometer, critical for accurate multicolor analysis including viability dyes [4]. |
Viability Dye Selection Logic
Comparative Data Tables
Table 1: Comparison of Common Viability Assessment Methods
| Method | Principle | Key Applications | Throughput | Key Advantage | Key Limitation |
|---|---|---|---|---|---|
| Trypan Blue + Automated Cell Counter [6] | Membrane integrity (exclusion) | Routine culture, basic QC | High | Fast, inexpensive | Misses early apoptosis; lower sensitivity |
| Flow Cytometry with PI/7-AAD [3] [6] | Membrane integrity (exclusion) | High-quality QC, multiparametric analysis | High | High-throughput, quantitative, objective | Requires instrument; complex sample prep |
| Flow Cytometry (Multiparametric) [3] | Membrane integrity, apoptosis markers, mitochondrial potential | Advanced R&D, detailed biosafety profiling | Medium | Distinguishes viable, apoptotic, and necrotic cells | Complex data analysis; expensive reagents |
| Fluorescence Microscopy with FDA/PI [3] | Membrane integrity & enzymatic activity | Visual confirmation, small-scale studies | Low | Visual validation of results | Low throughput; subjective; labor-intensive |
Table 2: Addressing Common Challenges in Stem Cell Viability Testing
| Challenge | Impact on Viability Assessment | Recommended Mitigation Strategy |
|---|---|---|
| Cell Aggregation (common in hPSCs) | Clogs flow cytometer, creates artifactual events, inaccurate counts [7]. | Optimize passaging to create even-sized aggregates (50-200 μm); filter sample before FCM analysis [7] [3]. |
| Differentiation in Culture | Altered cell size/granularity affects light scattering and dye uptake [7]. | Regularly monitor and remove differentiated areas pre-passaging; maintain optimal colony density [7]. |
| Spectral Overlap in multicolor flow | Spillover from bright markers into viability channel causes false positives/negatives [4]. | Choose viability dyes with minimal spillover; use bright dyes for rare populations; perform rigorous compensation [4]. |
In eukaryotic cell cultures, the integrity of the plasma membrane serves as the fundamental indicator distinguishing live cells from dead cells [8]. Viable cells maintain an intact membrane that functions as a selective barrier, preventing the free movement of molecules between the cytoplasm and the external environment. In contrast, cells classified as non-viable or dead have lost this membrane integrity, resulting in a compromised, "leaky" membrane that cannot be repaired [8]. This critical physiological difference forms the basis for how DNA-binding dyes discriminate between live and dead cell populations.
DNA-binding dyes, often referred to as "vital dyes," are typically impermeable to the membranes of healthy, viable cells [8]. However, when the membrane becomes damaged through processes such as necrosis or late-stage apoptosis, these dyes can readily enter the cell interior. Once inside, they bind to intracellular DNA (and sometimes RNA), often undergoing a significant fluorescent enhancement—sometimes up to 1000-fold—which allows for sensitive detection [8]. This selective staining mechanism enables researchers to identify and quantify dead cells within a heterogeneous population.
The following diagram illustrates the core mechanism by which these dyes differentiate between live and dead cells:
Key Dye Properties and Selection Criteria
Selecting the appropriate DNA-binding dye requires careful consideration of several factors to ensure experimental success, particularly when multiplexing with other fluorescent probes or working with specialized cell types like stem cells.
Spectral Properties and Compatibility
A primary consideration is the dye's excitation and emission profile. Knowledge of the excitation and emission spectra and the extent of any spectral overlap is crucial for predicting compatibility with other fluorophores in a panel and for selecting appropriate filter sets on the flow cytometer [8]. For instance, a green-emitting DNA binding dye would be a logical candidate to multiplex with an assay detecting a red fluorescent protein [8].
Binding Specificity and Sensitivity
Different DNA-binding dyes exhibit varying degrees of specificity for DNA over RNA and different binding affinities. Dyes that bind to both DNA and RNA can lead to artifacts and misinterpretation of results, especially under changing culture conditions that might alter cellular RNA content [8]. The fold-increase in fluorescence upon binding to nucleic acids—which can range from 20- to 1000-fold—directly impacts the sensitivity of dead cell detection [8].
Cytotoxicity and Cell Health Impact
For real-time assays where dyes remain in contact with cells for extended periods, the potential cytotoxic effects of the dye itself must be evaluated. Dyes that cause cytotoxicity upon long-term exposure may be the result of partial permeability or other cellular stresses [8]. This effect is cell-type specific and must be validated for each model system. It is recommended to use vendor-recommended concentrations as a starting point and test a range of dye concentrations with each cell model system to confirm the absence of artefactual cytotoxic or cytostatic effects [8].
Table 1: Common DNA-Binding Viability Dyes and Their Properties
| Dye Name | Excitation (nm) | Emission (nm) | DNA Binding Specificity | Key Features and Considerations |
|---|---|---|---|---|
| Propidium Iodide (PI) | 488 | 617 | Double-stranded DNA, intercalates base pairs [9]. | Large Stokes shift; compatible with FITC-conjugated antibodies [9]. |
| 7-AAD | 488 | 647 | Double-stranded DNA, intercalates in G-C rich regions [9]. | Large Stokes shift; can be used with other 488-excited fluorophores [9]. |
| DAPI | 358 | 461 | A-T rich regions in double-stranded DNA; can also bind RNA [9]. | Can be excited by violet (405 nm) laser; RNA binding emits at 500 nm at lower intensity [9]. |
| SYTOX Green | 488 | ~520 | Nucleic acids [8]. | 5 mM solution in DMSO; high fluorescence enhancement upon DNA binding [8]. |
Troubleshooting Common Experimental Issues
Even with a well-designed experiment, researchers can encounter challenges when using DNA-binding dyes. The following table addresses common problems and their solutions.
Table 2: Troubleshooting Guide for DNA-Binding Dye Assays
| Problem | Potential Causes | Recommended Solutions |
|---|---|---|
| High Background / Non-specific Staining | 1. Presence of excessive dead cells [10].2. Too much antibody used, leading to non-specific binding [10].3. Unlysed red blood cells or cellular debris [10]. | 1. Gate out dead cells using viability dye and light scatter [10] [11].2. Titrate antibodies to determine optimal concentration [10].3. Perform additional wash steps or optimize lysis protocol [10]. |
| False Positive Staining in Fixed Samples | DNA-binding dyes added after fixation and permeabilization, allowing dye to enter all cells [11]. | For intracellular staining assays, add DNA-binding dye prior to fixation/permeabilization steps [11]. Alternatively, use fixable viability dyes (amine-reactive dyes) for experiments requiring fixation [9] [11]. |
| Low or Weak Fluorescence Signal | 1. Inadequate staining concentration or time.2. Laser and PMT settings on cytometer not optimized for the dye [10].3. Suboptimal fixation/permeabilization [10]. | 1. Ensure proper dye concentration and incubation time.2. Verify that laser wavelength and PMT settings match the dye's excitation/emission spectra [10].3. Follow a standardized protocol for fixation and permeabilization [10]. |
| Variable Results Between Replicates | 1. Inconsistent sample preparation or staining time.2. Varying times between dye addition and analysis, as cells continue to die [9]. | 1. Standardize all sample preparation and staining steps.2. Add the dye at a consistent time before analysis across all samples for an accurate comparison [9]. |
| Poor Discrimination of Live/Dead Populations | 1. Incorrect dye concentration.2. Excessive cellular debris in sample, common in cryopreserved products [12] [13].3. High autofluorescence in certain cell types (e.g., neutrophils) [10]. | 1. Perform a dye titration to find the optimal concentration.2. Use light scatter gating to exclude debris and focus on intact cells [11].3. Use fluorochromes that emit in red-shifted channels (e.g., APC) where autofluorescence is minimal [10]. |
Critical Protocol Considerations for Stem Cell Research
Assessing the viability of cellular therapy products, including stem cells, is a critical quality attribute measured throughout the manufacturing process [12] [13]. The choice of viability assay can significantly impact the results, especially for cryopreserved products.
Impact of Cryopreservation on Viability Assessment
Studies comparing viability assays on fresh and cryopreserved cellular products have revealed important considerations for stem cell research. While methods like trypan blue exclusion, flow cytometry with 7-AAD/PI, and automated cell counters provide accurate and consistent data for fresh products, cryopreserved products often exhibit greater variability between different assay types [12] [13]. This is likely due to the increased debris and dead cells present after the freeze-thaw process, which can interfere with accurate analysis [12]. Furthermore, different cell subsets within a product show variable susceptibility to cryopreservation; T cells and granulocytes, for instance, often demonstrate decreased viability post-thaw compared to other populations [12] [13]. This highlights the importance of selecting a fit-for-purpose viability assay that is thoroughly validated for use with cryopreserved stem cell products.
The Advantage of Multiplexing with Surface Markers
Flow cytometry-based viability staining offers a key advantage for complex stem cell products: the ability to multiplex dead cell discrimination with immunophenotyping. This involves staining with fluorochrome-labeled antibodies against cell surface markers (like CD34, CD45, CD3) in conjunction with a DNA-binding dye like 7-AAD [12]. In this protocol, cells are first gated from the CD45-positive population (leukocytes), and then viable cells are identified as the 7-AAD negative population within that gate [12]. This method is particularly useful for characterizing products with non-homogeneous cell populations, as it allows for the simultaneous evaluation of both cell viability and specific cellular phenotypes [12].
Frequently Asked Questions (FAQs)
Q1: Why is it essential to include a viability dye in my flow cytometry panel? Dead cells can bind antibodies non-specifically, exhibit higher autofluorescence, and release DNA that causes cell clumping [9]. This can lead to inaccurate data, especially for low-expression antigens, and compromise the purity of cell sorting. Staining for dead cells allows you to gate them out during analysis, significantly improving data quality [14] [9].
Q2: What is the difference between DNA-binding dyes and fixable viability dyes? DNA-binding dyes (e.g., PI, 7-AAD) are generally not permeable to live cells and stain dead cells by entering through damaged membranes and binding to nucleic acids. However, if cells are fixed and permeabilized, these dyes will enter all cells and cannot distinguish viability [9] [11]. Fixable viability dyes (e.g., Zombie Dyes, Ghost Dyes) are amine-reactive dyes that covalently bind to proteins in dead cells. They remain stable after fixation, making them ideal for intracellular staining protocols [9] [11].
Q3: My sample is cryopreserved. Why might my viability results be inconsistent? Cryopreserved products are challenging due to the presence of increased cellular debris and dead cells, which can interfere with different assay types in varying ways [12] [13]. Automated counters might misclassify debris as cells, while flow cytometry can better gate out this debris using light scatter properties. It is crucial to validate your chosen viability assay specifically for your cryopreserved product.
Q4: How many cells should I use for a flow cytometry viability assay? As a general rule for cell analysis, beginning with 1 x 10^6 cells is a good starting point [14]. However, the ideal number can vary based on the assay and purpose. For rare event analysis, you will need to acquire a much larger number of events.
Q5: Can I use Propidium Iodide (PI) in a fixed sample? No. If you add PI after the cells have been fixed and permeabilized, it will enter every cell and stain all nuclei, making it impossible to distinguish between live and dead cells [11]. For fixed samples, you must use a fixable viability dye.
The Scientist's Toolkit: Essential Research Reagents
Table 3: Key Reagent Solutions for Viability Assessment
| Reagent / Instrument | Primary Function | Example Uses |
|---|---|---|
| Propidium Iodide (PI) | DNA-binding dye for dead cell discrimination in flow cytometry [8] [9]. | Endpoint viability staining for non-fixed cells; can be combined with Calcein-AM in viability/cytotoxicity kits [9]. |
| 7-Aminoactinomycin D (7-AAD) | DNA-binding dye that intercalates into G-C rich regions; used for dead cell exclusion [12] [9]. | Direct staining of unfixed cells for viability; often multiplexed with cell surface marker staining for immunophenotyping [12]. |
| SYTOX Green | High-affinity green fluorescent nucleic acid stain impermeable to live cells [8]. | Dead cell stain for endpoint assays; useful for high-throughput screening formats [8]. |
| Fixable Viability Dyes (e.g., Zombie Dyes) | Amine-reactive dyes that covalently label proteins in dead cells; stable after fixation [9] [11]. | Essential for intracellular staining protocols where cells must be fixed and permeabilized. |
| Automated Cell Counter (e.g., Vi-CELL BLU) | Automated image-based system that uses trypan blue exclusion to measure cell concentration and viability [12] [13]. | Rapid, reproducible viability and concentration measurements for routine checking of cell cultures and fresh products. |
| BD FACSCanto Flow Cytometer | Benchtop analyzer for multiparameter flow cytometry. | High-throughput, objective analysis of viability in conjunction with cell surface phenotype. |
A Deep Dive into Fixable Viability Dyes and Their Amine-Reactive Chemistry
In stem cell flow cytometry research, accurate viability assessment is not just a preliminary step—it is a critical component for ensuring data integrity. Dead cells can bind antibodies non-specifically, exhibit high autofluorescence, and compromise the identification of rare stem cell populations. Fixable viability dyes (FVDs) represent a significant advancement over traditional DNA-binding dyes like propidium iodide, as they withstand fixation and permeabilization procedures essential for intracellular staining. This technical support center article explores the amine-reactive chemistry behind these powerful tools and provides practical guidance for their successful application in your research.
FAQs: Understanding Fixable Viability Dyes
What are fixable viability dyes and how do they work?
Fixable Viability Dyes (FVDs) are amine-reactive fluorescent dyes that enable researchers to distinguish live from dead cells in samples that will be fixed prior to analysis by flow cytometry [15] [16].
Their mechanism relies on the differential accessibility of cellular amines between live and dead cells:
- In live cells with intact membranes, the dye can only react with surface amines, resulting in dim fluorescence.
- In dead cells with compromised membranes, the dye penetrates and reacts with both internal and external amines, producing bright fluorescence [15] [17].
This reaction is covalent (irreversible), meaning the staining pattern is preserved even after fixation, permeabilization, or long-term storage (up to 30 days post-fixation) [15].
Why should I use fixable viability dyes instead of propidium iodide (PI) for stem cell research?
While PI is a cost-effective viability indicator, FVDs offer distinct advantages for complex stem cell research:
- Compatibility with intracellular staining: FVDs retain their staining pattern after fixation, unlike PI which loses discrimination after fixation [15].
- Experimental flexibility: You can fix samples and continue processing at your convenience, rather than being constrained by PI's short window of analysis.
- Superior population separation: The fluorescence intensity difference between live and dead cell populations is typically greater than 50-fold with FVDs [15].
- Multiplexing capabilities: FVDs are available across the spectral range, allowing integration into complex multicolor panels [15].
How do I select the right fixable viability dye for my panel?
Selecting the appropriate FVD requires consideration of your flow cytometer's configuration and other fluorochromes in your panel:
Table: Fixable Viability Dye Selection Guide [15]
| Product Name | Laser Line (nm) | Excitation/Emission (nm) | Incompatible Fluorochromes |
|---|---|---|---|
| LIVE/DEAD Fixable Violet | 405 | 416/451 | Pacific Blue, CellTrace Violet, BV421 |
| LIVE/DEAD Fixable Aqua | 405 | 367/526 | Pacific Green, AmCyan, BV510 |
| LIVE/DEAD Fixable Green | 488 | 495/520 | NB510, NB530, NB555 |
| LIVE/DEAD Fixable Far Red | 633/635 | 650/665 | NR660 |
| LIVE/DEAD Fixable Near-IR | 633/635 | 750/775 | APC-Cy7, Vybrant DyeCycle Ruby |
The general principle is to choose an FVD whose emission does not overlap significantly with your key phenotypic markers, particularly those used to identify your stem cell populations of interest.
Troubleshooting Guides
Poor Separation Between Live and Dead Cell Populations
Table: Troubleshooting Poor Dye Separation
| Problem | Possible Causes | Solutions |
|---|---|---|
| Weak staining intensity | Insufficient dye concentration | Titrate the dye to determine optimal concentration [16] |
| Dye prepared in suboptimal buffer | Reconstitute and dilute dye in PBS; avoid media containing amines [16] | |
| Inadequate reaction time | Ensure 20-minute incubation at room temperature, protected from light [16] | |
| High background in live cells | Excessive dye concentration | Reduce dye concentration; aim for lowest background, not brightest dead cells [16] |
| Presence of protein-rich solution | Wash cells in PBS before staining; avoid serum-containing buffers during staining | |
| Cell population with inherent autofluorescence | Use viability dyes emitting in red spectrum where autofluorescence is lower [18] |
High Background Staining in Flow Cytometry
- Cause: Presence of dead cells non-specifically binding to antibodies [18] [19]
- Solution: Incorporate FVDs to gate out dead cells before analyzing marker expression
- Additional strategies:
- Include Fc receptor blocking step when working with immune cells
- Titrate all antibodies to determine optimal signal-to-noise ratios
- Increase wash steps or include low detergent concentration in wash buffers [19]
Fixation Compromises Viability Staining
- Problem: Traditional DNA-binding dyes like PI lose staining pattern after fixation [15]
- Advantage of FVDs: Covalent binding to amines preserves viability discrimination post-fixation
- Validation: The distinction between live and dead cells is preserved for up to 30 days after fixation with FVDs [15]
Experimental Protocols
Titration of Fixable Viability Dyes
Proper titration is essential for optimal performance. This protocol is adapted from established methodologies for amine-reactive dyes [16]:
- Prepare dye stock solutions: Create serial dilutions of the lyophilized dye in DMSO as outlined in the table below.
- Create working solutions: Dilute 1µL of each stock in 39µL dH₂O (critical: do not use media containing amines).
- Stain cells: Add 5µL of each working dilution to 95µL of cells in PBS. Use a sample with substantial dead cells (e.g., frozen-thawed PBMCs or heat-treated cells).
- Incubate: Protect from light for 20 minutes at room temperature.
- Wash and analyze: Wash twice with standard staining media and analyze by flow cytometry.
Table: Dye Titration Dilution Scheme [16]
| Dilution | Dye Weight (µg) | DMSO Volume (µL) | Stock Concentration (µg/mL) | Working Concentration (µg/mL) | Final Concentration (µg/mL) |
|---|---|---|---|---|---|
| 1 | 25 | 50 | 500 | 12.50 | 0.625 |
| 2 | 25 | 100 | 250 | 6.25 | 0.313 |
| 3 | 25 | 200 | 125 | 3.12 | 0.156 |
| 4 | 25 | 400 | 62.5 | 1.56 | 0.078 |
| 5 | 25 | 800 | 31.25 | 0.78 | 0.039 |
| 6 | 25 | 1600 | 15.62 | 0.39 | 0.020 |
Key consideration: When analyzing titration results, select the concentration that provides the best separation with the lowest background signal, not necessarily the brightest dead cell population [16].
Creating Compensation Controls with Amine-Reactive Beads
For multicolor panels including FVDs, proper compensation is essential:
- Use amine-reactive compensation beads following manufacturer's protocols
- Stain beads with the same FVD concentration used for cells
- Include single-stained beads for all other fluorochromes in your panel
- Acquire compensation data before running experimental samples
This approach is particularly important when using FVDs in "dump channels" combined with other markers to exclude unwanted populations [16].
The Scientist's Toolkit: Essential Research Reagents
Table: Key Reagents for Fixable Viability Dye Experiments
| Reagent | Function | Application Notes |
|---|---|---|
| LIVE/DEAD Fixable Viability Dyes | Distinguish live/dead cells in fixed samples | Available in multiple spectral formats; select based on laser availability and panel design [15] |
| Amine-reactive compensation beads | Create compensation controls | Essential for accurate spectral overlap correction in multicolor panels [16] |
| Phosphate Buffered Saline (PBS) | Dye preparation and cell washing | Must be free of amines or proteins during staining step [16] |
| Standard Staining Media | Post-staining washes | Typically contains serum to quench any unreacted dye |
| Fc Receptor Blocking Solution | Reduce non-specific antibody binding | Particularly important when working with immune cells [19] |
| Formaldehyde Fixation Solution | Preserve cellular structure and staining | Use methanol-free formaldehyde for best preservation of intracellular epitopes [18] |
Visualizing the Workflow: Fixable Viability Dye Mechanism
Fixable viability dyes based on amine-reactive chemistry have revolutionized viability assessment in stem cell flow cytometry research. Their covalent binding to cellular amines preserves critical viability information through fixation and permeabilization steps, enabling cleaner identification of rare cell populations. Proper implementation—including careful dye selection, rigorous titration, and appropriate compensation—ensures that these powerful tools enhance the quality and reliability of your experimental data. As flow cytometry panels continue to increase in complexity, the strategic application of FVDs will remain essential for generating meaningful results in stem cell research and therapeutic development.
Exploring Metabolic Activity Assays as an Alternative to Membrane Integrity Dyes
In stem cell flow cytometry research, accurately assessing cell viability is fundamental to data integrity. While membrane integrity dyes (like propidium iodide) have been the traditional mainstay, metabolic activity assays offer a powerful functional alternative for distinguishing live cells. This resource center provides troubleshooting guides and FAQs to help you navigate the specific challenges and applications of these assays in your research.
Frequently Asked Questions (FAQs)
Q1: What is the core difference between membrane integrity dyes and metabolic activity assays?
Membrane integrity dyes, such as propidium iodide, function by entering cells with a compromised plasma membrane—a definitive characteristic of dead cells—and binding to nucleic acids. In contrast, metabolic activity assays use cell-permeant probes that are enzymatically converted into fluorescent products by active intracellular enzymes (e.g., esterases) present only in living, metabolically active cells. [20] Metabolic assays thus report on cell health and function, not just physical membrane damage.
Q2: Why would I choose a metabolic assay for my stem cell research?
Metabolic assays can be preferable when:
- Detecting Early Apoptosis: They can identify early changes in cell health before the plasma membrane becomes permanently permeable. [3]
- Functional Assessment: They confirm not just structural integrity but also metabolic function, which is crucial for stem cell potency and differentiation studies. [21]
- Complex Samples: In multi-parameter flow cytometry, fixable viability dyes based on metabolic function are often compatible with intracellular staining protocols, allowing you to gate out dead cells before fixation and permeabilization. [22]
Q3: What are the limitations of metabolic activity assays I should be aware of?
The primary limitation is that a reduction in metabolic signal does not automatically equate to cell death. It could indicate that all cells are alive but with a uniformly reduced metabolic rate, for instance, due to a metabolic inhibitor or quiescence. [23] [20] Furthermore, the enzymes responsible for converting the probes are synthesized when the cell is viable, and their activity can be affected by various experimental conditions. [20]
Q4: How do I handle and validate metabolic probes for flow cytometry?
- Storage: Protect dyes from light and moisture. Follow the manufacturer's instructions for storage temperature.
- Validation: Always include controls. Use an untreated, healthy cell sample as a positive control and a sample of heat-killed or ethanol-killed cells as a dead cell control. [23] Fluorescence Minus One (FMO) controls are essential for setting gates accurately in multicolor panels. [24]
- Titration: Titrate every new batch of dye to determine the optimal concentration that provides the best signal-to-noise ratio without causing non-specific staining.
Troubleshooting Guides
Problem 1: Weak or No Metabolic Signal
| Possible Cause | Recommendation |
|---|---|
| Insufficient Cell Metabolism | Ensure cells are healthy and proliferating. Overly confluent cultures or cells in a quiescent state may exhibit low metabolic activity. Use a positive control of known viable cells. |
| Suboptimal Dye Concentration | Titrate the metabolic dye. Too little dye will yield a weak signal; follow the manufacturer's protocol for the recommended starting concentration. [24] |
| Incorrect Instrument Settings | Verify that your flow cytometer's lasers and PMT voltages are correctly configured for the fluorochrome you are using. Check with calibration beads. [25] |
| Probe Degradation | The fluorescent probe may have degraded due to improper storage or repeated freeze-thaw cycles. Use a fresh aliquot. [26] |
Problem 2: High Background or Non-Specific Staining
| Possible Cause | Recommendation |
|---|---|
| Excessive Dye Concentration | High dye concentration can lead to non-specific binding and high background. Perform a titration to find the optimal concentration. [26] |
| Inadequate Washing | Ensure thorough washing steps after staining to remove any unincorporated dye. You can add a mild detergent like Tween to your wash buffer. [26] |
| Presence of Dead Cells | Dead cells can non-specifically bind to antibodies and probes. Use a viability dye (e.g., a fixable viability dye) in a different channel to gate them out during analysis. [25] |
| High Cellular Autofluorescence | Certain cell types are naturally autofluorescent. Use fluorochromes that emit in red-shifted channels (e.g., APC instead of FITC), where autofluorescence is typically lower. [25] |
Problem 3: Inconsistent Results Between Assays
| Possible Cause | Recommendation |
|---|---|
| Assaying Different Parameters | Understand what each assay measures. A membrane integrity dye (e.g., PI) counts dead cells, while a metabolic assay (e.g., Calcein-AM) counts live, active cells. Results can differ if a treatment affects metabolism before membrane integrity. [3] |
| Assay Interference | Some test substances can intrinsically interact with assay reagents. For example, highly hydrophobic particles can adsorb the reduced form of metabolic indicators, leading to artificially low readings. [23] |
| Inconsistent Cell Preparation | Standardize your cell harvesting and preparation. Using trypsin to detach adherent cells can damage membranes and cause false positives in apoptosis assays; allow cells to recover for 30-45 minutes after detachment. [24] |
Comparison of Viability Assessment Methods
The table below summarizes the key characteristics of different viability assessment methods to guide your selection.
| Method Category | Example Assays | Principle | Key Advantages | Key Limitations |
|---|---|---|---|---|
| Membrane Integrity | Propidium Iodide (PI), Trypan Blue | Dyes enter dead cells with compromised membranes. | Simple, direct measure of cell death. | May miss early apoptotic cells; can be time-consuming for microscopy. [20] |
| Metabolic Activity | MTT, WST, Calcein-AM, Resazurin | Live cells convert substrates into colored/fluorescent products. | Indicates functional activity; amenable to high-throughput. | A 50% signal reduction can mean half dead cells OR all cells with reduced metabolism. [23] [20] |
| Lysosomal Activity | Neutral Red Uptake | Live cells accumulate dye in acidic lysosomes. | Simple plate-based format. | Can be inhibited by substances affecting lysosomal pH; "viability" over 100% possible with cell activation. [23] |
| Enzyme Release | Lactate Dehydrogenase (LDH) | Cytosolic enzyme released from dead cells. | Measures a downstream consequence of death. | Can leak from stressed but viable cells; high background in some media; interference from tested substances. [20] |
The Scientist's Toolkit: Key Research Reagent Solutions
| Item | Function/Benefit |
|---|---|
| Fixable Viability Dyes | Amine-reactive dyes that covalently bind to cellular proteins, allowing viability staining to withstand cell fixation and permeabilization. Essential for intracellular staining workflows. [22] |
| Calcein-AM | A cell-permeant metabolic probe. Esterases in live cells convert non-fluorescent Calcein-AM into green-fluorescent calcein, which is retained in live cells. |
| Flow Cytometry Panel Builder Tools | Online software provided by various vendors to help design multicolor panels, ensuring fluorophore compatibility and including viability dye selection. [24] |
| Compensation Beads | Uniform particles used to set up fluorescence compensation on the flow cytometer, critical for accurately distinguishing signals in multi-parametric experiments. [24] |
| SCENITH Assay Kits | A flow cytometry-based method to profile cellular energy metabolism and metabolic dependencies at single-cell resolution, ideal for complex systems like stem cells. [21] |
Experimental Workflow: Metabolic Profiling for Stem Cell Research
The following diagram outlines a generalized workflow for incorporating metabolic activity assays into a stem cell flow cytometry experiment.
Diagram 1: Metabolic assay workflow for flow cytometry.
Advanced Technique: Metabolic Pathway Profiling
For deeper investigation into stem cell metabolic states, you can profile metabolic pathways using antibodies against metabolic enzymes, compatible with surface and intracellular staining.
Diagram 2: Multi-parametric metabolic profiling strategy.
Fundamental Concepts FAQ
Q1: Why is it crucial to exclude dead cells in stem cell flow cytometry analysis?
Dead cells can negatively impact data quality in two key ways. First, their compromised membranes allow antibodies to bind non-specifically to intracellular contents, leading to false positive results [27]. Second, dead cells exhibit greater autofluorescence than live cells, which can obscure the detection of rare cell populations or weakly expressed markers, a critical concern when analyzing heterogeneous stem cell samples [27]. Using viability dyes to exclude these cells during analysis ensures more accurate and reliable data.
Q2: How do amine-reactive fixable viability dyes work at a cellular level?
These dyes are fluorescent, amine-reactive molecules that cannot penetrate the intact membrane of a live cell. Consequently, in live cells, the dye only labels the few amine groups on the cell surface, resulting in dim fluorescence [15]. In dead cells, the damaged membrane allows the dye to access the abundant intracellular amine groups, leading to intense fluorescent staining [27] [15]. This creates a clear, typically 50-fold or greater, difference in fluorescence intensity between live and dead populations [15].
Q3: What does "fixable" mean in the context of a viability dye, and why is it important for intracellular staining?
A fixable dye is one that covalently and irreversibly binds to cellular amines, allowing it to retain its staining pattern—bright for dead cells, dim for live cells—even after the sample is treated with fixatives (like paraformaldehyde) and permeabilization buffers [27] [15]. This is essential for any protocol involving intracellular antibody staining, as these steps would otherwise wash out non-fixable dyes (e.g., propidium iodide) and eliminate the ability to distinguish live from dead cells [15] [28].
Dye Selection & Experimental Design FAQ
Q4: What are the main categories of viability dyes, and when should each be used?
The table below summarizes the primary types of viability dyes used in flow cytometry.
| Dye Category | Mechanism of Action | Fixable? | Primary Application |
|---|---|---|---|
| Amine-Reactive Fixable Dyes [15] [29] | Bind to intracellular and surface amines in dead cells. | Yes | Intracellular staining protocols; requires post-staining fixation. |
| DNA-Binding Dyes [28] [29] (e.g., 7-AAD, DAPI, PI) | Enter dead cells and bind to nucleic acids. | No | Simple viability assessment on unfixed samples only. |
| Esterase-Activated Dyes [29] (e.g., CFSE) | Metabolized by active esterases in live cells, creating a fluorescent product. | Some (e.g., CFSE) | Primarily for tracking cell proliferation, not ideal for dead cell exclusion. |
Q5: How do I select a specific fixable viability dye for my multicolor panel?
Selection should be based on your flow cytometer's laser and filter configuration, with the goal of minimizing spectral overlap with other fluorochromes in your antibody panel [30]. Choose a viability dye whose emission spectrum does not interfere with your key markers [28]. The following table lists several common fixable viability dyes and their spectral properties to aid in panel design.
| Dye Name | Laser Excitation (nm) | Emission Max (nm) | Compatibility Notes |
|---|---|---|---|
| GloCell Violet 450 [27] | 405 (Violet) | 450 | Compatible with EasySep/RosetteSep [27]. |
| LIVE/DEAD Fixable Violet [15] | 405 (Violet) | 451 | Incompatible with Pacific Blue, BV421 [15]. |
| GloCell Violet 510 [27] | 405 (Violet) | 510 | - |
| LIVE/DEAD Fixable Aqua [15] | 405 (Violet) | 526 | Incompatible with Pacific Green, BV510 [15]. |
| LIVE/DEAD Fixable Yellow [15] | 405 (Violet) | 575 | Incompatible with Pacific Orange, BV605 [15]. |
| LIVE/DEAD Fixable Green [15] | 488 (Blue) | 520 | - |
| GloCell Red 710 [27] | 633 (Red) | 710 | - |
| LIVE/DEAD Fixable Far Red [15] | 633/635 (Red) | 665 | - |
Troubleshooting Guide
| Problem | Possible Cause | Solution |
|---|---|---|
| No or Weak Viability Stain | • Signal not correctly compensated.• Laser misalignment.• Fluorochrome faded due to light exposure. | • Check and adjust compensation using single-stain controls [26].• Run alignment beads and service instrument if needed [26].• Use fresh dye and protect from light [26]. |
| Poor Separation of Live/Dead Populations | • Inadequate staining incubation.• Wrong dye concentration.• Using a non-fixable dye with a fixation protocol. | • Follow manufacturer's incubation instructions (time/temp) [28].• Titrate the dye to find optimal concentration [30].• Switch to an amine-reactive fixable dye [29]. |
| High Background / Non-Specific Staining | • Antibody concentration too high.• Inadequate washing steps.• Insufficient Fc receptor blocking. | • Titrate antibodies to optimal concentration [26] [30].• Increase wash steps or add detergent to wash buffer [26].• Include an Fc receptor blocking step prior to staining [28] [30]. |
| Low Cell Event Rate / Clogging | • Cells are clumped.• Cell concentration is too high. | • Gently mix cells and filter through a nylon mesh (e.g., 40-70 µm) before running [30].• Dilute sample to between 1x10⁵ and 1x10⁶ cells/mL [26]. |
| Unusual Scatter Properties Post-Staining | • Permeabilization step affecting cell morphology. | • Be aware that permeabilization alters light scatter. Gate using fixed, permeabilized controls [28]. |
The Scientist's Toolkit: Essential Reagents & Materials
| Item | Function | Example |
|---|---|---|
| Fixable Viability Dye | Allows discrimination of live/dead cells after fixation/permeabilization. | GloCell Dyes [27], LIVE/DEAD Fixable Stains [15] |
| Fc Receptor Blocking Reagent | Reduces non-specific antibody binding. | Human IgG, Mouse anti-CD16/CD32, commercial blocking solutions [28] [30] |
| Fixative | Cross-links proteins to preserve cell structure and intracellular antigens. | 1-4% Paraformaldehyde (PFA), Methanol [28] |
| Permeabilization Reagent | Disrupts cell membrane to allow antibody access to intracellular targets. | Saponin, Triton X-100, Tween-20 [28] |
| Compensation Beads | Used to set up accurate fluorescence compensation for multicolor experiments. | ArC Amine Reactive Compensation Bead Kit [15] |
| Cell Strainer | Removes cell clumps to prevent instrument clogging and ensure single-cell data. | 40-70 µm Nylon Mesh [26] [30] |
Experimental Workflow & Dye Mechanism
Viability Dye Mechanism
Staining Protocol Workflow
From Theory to Practice: Optimized Protocols for Stem Cell Viability Staining
In stem cell flow cytometry, accurately distinguishing live cells is paramount. The presence of dead cells can lead to autofluorescence, non-specific antibody binding, and compromised data, which is especially critical when analyzing rare stem cell populations or antigens with low expression levels [31]. The cornerstone of a successful experiment is the precise matching of your viability dyes' excitation and emission profiles to the laser and filter configuration of your flow cytometer. This guide provides troubleshooting and FAQs to help you master this process.
Viability Dye Selection Guide
Selecting the appropriate viability dye requires understanding its mechanism of action and its compatibility with your experimental protocol, particularly regarding fixation.
Table 1: Categories of Viability Dyes for Flow Cytometry
| Dye Type | Mechanism of Action | Key Examples | Fixable? | Best for Stem Cell Applications |
|---|---|---|---|---|
| Amine-Reactive Dyes [31] [29] | Bind to intracellular amines in dead cells with compromised membranes. | Zombie Violet, LIVE/DEAD Fixable Far Red, Ghost Dye [31] | Yes [29] | Yes. Ideal for intracellular staining and fixed samples. |
| DNA-Binding Dyes [31] [29] | Enter dead cells and bind to nucleic acids. | Propidium Iodide (PI), 7-AAD, DAPI [31] [29] | No [29] | No, if fixation is required. Simple, cost-effective for live-cell assays. |
| Enzyme-Activated Dyes [31] | Converted to fluorescent, membrane-impermeant products by enzymes in live cells. | Calcein AM, CellTracker Deep Red [31] | Varies | Yes, for tracking live cell proliferation and migration. |
To ensure the dye you select is compatible with your instrument, consult its excitation and emission maxima.
Table 2: Excitation and Emission Maxima of Common Viability Dyes
| Dye Name | Excitation Max (nm) | Emission Max (nm) | Recommended Laser Line | Recommended Filter |
|---|---|---|---|---|
| DAPI [29] | 359 | 457 | UV (355 nm) [32] | 450/45 [29] |
| Zombie Violet (Analogous to BV421) [32] | 407 | 423 | Violet (405 nm) [32] | 431/28 [32] |
| Fixable Viability Dye eFluor 450 (Analogous to V450) [32] | 405 | 450 | Violet (405 nm) [32] | 450/50 [32] |
| Calcein AM [29] | 494 | 517 | Blue (488 nm) [32] | 525/40 [29] |
| FITC [32] | 494 | 518 | Blue (488 nm) [32] | 525/40 |
| Propidium Iodide (PI) [29] | 535 | 617 | Blue (488 nm) [32] | 610/20 [29] |
| 7-AAD [29] | 543 | 647 | Blue (488 nm) [32] | 690/50 [29] |
| LIVE/DEAD Fixable Far Red (Analogous to APC) [32] | 651 | 660 | Red (640 nm) [32] | 660/10 [29] |
Troubleshooting FAQs
My viability dye signal is weak or absent. What should I check?
A weak signal can arise from several issues related to instrument configuration or sample handling.
- Verify Laser and Filter Configuration: Confirm that your cytometer has the correct laser for your dye and that the emission filter matches the dye's emission maximum. For example, a violet laser (405 nm) is required to excite BV421, and a 431/28 nm filter is needed to capture its emission [32]. Laser misalignment can also cause weak signals; run calibration beads to check instrument performance [33].
- Check Antibody and Dye Titration: Your dye may be too dilute. Titrate the viability dye concentration to find the optimal staining intensity for your specific stem cell type [33].
- Protect from Light and Fixation: Fluorochromes can photobleach if exposed to excessive light. Protect samples from light during staining. Additionally, note that some tandem dyes can be degraded by fixation, especially over extended periods [33].
I am seeing high background fluorescence. How can I reduce it?
High background is often caused by dead cells or non-specific binding, which is a major concern in stem cell assays.
- Use a Viability Dye: This is the primary solution. Tissue dissociation can increase cell death, leading to high background. Use a viability dye to identify and gate out these dead cells during analysis [33].
- Employ Fc Receptor Blocking: Non-specific antibody binding via Fc receptors can cause high background. Use an Fc receptor blocking reagent to prevent this [33].
- Ensure Proper Washing: Increase the number or duration of wash steps to remove unbound dye, especially when using unconjugated primary antibodies or high dye concentrations [33].
How does my choice of cytometer (conventional vs. spectral) affect panel design?
The type of cytometer you use fundamentally changes how you handle spectral overlap.
- Conventional Cytometers: These instruments use optical filters and detectors to capture a narrow band of emission light for each fluorochrome. They rely on compensation, a mathematical process to subtract spectral overlap from other channels. This works well for panels of up to ~12 colors but has a firm ceiling as the number of dyes increases [34].
- Spectral Cytometers: These instruments capture the full emission spectrum of every fluorochrome using an array of detectors. They use spectral unmixing to identify each dye based on its entire spectral signature, not just its peak emission. This allows for the use of dyes with highly overlapping spectra and enables more accurate measurement of cellular autofluorescence, which is beneficial for complex cells [34] [35]. Spectral systems can robustly handle 40+ color panels [36].
What are the best practices for compensating viability dyes in a multicolor panel?
- Use Single-Stained Controls: For each fluorochrome in your panel, including your viability dye, you must run a single-stained control. These controls are used to calculate the compensation matrix. You can use either cells or compensation beads [33].
- Ensure Brightness of Controls: The positive population in your single-stained control should have at least 5,000 events to ensure an accurate calculation of the median fluorescence intensity [33].
- Treat Controls like Samples: Your compensation controls must be subjected to the same protocols (e.g., fixation, permeabilization) as your experimental samples. This controls for any alteration of fluorescent properties caused by the protocol itself [33].
The Scientist's Toolkit: Research Reagent Solutions
Table 3: Essential Reagents for Viability Staining in Stem Cell Research
| Reagent / Tool | Function | Example Use Case |
|---|---|---|
| Amine-Reactive Viability Dyes [31] | Distinguishes live/dead cells in fixed samples. | Staining human hematopoietic stem cells (HSCs) prior to intracellular transcription factor staining. |
| Fc Receptor Blocker [33] | Reduces non-specific antibody binding. | Blocking murine mesenchymal stem cells before surface marker staining with anti-Sca-1 and anti-CD90. |
| Compensation Beads [33] | Provide consistent positive and negative controls for setting up compensation. | Creating single-stained controls for a 10-color panel analyzing induced pluripotent stem cells (iPSCs). |
| Viability Dye with Amine-Reactive Beads [31] | Acts as a compensation control for amine-reactive dye-based assays. | Accurately compensating for spillover of a fixable viability dye in a complex multicolor panel. |
| BD Spectrum Viewer / FluoroFinder [32] [31] | Online tools to visualize dye spectra and check compatibility with your instrument's lasers and filters. | Designing a new panel to ensure the chosen viability dye does not have excessive spectral overlap with a critical marker. |
Experimental Protocol: Viability Staining for Fixed Stem Cell Samples
This protocol is optimized for using amine-reactive viability dyes with stem cells, allowing for subsequent intracellular staining.
Workflow: Viability Staining & Intracellular Antigen Analysis
Materials:
- Amine-reactive viability dye (e.g., Zombie Violet, LIVE/DEAD Fixable dyes)
- Phosphate Buffered Saline (PBS)
- Flow cytometry staining buffer
- Fixation and permeabilization solutions
- Antibodies for surface and intracellular targets
Method:
- Harvest and Wash: Harvest your stem cells and wash them in cold PBS. Count and resuspend to a concentration of 1-5 x 10^6 cells/mL in PBS [26].
- Viability Staining: Add the recommended concentration of the amine-reactive viability dye to the cell suspension. Incubate for 30 minutes at room temperature, protected from light. Note: Live cells are impermeable to the dye, while dead cells with compromised membranes will be stained.
- Wash: Wash cells twice with excess flow cytometry staining buffer to remove any unbound dye.
- Surface Marker Staining: Resuspend the cell pellet in staining buffer containing pre-titrated antibodies against your surface antigens of interest. Incubate for 30 minutes on ice, protected from light.
- Fixation and Permeabilization: Wash cells and then resuspend in a commercial fixation/permeabilization solution, following the manufacturer's instructions.
- Intracellular Staining: Wash cells with a permeabilization buffer and then resuspend in permeabilization buffer containing antibodies against your intracellular targets. Incubate for 30-60 minutes on ice, protected from light.
- Acquisition and Analysis: Wash cells and resuspend in staining buffer for acquisition on the flow cytometer. During analysis, use the viability dye channel to gate on the negative (viable) cell population.
Laser and Dye Compatibility Diagram
Fluorochrome Excitation by Laser Lines
In stem cell flow cytometry research, accurate viability assessment is not merely a preliminary step but a fundamental requirement for data integrity. Dead cells can compromise experimental outcomes through non-specific antibody binding and increased autofluorescence, leading to false positives and misinterpretation of stem cell marker expression [37] [29]. Selecting the appropriate viability dye becomes particularly crucial when working with precious stem cell samples, where preserving the accurate phenotype of live cells is paramount. This guide provides detailed protocols for the most common viability dyes, enabling researchers to make informed selections based on their specific experimental designs, particularly within the context of stem cell research where cellular integrity directly correlates with interpretive validity.
Dye Selection Guide: Properties and Applications
Table 1: Viability Dye Characteristics and Selection Guide
| Dye | Ex/Em Max (nm) | Staining Target | Fixable? | Compatible with Intracellular Staining? | Primary Application Context |
|---|---|---|---|---|---|
| DAPI | 358/461 [38] | dsDNA (AT clusters) [38] | No [29] | No | Flow cytometry (UV laser) & microscopy; nuclear counterstaining [38] |
| Propidium Iodide (PI) | 488/617 [39] | dsDNA/dsRNA (intercalation) [37] | No [15] | No | Live cell surface staining; cell cycle analysis [37] [39] |
| 7-AAD | 546/647 [29] | dsDNA (GC-rich regions) [40] | No [29] | No | Multicolor flow cytometry with FITC/PE [40] |
| Fixable Viability Dyes (e.g., LIVE/DEAD) | Varies by dye [15] | Cellular amines (proteins) [15] | Yes [15] | Yes [15] | Protocols requiring fixation/permeabilization [15] |
The workflow for selecting an appropriate viability dye depends on your experimental goals, particularly whether you need to perform intracellular staining.
Step-by-Step Staining Protocols
DAPI Staining Protocol
DAPI is a nucleic acid stain that preferentially binds to double-stranded DNA, producing a ~20-fold fluorescence enhancement upon binding [38]. It serves as an excellent nuclear counterstain.
Stock Solution Preparation: Dissolve DAPI in deionized water or DMF to create a 5 mg/mL (approximately 14.3 mM) stock solution. Aliquot and store at ≤ -20°C protected from light [38].
Staining Protocol for Flow Cytometry:
- Prepare a staining buffer (100 mM Tris, pH 7.4, 150 mM NaCl, 1 mM CaCl₂, 0.5 mM MgCl₂, 0.1% Nonidet P-40) [38].
- Dilute the DAPI stock solution to a 3 µM working concentration in the staining buffer [38].
- After staining cells for surface antigens, pellet the cells by centrifugation and discard the supernatant.
- Resuspend the cell pellet in 1 mL of the diluted DAPI staining solution.
- Incubate for 15 minutes at room temperature, protected from light.
- Analyze by flow cytometry without washing to prevent dye leakage [38].
Safety Note: DAPI is a known mutagen. Handle with care and dispose of in accordance with local regulations [38].
Propidium Iodide (PI) Staining Protocol
PI is a membrane-impermeant dye that intercalates into double-stranded DNA or RNA and is commonly used for live-cell viability assessment [37] [39].
Stock Solution: A 10 µg/mL PI solution in PBS is used for staining [39].
Staining Protocol:
- Harvest and wash cells. Surface antigen staining can be performed at this stage. Note that PI cannot be used for intracellular staining [39].
- Resuspend up to 1 x 10⁶ cells in 100 µL of Flow Cytometry Staining Buffer [39].
- Add 5-10 µL of PI staining solution to the cell suspension [37] [39].
- Incubate for 5-15 minutes on ice or at room temperature, protected from light [37].
- Analyze by flow cytometry immediately without washing. PI must remain in the buffer during acquisition [37] [39].
Critical Tip: For multicolor experiments using FITC or PE, collect PI fluorescence in the FL-3 channel to minimize spectral overlap [39].
7-AAD Staining Protocol
7-AAD is a viability dye that preferentially binds to GC-rich regions in dsDNA, offering spectral characteristics that make it suitable for use with FITC and PE in multicolor panels [40].
Staining Protocol:
- After harvesting and washing cells, resuspend up to 1 x 10⁶ cells in 100 µL of Flow Cytometry Staining Buffer [40].
- Add 5-10 µL of 7-AAD staining solution (e.g., 1 mg/mL in PBS) [40].
- Incubate for 30 minutes at 4°C in the dark [40].
- Analyze by flow cytometry without washing [40]. Cells should be analyzed within 4 hours due to adverse effects on cell viability over prolonged periods [37].
Fixable Viability Dye (FVD) Staining Protocol
Fixable Viability Dyes (FVDs) are amine-reactive dyes that covalently bind to cellular proteins. They are ideal for experiments requiring fixation and permeabilization, as the staining pattern is preserved through these processes [15].
Standard Staining Protocol (in tubes):
- Wash cells twice in azide-free and protein-free PBS. This is critical for reducing non-specific staining [37].
- Resuspend cells at a concentration of 1-10 x 10⁶ cells/mL in azide-free and protein-free PBS [37].
- Add 1 µL of Fixable Viability Dye per 1 mL of cells and vortex immediately [37].
- Incubate for 30 minutes at 2-8°C, protected from light [37].
- Wash cells 1-2 times with Flow Cytometry Staining Buffer to remove unbound dye [37].
- Proceed with surface and/or intracellular antibody staining protocols.
Technical Note: The difference in fluorescence intensity between live and dead cell populations is typically greater than 50-fold, allowing excellent discrimination [15].
Troubleshooting Common Issues in Viability Staining
Table 2: Troubleshooting Viability Staining Problems
| Problem | Possible Cause | Solution |
|---|---|---|
| High background/Non-specific staining | Presence of dead cells or cellular debris [41]. | Gate out dead cells using viability dyes; include additional wash steps [41]. |
| Weak fluorescence signal | Suboptimal dye concentration; incorrect laser/PMT settings [41]. | Titrate the dye to determine optimal concentration; verify instrument settings match dye spectra [41]. |
| Loss of signal after fixation | Using non-fixable dyes (PI, 7-AAD) in fixed-cell protocols [15]. | Switch to a fixable viability dye for protocols requiring fixation/permeabilization [15]. |
| Unviable cells appear in live gate | Incorrect flow cytometer compensation [41]. | Use single-stained controls for proper compensation; create a live/dead cell control for setup [37]. |
| Variable results day-to-day | Inconsistent sample preparation or staining conditions [42]. | Standardize protocol timing, temperature, and washing steps across all experiments. |
Essential Reagents and Materials
Table 3: Research Reagent Solutions for Viability Staining
| Reagent/Material | Function/Application | Example Use Cases |
|---|---|---|
| DAPI (dihydrochloride or dilactate) | Nuclear counterstain for DNA [38]. | Flow cytometry with UV laser; fluorescence microscopy [38]. |
| Propidium Iodide (PI) Staining Solution | Membrane-impermeant DNA dye for dead cell discrimination [37]. | Live cell viability assessment; cell cycle analysis [39]. |
| 7-AAD Staining Solution | Membrane-impermeant DNA dye for dead cell exclusion [40]. | Multicolor flow cytometry panels with FITC and PE [40]. |
| Fixable Viability Dyes (FVDs) | Amine-reactive dyes for viability staining compatible with fixation [15]. | Intracellular staining protocols; samples requiring fixation [15]. |
| Flow Cytometry Staining Buffer | Buffer for antibody dilution and cell washing. | Resuspending cells during surface staining; washing steps [37] [40] [39]. |
| Phosphate-Buffered Saline (PBS) | Isotonic buffer for cell washing and dilution. | Diluting dyes; washing cells before staining [38] [40]. |
Frequently Asked Questions (FAQs)
Q1: Can I use PI or 7-AAD if I plan to perform intracellular staining? A1: No. PI and 7-AAD are not compatible with intracellular staining protocols because they cannot penetrate the membranes of live, fixed cells and require access to DNA for binding. For intracellular staining, you must use Fixable Viability Dyes (FVDs), which covalently label amines before fixation and retain their staining pattern through the fixation and permeabilization process [37] [15].
Q2: Why is it critical not to wash cells after adding PI or 7-AAD, but necessary to wash after Fixable Viability Dyes? A2: PI and 7-AAD bind to DNA via intercalation, which is mediated by non-covalent forces. Washing would remove the dye from dead cells, leading to a loss of signal. These dyes must remain in the buffer during acquisition [37]. In contrast, Fixable Viability Dyes form covalent bonds with cellular amines during the incubation period. After this reaction is complete, washing removes any unreacted dye, reducing background without affecting the signal from dead cells [15].
Q3: How does cryopreservation affect viability assay selection for stem cell products? A3: Cryopreserved products, such as PBSCs, often contain more debris and dead cells, which can impact the accuracy of different assays. A 2024 study highlights that while various methods (TB, 7-AAD/PI, image-based assays) are reliable for fresh cells, results can be more variable for cryopreserved products. Furthermore, specific cell subsets like T cells and granulocytes show decreased viability post-thaw. This underscores the need for careful assay validation specifically for your cryopreserved stem cell samples [12].
Q4: What is the single most important factor when choosing a viability dye for a complex multicolor panel? A4: The most critical factor is spectral compatibility. Your viability dye must have minimal spectral overlap with the other fluorochromes in your panel. This often requires careful panel design and compensation. Fixable Viability Dyes are available in a wide range of fluorescence colors, making them highly adaptable for complex multicolor panels [15].
This technical support guide addresses a critical challenge in stem cell research and therapy: adapting flow cytometry viability assays for both fresh and cryopreserved products. The viability of cellular products is a fundamental quality attribute measured throughout the manufacturing process, from starting materials to final product release [12]. However, the optimal workflow can differ significantly between fresh and cryopreserved samples, impacting data accuracy, clinical outcomes, and therapeutic efficacy. This resource provides targeted troubleshooting guides, FAQs, and standardized protocols to help you navigate these complexities.
Viability Assay Performance: A Quantitative Comparison
The table below summarizes key performance characteristics of common viability assays as applied to different stem cell product types, based on comparative studies [12].
| Assay Method | Fresh PBSC/PBMC Products | Cryopreserved PBSC/PBMC Products | Cultured CAR/TCR-T Cell Products | Key Advantages |
|---|---|---|---|---|
| Manual Trypan Blue | Accurate and consistent [12] | Variable results, subject to debris interference [12] | Accurate and consistent [12] | Simplicity, cost-effectiveness, versatility [12] |
| Flow Cytometry (7-AAD/PI) | Accurate and consistent [12] | Variable results; allows subset-specific viability analysis [12] | Accurate and consistent [12] | Objectivity, multi-parameter analysis, high-throughput [12] |
| Image-based (AO/PI) | Accurate and consistent [12] | Variable results [12] | Accurate and consistent [12] | Rapid measurement, audit-proof documentation [12] |
| Vi-Cell BLU Analyzer | Accurate and consistent [12] | Variable results [12] | Accurate and consistent [12] | Automated, based on trypan blue exclusion [12] |
Detailed Experimental Protocols
Protocol 1: Flow Cytometry Viability Staining for Fresh & Cryopreserved Cells
This protocol outlines a dual approach for assessing viability in fresh and cryopreserved samples using 7-AAD, a common nucleic acid-binding dye [12] [43].
Workflow Diagram: Viability Staining Process
Solutions and Reagents
- Staining Buffer: Phosphate-buffered saline (PBS) supplemented with 1-5% fetal bovine serum (FBS) or bovine serum albumin (BSA).
- Antibody Cocktail: Fluorochrome-conjugated surface markers (e.g., anti-CD45, anti-CD34) and 7-AAD viability dye [12] [43].
- Wash Buffer: Cold PBS.
- Fixation Solution (Optional): 1-4% formaldehyde in PBS.
Step-by-Step Procedure
- Sample Preparation: For cryopreserved cells, rapidly thaw in a 37°C water bath and immediately transfer to pre-warmed culture medium. For fresh cells, proceed directly to counting [43].
- Cell Counting and Washing: Count cells using a hemocytometer or automated counter. Wash cells by centrifuging at 300-400 x g for 5 minutes and decanting the supernatant.
- Staining: Resuspend the cell pellet at a concentration of 1-5 x 10^7 cells/mL in staining buffer. Add the pre-titrated antibody cocktail and 7-AAD dye. Vortex gently [12].
- Incubation: Incubate the cell mixture for 20 minutes at 4°C in the dark [12].
- Washing and Fixation: Wash cells twice with cold staining or wash buffer. Resuspend in an appropriate volume of buffer for acquisition. If required, fix cells with 1% formaldehyde (optional).
- Data Acquisition and Analysis: Acquire samples on a flow cytometer within a few hours. Identify viable cells as those negative for 7-AAD staining [12] [43].
Protocol 2: Long-Term Storage and Delayed Viability Assessment
This protocol is tailored for evaluating product stability, such as in biobanking or retrospective studies, where delayed post-thaw assessment is necessary [43].
Workflow Diagram: Long-Term Storage Viability Check
Key Steps
- Thawing: Thaw cryopreserved products in a 37°C water bath with gentle agitation until just ice-free [43].
- Immediate Assessment (T0): Perform viability assessment immediately post-thaw using Acridine Orange (AO) or 7-AAD flow cytometry [43].
- Delayed Assessment (T2): Hold the sample at 4°C and re-assess viability 2-4 hours post-thaw. AO staining has demonstrated greater sensitivity for detecting this delayed cellular degradation compared to 7-AAD flow cytometry [43].
- Calculation: Calculate viability loss as:
% Viability Loss = [(T0 Viability % - T2 Viability %) / T0 Viability %] * 100.
Troubleshooting Guides & FAQs
Frequently Asked Questions (FAQs)
Q1: Why do I get different viability results for the same sample when using different assays on cryopreserved cells? Cryopreserved products often contain more cellular debris and dead cells, which can interfere differently with various assay principles. Automated image-based systems like the Cellometer or Vi-Cell BLU might interpret debris differently than flow cytometry, which can gate out smaller debris based on light scatter properties [12]. This underscores the need for assay validation specifically for cryopreserved samples.
Q2: My flow cytometry data from cryopreserved samples shows high background. What is the cause and how can I fix it? High background is frequently caused by the presence of dead cells and cellular debris resulting from the freeze-thaw process [44] [33].
- Solution: Always include a viability dye (e.g., 7-AAD, PI, or a fixable viability dye) in your staining panel to gate out dead cells during analysis [44] [33]. Increase the number and volume of washes after thawing to remove cell-free DNA and proteins. Using an Fc receptor blocking reagent can also reduce non-specific antibody binding [33].
Q3: How does long-term cryostorage impact the viability and function of hematopoietic stem cells (HSCs)? Studies on CD34+ hematopoietic stem and progenitor cells (HSPCs) show that while grafts are resilient for over a decade, viability and functionality can decline after very long storage (≥20 years). One study found significant decreases in the viability of total leukocytes (CD45+7-AAD-) and HSPCs (CD34+7-AAD-), as well as colony-forming function, after two decades [45]. However, cells that survive the storage process can retain significant functional capacity.
Q4: What is the best fluorochrome to use for a low-abundance surface marker on thawed cells? For low-density targets on any cell, especially those that may have reduced antigenicity post-thaw, always use the brightest fluorochrome available (e.g., PE or APC) [46]. Save dimmer fluorochromes (e.g., FITC) for highly expressed antigens.
Troubleshooting Common Problems
| Problem | Possible Causes | Recommended Solutions |
|---|---|---|
| Weak or No Fluorescence Signal | Cryopreservation effect on antigen: The freeze-thaw process or DMSO can damage surface epitopes [33].Inadequate antibody titration.Using a dim fluorochrome for a low-abundance target. | Check literature for antigen stability post-thaw. If possible, use fresh cells for optimization [44].Titrate antibodies for use on cryopreserved cells, as optimal concentration may differ from fresh cells [33].Pair low-abundance targets with the brightest fluorochromes (e.g., PE, APC) [46]. |
| High Background/Non-Specific Staining | High dead cell burden from cryopreservation [33].Non-specific antibody binding to Fc receptors.Insufficient washing post-thaw. | Incorporate a viability dye to exclude dead cells from analysis [44] [33].Use an Fc receptor blocking reagent prior to antibody staining [33].Increase the number and volume of washes after thawing and after antibody incubation. |
| Poor Scatter Profile Post-Thaw | Cell lysis and debris from the freeze-thaw process.Cell clumping. | Use a gentle centrifugation speed (e.g., 300-400 x g) to pellet cells without damaging them. Filter cells through a cell strainer (e.g., 40-70 µm) before acquisition to remove aggregates. |
| Low Cell Viability Post-Thaw | Suboptimal freeze or thaw rate.Ineffective cryoprotectant.Extended storage duration. | Ensure use of controlled-rate freezing and rapid thawing. Verify the concentration and type of cryoprotectant (e.g., DMSO) used [47]. Note that even with optimal practice, a moderate time-dependent decline in viability (~1% per 100 days) can occur at -80°C [43]. |
The Scientist's Toolkit: Essential Research Reagents
This table lists key reagents and their critical functions in stem cell flow cytometry workflows.
| Reagent / Material | Function / Application | Technical Notes |
|---|---|---|
| 7-AAD / Propidium Iodide (PI) | Viability dye that stains nucleic acids in membrane-compromised (dead) cells. Used for live/dead discrimination in flow cytometry [12]. | Membrane-impermeant dyes. Can be used in direct staining without washing. 7-AAD is often preferred for its convenience in no-wash protocols [12]. |
| Dimethyl Sulfoxide (DMSO) | Cryoprotective agent (CPA). Penetrates cells to prevent intracellular ice crystal formation during freezing [48] [47]. | Concentrations typically range from 5-15% in final freezing media. Often combined with media and albumin [47]. |
| Human Serum Albumin (HSA) | Supplement in freezing media. Provides macromolecular support, mitigates osmotic shock, and improves post-thaw recovery [47]. | Often used at 5-10% concentration, sometimes replaced with autologous plasma [47]. |
| Acridine Orange (AO) | Cell-permeant nucleic acid dye that stains all nucleated cells green. Used in AO/PI viability assays. | In automated counters, AO stains all nuclei (live cells: green), while PI stains dead cells (red). AO shows sensitivity for delayed post-thaw degradation [43]. |
| Fc Receptor Blocking Reagent | Blocks non-specific binding of antibodies to Fc receptors on immune cells, reducing background staining [33]. | Crucial for staining immune cells like PBMCs and HSCs. Use prior to antibody incubation. |
| Compensation Beads | Used to set fluorescence compensation for multicolor flow cytometry panels. | Provide a consistent and bright positive signal for each fluorochrome, superior to using cells for setup [33]. |
Combining Viability Staining with Cell Surface and Intracellular Marker Detection
In stem cell flow cytometry research, accurately distinguishing live from dead cells is not merely a preliminary step but a fundamental requirement for data integrity. Dead cells can bind antibodies non-specifically, compromising the analysis of both cell surface and intracellular targets and leading to inaccurate results [37] [28]. The selection of an appropriate viability dye becomes paramount, especially for stem cell products where viability is a critical quality attribute [12]. This technical support center addresses the specific challenges researchers face when integrating viability assessment into multicolor panels for comprehensive stem cell phenotyping and functional analysis.
Core Concepts and Dye Selection
Why is viability staining critical for stem cell flow cytometry?
Viability staining is an essential component of any flow cytometry experiment. Dead cells compromise data integrity by non-specifically binding antibodies; therefore, it is crucial to exclude them from analysis [37]. This is especially true for stem cell research, where the accurate assessment of viability is a key metric for product quality throughout the manufacturing process, from starting materials to final product release [12]. Low viability can indicate manufacturing errors and may impact the efficacy and safety of the cellular product.
What are the main classes of viability dyes?
The choice of viability dye is dictated by your experimental workflow, particularly whether it involves fixation and permeabilization for intracellular staining. The table below summarizes the key characteristics of the main dye classes.
Table 1: Characteristics of Major Viability Dye Classes
| Dye Class | Examples | Mechanism of Action | Compatible with Intracellular Staining? | Key Considerations |
|---|---|---|---|---|
| DNA-Binding Dyes (Membrane-Impermeant) | Propidium Iodide (PI), 7-AAD [37] [12] | Enter dead cells with compromised membranes and intercalate into DNA/RNA. | No [37] | Must be present in buffer during acquisition; do not wash out. Analyze samples within 4 hours [37]. |
| Fixable Viability Dyes (FVDs) | eFluor 506, eFluor 780, and other dye-conjugated polymers [37] | Covalently bind to amine groups in dead cells; staining survives fixation/permeabilization. | Yes [37] | Essential for any protocol involving intracellular staining. Allow for cryopreservation and complex staining workflows [37]. |
| Esterase-Activated Live Cell Dyes | Calcein AM, Calcein Violet AM [37] | Cross the membrane of live cells and are converted to fluorescent, retained compounds. | No [37] | Label live cells; apoptotic/dead cells do not retain the dye. Not compatible with fixation/permeabilization [37]. |
What is the recommended workflow for combining these stains?
A successful multicolor experiment hinges on a logical staining sequence. The following workflow is optimized for staining cell surface markers, followed by viability staining, and then intracellular targets.
Detailed Experimental Protocols
Protocol A: Standard Staining with Fixable Viability Dyes (for Intracellular Work)
This protocol is designed for staining dead cells so they may be excluded from analysis in protocols that include intracellular staining. FVDs covalently cross-link to cellular proteins, allowing samples to undergo fixation and permeabilization without loss of staining intensity [37].
Materials:
- Phosphate-buffered saline (PBS), azide- and protein-free
- Flow Cytometry Staining Buffer (e.g., Thermo Fisher, cat. no. 00-4222) [37]
- Invitrogen Fixable Viability Dye (e.g., eFluor 506, eFluor 780) [37]
- 12 x 75 mm round-bottom tubes or 96-well plates
Procedure:
- Prepare Cells: Harvest and wash cells 2 times in azide-free and protein-free PBS [37].
- Resuspend Cells: Resuspend cells at 1–10 x 10^6 /mL in azide-free and serum/protein-free PBS. For consistent staining, do not use less than 0.5 mL [37].
- Stain with FVD: Add 1 μL of FVD per 1 mL of cells and vortex immediately [37].
- Incubate: Incubate for 30 minutes at 2–8°C; protect from light [37].
- Wash: Wash cells 1–2 times with Flow Cytometry Staining Buffer or equivalent [37].
- Continue: Proceed to surface and/or intracellular staining protocols.
Protocol B: Staining for Cell Surface Markers Only (with 7-AAD/PI)
This protocol uses DNA-binding dyes like 7-AAD or PI for simple live/dead discrimination in experiments that only require cell surface immunophenotyping.
Materials:
- Propidium Iodide Staining Solution (e.g., cat. no. 00-6990) or 7-AAD Viability Staining Solution (e.g., cat. no. 00-6993) [37]
- Flow Cytometry Staining Buffer [37]
Procedure:
- Stain Surface Antigens: After staining cells for surface antigens, wash cells 1-2 times with Flow Cytometry Staining Buffer [37].
- Resuspend Cells: Resuspend cells in an appropriate volume of Flow Cytometry Staining Buffer [37].
- Add Viability Dye: Add 5 µL of PI or 7-AAD Staining Solution per 100 µL of cells [37].
- Incubate: Incubate for 5–15 minutes on ice or at room temperature. Do not wash cells. [37]
- Analyze: Analyze samples by flow cytometry within 4 hours [37].
Protocol C: Intracellular Staining Following Surface and Viability Staining
This protocol follows the fixation and permeabilization steps required for intracellular antigen detection after surface staining and FVD staining.
Materials:
- Fixative (e.g., 1-4% paraformaldehyde (PFA) or 90% methanol) [28]
- Permeabilization solution (e.g., Triton X-100, NP-40, Saponin, or commercial kits) [28]
- Suspension/Wash Buffer (PBS with 5-10% fetal calf serum) [28]
Procedure:
- Fix Cells: Following surface and FVD staining, spin down cells (200-500 x g for 5 minutes), discard supernatant, and resuspend pellet in fixative.
- Wash: Wash cells twice with suspension/wash buffer [28].
- Permeabilize: Resuspend cell pellet in a detergent-based permeabilization solution and incubate for 10-15 minutes at room temperature [28].
- Harsh detergents (Triton X-100, NP-40, 0.1-1%): Suitable for nuclear antigens [28].
- Mild detergents (Tween 20, Saponin, 0.2-0.5%): Suitable for cytoplasmic antigens or soluble nuclear antigens [28].
- Note: Acetone fixation also permeabilizes cells, making a separate permeabilization step unnecessary [28].
- Wash: Wash cells twice with suspension/wash buffer [28].
- Stain Intracellular Targets: Proceed with antibody incubation for intracellular markers.
Troubleshooting Common Issues
High background or non-specific staining in my stem cell population.
| Possible Cause | Recommended Solution |
|---|---|
| Presence of dead cells. | Always use a viability dye and gate out dead cells during analysis. For fixed-cell intracellular staining, use a fixable viability dye (FVD), not PI or 7-AAD [49]. |
| Incomplete Fc receptor blocking. | Block Fc receptors with Bovine Serum Albumin, Fc receptor blocking reagents, or normal serum from the same host as your primary antibody prior to staining [49]. This is crucial for primary cells like stem cells and immune cells. |
| Too much antibody. | Titrate your antibodies to determine the optimal concentration. Over-staining can lead to high background [49]. |
| Antibody binding to off-target cell populations. | Include FMO (fluorescence-minus-one) controls for each fluorophore in your panel to accurately set gates and distinguish positive staining from background [24]. |
My viability dye signal is lost or weak after fixation/permeabilization.
| Possible Cause | Recommended Solution |
|---|---|
| Using an incompatible viability dye. | PI, 7-AAD, and calcein AM dyes are not compatible with fixation/permeabilization. You must use a fixable viability dye (FVD) for any protocol involving intracellular staining [37]. |
| Staining in suboptimal buffer. | For the brightest FVD staining, use an azide- and protein-free PBS during the dye incubation step. Staining in buffers containing protein or azide may significantly decrease staining intensity [37]. |
I see poor resolution of cell populations in cryopreserved stem cell products.
| Possible Cause | Recommended Solution |
|---|---|
| Assay-dependent variability. | A comparative study found that while various viability assays (TB, 7-AAD/PI flow cytometry, image-based) are reliable for fresh products, cryopreserved products exhibited variability among the tested assays [12]. Validate your chosen viability assay specifically for your cryopreserved samples. |
| Increased debris and dead cells. | Cryopreservation and thawing generate debris and dead cells that can interfere with analysis. Use a viability dye and consider gradient centrifugation to remove debris before staining [12]. |
The flow cytometry data shows high fluorescence in negative controls.
| Possible Cause | Recommended Solution |
|---|---|
| High cellular autofluorescence. | Certain cell types naturally autofluoresce. Use fluorochromes that emit in red-shifted channels (e.g., APC instead of FITC), where autofluorescence is minimal. Alternatively, use very bright fluorochromes to overcome the autofluorescence [49]. |
| Carryover of unbound antibody. | Ensure adequate washing between staining steps. Typically, two washes with 2 mL of staining buffer are recommended after each antibody incubation step [50]. |
The Scientist's Toolkit: Essential Research Reagents
Table 2: Key Reagents for Combined Viability and Marker Staining
| Reagent | Function | Example Products / Components |
|---|---|---|
| Fixable Viability Dyes (FVD) | Irreversibly labels dead cells; compatible with fixation/permeabilization. | Invitrogen eFluor 455, 506, 660, 780; LIVE/DEAD Fixable Dead Cell Stains [37] [24]. |
| Flow Cytometry Staining Buffer | Wash and resuspension buffer; typically contains BSA and sodium azide to stabilize cells and prevent capping. | Flow Cytometry Staining Buffer (00-4222); PBS with 0.5-5% BSA or fetal calf serum [37] [50] [28]. |
| Fc Receptor Blocking Reagent | Prevents non-specific antibody binding via Fc receptors, reducing background. | Purified IgG, anti-CD16/CD32 antibodies, normal serum (e.g., goat serum) [50] [28]. |
| Fixation Solution | Preserves cell structure and cross-links proteins, inactivating enzymes. | 1-4% Paraformaldehyde (PFA), 90% Methanol (ice-cold) [49] [28]. |
| Permeabilization Solution | Disrupts lipid membranes to allow antibody access to intracellular targets. | Triton X-100, NP-40, Saponin, Tween 20; commercial fixation/permeabilization kits [49] [28]. |
| Compensation Controls | Essential for correcting spectral overlap in multicolor panels. | Single-stained cells or compensation beads for each fluorophore, including the FVD [37] [24]. |
FAQs and Troubleshooting Guides
FAQ 1: What are the key advantages of using cryopreserved leukapheresis over fresh material for CAR-T manufacturing?
Cryopreserved leukapheresis significantly enhances supply chain resilience by decoupling manufacturing from the logistics and time constraints of fresh material transport, which typically has a narrow 24-72 hour viability window [51]. It preserves critical cellular diversity by avoiding the significant cell loss of monocytes and stromal cells that can occur with traditional Ficoll-based PBMC isolation [51]. Studies demonstrate that when a standardized, automated closed-system process is used, cryopreserved leukapheresis achieves ≥90% post-thaw viability with recovery and phenotypic profiles comparable to fresh samples, making it a universal raw material for CAR-T manufacturing [51].
FAQ 2: Why is viability assessment critical, and how does the choice of assay differ for fresh versus cryopreserved cellular products?
Viability assessment is crucial because dead cells can compromise data integrity by non-specifically binding antibodies, leading to inaccurate results [37]. Furthermore, in the context of cellular product manufacturing, viability is a key critical quality attribute.
While multiple viability assays (Trypan Blue, 7-AAD, PI, automated cell counters) provide accurate and consistent measurements for fresh cellular products, they can yield variable results when used on cryopreserved products [13]. Research indicates that in cryopreserved PBSC and PBMC apheresis products, certain cell subsets, particularly T cells and granulocytes, are more susceptible to the freeze-thaw process and show decreased viability [13]. Therefore, careful selection, validation, and standardization of a fit-for-purpose viability assay are especially important for cryopreserved products [13].
FAQ 3: What are the common causes of low cell viability post-thaw, and how can they be mitigated?
- Cause: Improper Cryoprotectant Handling. Excessive exposure to DMSO at room temperature is toxic to cells [52].
- Mitigation: Work quickly and efficiently during cryopreservation. Limit the time cells are suspended in DMSO before freezing to just a few minutes for sensitive cell types [52].
- Cause: Suboptimal Freezing or Thawing Rates. Slow thawing promotes ice crystal formation, while improper freezing causes osmotic shock [53].
- Cause: Cell Clumping from DNA Release. Dead cells release sticky DNA that causes viable cells to clump [52].
- Mitigation: Use a filter to remove clumps during post-thaw processing [52].
FAQ 4: How does granulocyte contamination affect PBMC samples, and how can it be minimized?
Granulocyte contamination in the PBMC fraction can intensify if whole blood is stored at 2-8°C for more than 24 hours before processing, as this activates granulocytes and alters their buoyancy [52]. This contamination is problematic because it correlates with a loss of cell integrity, reduced T cell proliferation following stimulation, and increased variability in Regulatory T cell assays [52].
To minimize contamination:
- Perform density gradient separation using blood and reagents that have been equilibrated to room temperature (15-25°C) to ensure proper RBC aggregation and sedimentation [52].
- If contamination persists, use CD15 or CD16 MicroBeads to deplete granulocytes from the PBMC fraction, noting that this will cause a decline in total cell recovery [52].
Experimental Protocols
Protocol 1: Cell Surface Staining for Flow Cytometry
This protocol is used to identify cell types and delineate developmental stages via antibody-stained surface markers [54].
- Preparation: Count cells and resuspend in a single-cell suspension in cell staining buffer or PBS with 2% FBS. Aliquot 100 µL containing 10^5 to 10^6 cells into a tube or well [54].
- Fc Receptor Blocking: Incubate cells with an FcR blocking antibody (e.g., anti-CD16/32/64) to reduce non-specific immunofluorescent staining [54].
- Antibody Staining: Add fluorochrome-conjugated primary antibodies at vendor-suggested, pre-titrated concentrations. Incubate at 2-8°C for 30 minutes in the dark [54] [55].
- Washing: Wash cells twice with 2 mL (tubes) or 200 µL (wells) of cell staining buffer by centrifuging at 350-600 x g for 5 minutes [54].
- Viability Staining (if required): Resuspend the cell pellet in a viability dye, such as propidium iodide (PI) or 7-AAD, if it was not included in the primary antibody mix [54] [37].
- Analysis: Resuspend cells in 100-500 µL of PBS or staining buffer and proceed to flow cytometry analysis. If analysis is delayed, store cells at 2-8°C in the dark or fix for next-day analysis [54] [55].
Protocol 2: Staining with Fixable Viability Dyes (FVDs)
FVDs are amine-reactive dyes that covalently bind to cellular proteins in cells with compromised membranes. They are ideal for experiments involving intracellular staining, cryopreservation, or fixation, as the staining survives these processes [37].
- Preparation: Wash cells twice in azide-free and protein-free PBS. Resuspend at 1-10 x 10^6 cells/mL in the same buffer [37].
- Staining: Add 1 µL of FVD per 1 mL of cells and vortex immediately. Incubate for 30 minutes at 2-8°C, protected from light [37].
- Washing: Wash cells 1-2 times with Flow Cytometry Staining Buffer or an equivalent buffer to remove unbound dye [37].
- Continue Experiment: Proceed with surface or intracellular antibody staining as required by your experimental design [37].
Best Practice Note: For consistent staining, do not use less than 0.5 mL of cell suspension. Staining in buffers containing protein or azide can significantly reduce staining intensity and is not recommended [37].
Workflow and Signaling Pathways
Viability Assessment Workflow
Troubleshooting Logic for Low Viability
Data Presentation
Table 1: Comparison of Viability Assays for Cellular Products
This table summarizes key characteristics of common viability assays based on a comparative study [13].
| Assay Method | Typical Use Case | Key Advantages | Key Limitations | Suitability for Cryopreserved Products |
|---|---|---|---|---|
| Trypan Blue Exclusion | Quick, routine viability check | Low cost, simple protocol, no special equipment required (beyond a microscope) | Does not distinguish between apoptotic and necrotic cells; subjective reading | Variable performance; less reliable |
| Flow Cytometry (7-AAD/PI) | High-throughput analysis of heterogeneous populations | Objective, quantitative, allows combination with immunophenotyping | Requires a flow cytometer; more complex protocol | Variable performance; subset-specific viability can be assessed |
| Acridine Orange/Propidium Iodide (Cellometer) | Automated and reproducible count | Provides cell concentration and viability; visual confirmation | Requires dedicated instrumentation | Variable performance; less reliable |
| Vi-CELL BLU Analyzer | GMP-compliant manufacturing environments | Automated, standardized, high reproducibility, data integrity features | High cost of equipment and reagents | Variable performance; less reliable |
Table 2: Quality Attributes of Cryopreserved Leukapheresis vs. PBMCs
Data from a comparability study shows that cryopreserved leukapheresis maintains a cellular profile advantageous for CAR-T manufacturing [51].
| Quality Attribute | Cryopreserved Leukapheresis | Cryopreserved PBMCs | Significance |
|---|---|---|---|
| Post-Thaw Viability | 90.9% - 97.0% | Not Specified | Meets minimum threshold for manufacturing |
| Lymphocyte Proportion | 66.59% ± 2.64% | 52.20% ± 9.29% | Higher lymphocyte count is beneficial for T-cell therapies |
| CD3+ T-cell Proportion | 42.01% - 51.21% | Comparable | Preserved T-cell population for engineering |
| Key Advantage | Preserves granulocyte and monocyte content; avoids cell loss from Ficoll isolation | Standardized starting material | Leukapheresis maintains a more native immune cell composition |
The Scientist's Toolkit: Research Reagent Solutions
Essential Materials for Viability and Phenotypic Assessment
| Reagent / Material | Function | Example Catalog Numbers |
|---|---|---|
| Fixable Viability Dyes (FVDs) | Irreversibly stains dead cells for exclusion during flow analysis; compatible with fixation and intracellular staining. | eFluor 455, 450, 506, 520, 660, 780 [37] |
| Propidium Iodide (PI) / 7-AAD | Membrane-impermeant DNA dyes that identify dead cells in live-cell surface staining protocols. | PI (00-6990), 7-AAD (00-6993) [37] |
| Flow Cytometry Staining Buffer | Protein-based buffer (e.g., with BSA) used to wash and resuspend cells, reducing non-specific antibody binding. | 00-4222 [37] |
| FcR Blocking Reagent | Antibodies (e.g., anti-CD16/32/64) that block Fc receptors to minimize non-specific antibody staining. | Not Specified [54] |
| Cryopreservation Medium (CS10) | Clinical-grade cryoprotectant containing 10% DMSO, used for long-term storage of cells. | Not Specified [51] |
| Ammonium Chloride Solution | Used for lysing red blood cells in whole blood or leukapheresis samples. | 07800 [54] |
Solving Common Challenges: A Troubleshooting Guide for Reliable Data
Addressing High Background and Non-Specific Binding in Complex Samples
Frequently Asked Questions (FAQs)
Q1: Why does my stem cell sample show such high background fluorescence? High background in complex samples like stem cells often arises from multiple factors. Dead cells and debris are primary contributors, as they exhibit high autofluorescence and bind antibodies non-specifically [56] [57]. Furthermore, non-specific binding can occur via Fc receptors on certain cell types, which mistakenly bind the Fc portion of antibodies instead of the specific antigen-binding site [33] [58]. Sample preparation methods, such as tissue dissociation or the use of trypsin on adherent cells, can also damage cells and increase background signal [33].
Q2: How can I reduce non-specific antibody binding in my flow cytometry experiments? Effective reduction of non-specific binding involves several strategic steps. Fc receptor blocking is crucial; using specific FcR blocking reagents or normal serum from the same host as your antibodies can prevent this common issue [56] [57]. Optimal antibody titration is also key, as excessively high antibody concentrations increase non-specific interactions [33] [56]. Additionally, incorporating more thorough wash steps, potentially with buffers containing detergents like Tween-20 or Triton X-100, can help remove unbound or loosely-bound antibody [33] [26] [58].
Q3: I am using a viability dye, but my background is still high. What am I missing? The type of viability dye and its compatibility with your protocol are critical. Traditional DNA-binding dyes like Propidium Iodide or 7-AAD are not fixable and cannot be used if your protocol involves cell fixation and permeabilization for intracellular staining [56] [29]. For such protocols, you must use amine-reactive fixable viability dyes (e.g., Zombie dyes, LIVE/DEAD fixable stains) [31] [57]. It is also essential to ensure you are gating out the dead cell population identified by the dye during your analysis, as their mere presence contributes to background [31] [57].
Q4: How does panel design contribute to high background, and how can I fix it? In multicolor panels, background can manifest as "spillover spreading," where the signal from a bright fluorophore spills into adjacent detectors, obscuring dim populations [33] [46]. To minimize this, assign the brightest fluorophores (e.g., PE, APC) to detect low-abundance antigens and use dimmer fluorophores (e.g., FITC) for highly expressed markers [46] [57]. Utilize a spectrum viewer during panel design to select fluorochromes with minimal emission spectrum overlap [33] [46]. Always include proper controls like FMO (Fluorescence Minus One) to accurately set gates and distinguish positive signals from background spread [33] [56].
Troubleshooting Guide: Common Issues and Solutions
| Problem | Possible Cause | Recommended Solution |
|---|---|---|
| High Background Fluorescence | Presence of dead cells and cellular debris [56] [57]. | Use a viability dye and gate out dead cells. For intracellular staining, select a fixable viability dye [31] [57]. |
| Non-specific binding via Fc receptors [33] [58]. | Block Fc receptors prior to staining using commercial blockers, normal serum, or BSA [56] [57]. | |
| Antibody concentration is too high [26] [58]. | Titrate all antibodies to determine the optimal concentration that maximizes signal-to-noise [33] [56]. | |
| Inadequate washing, leaving unbound antibody [26] [58]. | Increase the number, duration, or volume of washes. Consider adding low-concentration detergents to wash buffers [33] [58]. | |
| Spillover Spreading | Poor fluorophore combination with significant spectral overlap [33] [46]. | Redesign panel using a spectrum viewer. Pair bright fluorophores with low-abundance antigens [46] [57]. |
| Poorly compensated data [33] [26]. | Use single-stained controls (beads or cells) that are at least as bright as your experimental sample to set compensation correctly [33] [46]. | |
| Weak or No Signal | Loss of antigen due to internalization or enzymatic damage (e.g., trypsin) [33] [26]. | Keep cells on ice during surface staining and use enzyme inhibitors like sodium azide [33] [26]. |
| Inadequate permeabilization for intracellular targets [33] [57]. | Optimize permeabilization protocol. Use appropriate detergents (Saponin, Triton X-100) for cytoplasm or alcohols for nuclear targets [33]. | |
| Fluorophore has photobleached or degraded [33] [58]. | Protect all staining steps from light. Ensure antibodies are stored correctly and are not expired [33] [58]. |
Experimental Workflow: A Systematic Approach to Troubleshooting
The following diagram outlines a logical pathway to diagnose and resolve the common issues of high background and non-specific binding in your flow cytometry experiments.
Systematic Troubleshooting for Background Issues
Viability Dye Selection Guide for Stem Cell Research
Selecting the correct viability dye is paramount for accurate analysis, especially when working with sensitive primary stem cells. The following table compares the main classes of viability dyes.
| Dye Type | Examples | Fixable? | Best For | Key Considerations |
|---|---|---|---|---|
| DNA-Binding | Propidium Iodide (PI), 7-AAD, DAPI [29] | No [29] | Simple surface staining protocols without fixation [56]. | Inexpensive, easy to use. Not compatible with intracellular staining protocols [31] [29]. |
| Amine-Reactive (Fixable) | Zombie dyes, LIVE/DEAD Fixable stains [31] [29] | Yes [29] | Complex samples, intracellular staining, and stem cell immunophenotyping [57]. | Essential for any experiment involving fixation/permeabilization. Requires proper compensation controls [31]. |
| Enzyme-Activated | Calcein AM, CellTracker dyes [31] | Varies | Tracking live cell migration and proliferation over time [31]. | Stain live cells metabolically. Can be transferred to daughter cells [31]. |
The decision tree below guides you in selecting the most appropriate viability dye based on your experimental design.
Viability Dye Selection Guide
The Scientist's Toolkit: Essential Research Reagent Solutions
| Item | Function | Application Note |
|---|---|---|
| Fc Receptor Blocking Reagent | Blocks Fc receptors on cells to prevent non-specific antibody binding, a major source of background [33] [56]. | Critical for immune cells and stem cells expressing Fc receptors. Use before antibody incubation [57]. |
| Fixable Viability Dyes | Distinguishes live from dead cells in samples that will be fixed, allowing for their exclusion during analysis [31] [57]. | Must be used prior to fixation. Amine-reactive dyes (e.g., Zombie Violet) are the standard for intracellular staining [29]. |
| Permeabilization Buffers | Disrupts cell membranes to allow antibodies access to intracellular targets [33] [57]. | Choice matters: mild detergents (Saponin) for cytoplasmic targets; stronger alcohols (Methanol) for nuclear targets [33]. |
| Compensation Beads | Uniform particles used to create single-stained controls for setting accurate fluorescence compensation [33] [46]. | Produce more consistent controls than cells. Ensure beads are matched to your antibody species and fluorophore [33]. |
| UltraPure BSA | Used as a blocking agent and buffer additive to reduce non-specific protein-binding and stabilize cells [56] [57]. | Typically used at 0.5-3% in wash and staining buffers to minimize background [58]. |
Optimizing Gating Strategies to Accurately Resolve Live/Dead Populations
Fundamental Concepts: How Viability Dyes Work
Mechanism of Amine-Reactive Fixable Viability Dyes
Fixable viability dyes (FVDs) are fluorescent amine-reactive dyes that enable clear discrimination between live and dead cells. Their function is based on the principle of cell membrane integrity [15] [27]:
- In live cells, the dye cannot cross the intact cell membrane and only binds to surface amines, resulting in dim fluorescence [15] [27].
- In dead cells, the compromised membrane allows the dye to access abundant intracellular amines, resulting in bright fluorescence [15] [27].
The difference in fluorescence intensity between live and dead cell populations is typically greater than 50-fold, allowing clear discrimination [15]. This covalent binding to cellular proteins preserves the staining pattern through fixation and permeabilization steps, unlike non-fixable dyes like propidium iodide (PI) which lose staining pattern after fixation [15].
Importance of Viability Staining in Stem Cell Research
Accurately excluding dead cells is crucial in flow cytometry experiments, particularly in stem cell research, for several reasons [27] [59]:
- Reduced false positives: Dead cells exhibit increased non-specific antibody binding and greater autofluorescence, which can lead to inaccurate data interpretation [27] [59].
- Improved rare population detection: Eliminating dead cells decreases background noise, enhancing the detection of weakly positive markers and rare stem cell subpopulations [27].
- Cleaner data: Gating strategies alone cannot completely exclude all dead cells based on scatter properties, making viability staining essential for high-quality data [27].
Frequently Asked Questions (FAQs)
Dye Selection and Compatibility
Q: What factors should I consider when selecting a fixable viability dye for my stem cell panel?
A: Choose based on these key parameters [15]:
- Laser availability: Match the dye's excitation requirements to your flow cytometer's laser lines
- Emission profile: Ensure the dye's emission doesn't overlap with your key markers
- Fixation compatibility: Verify the dye maintains staining pattern through your fixation protocol
- Brightness: Select brighter dyes for dim markers or low-abundance targets
Q: Can I combine multiple viability dyes in a single experiment?
A: Generally, no. Multiple viability dyes are unnecessary and will consume valuable fluorescence channels. Select one optimal dye for your panel instead.
Q: How do I prevent viability dye interference with my antibody panel?
A: [15]:
- Consult dye compatibility charts before panel design
- Avoid using viability dyes with spectral signatures similar to your key markers
- Use the "dump channel" strategy carefully in spectral flow cytometry, ensuring fluorophores in this channel are identical
Experimental Protocol Questions
Q: Why is saline buffer recommended for viability staining instead of growth media or water?
A: Saline buffer (e.g., 0.85% NaCl) produces minimal staining artifacts compared to deionized water or growth media, which can cause unstained and dead-like cells in control samples [60].
Q: How long can I store stained samples before analysis?
A: When properly fixed, the distinction between live and dead cells stained with fixable viability dyes can be preserved for up to 30 days after fixation [15].
Q: What are the critical controls for viability staining validation?
A: Essential controls include [61] [59]:
- Unstained cells
- Single-stained controls for compensation
- Cells with known viability (live and dead control populations)
- Fluorescence Minus One (FMO) controls in multicolor experiments
Troubleshooting Guide
Common Problems and Solutions
| Problem | Possible Causes | Recommended Solutions |
|---|---|---|
| Poor separation between live and dead populations | Incorrect dye concentration; Inadequate staining time; Wrong buffer conditions | Titrate dye concentration; Optimize incubation time (typically 15-30 min); Use recommended saline buffer [60] |
| High background in live cell population | Excessive dye; Too many dead cells in sample; Insufficient washing | Titrate dye; Pre-enrich live cells; Increase wash steps after staining [59] |
| Loss of viability signal after fixation | Incompatible fixation method; Wrong dye type | Use fixable viability dyes specifically; Avoid non-fixable dyes (e.g., PI, 7-AAD) if fixing cells [15] |
| Inconsistent results between replicates | Uneven staining; Variable cell concentrations; Instrument fluctuations | Standardize cell concentration; Ensure consistent staining conditions; Use instrument quality control [60] |
| Unexpected dim staining in dead cells | Dye degradation; Insufficient staining time; Incorrect storage | Use fresh dye aliquots; Validate staining with control cells; Follow storage recommendations [59] |
Advanced Gating Issues
Problem: Viability dye spillover affecting adjacent channels
- Use amine-reactive compensation beads for proper compensation controls [15]
- Re-configure panel to assign viability dye to less critical channels
- For spectral flow cytometry, verify the viability dye's spectral signature doesn't overlap with key markers
Problem: Intermediate populations with ambiguous viability status
Solution: [60]
- Include both positive (heat-killed) and negative (fresh) controls in each experiment
- Use a two-dye system like SYTO9/PI that can resolve damaged intermediate populations [60]
- Apply consistent gating boundaries across all samples using FMO controls
Experimental Protocols
Standardized Staining Protocol for Stem Cells
Materials Needed [60]:
- Fixable viability dye (select appropriate color for your panel)
- Sterile saline buffer (0.85% NaCl recommended)
- Appropriate growth media for your stem cell type
- Centrifuge capable of 3,000 × g
- Fixation reagent (if performing intracellular staining)
Step-by-Step Procedure:
- Prepare cell suspension
- Harvest stem cells and wash once with saline buffer
- Resuspend cells in saline buffer at 1×10^6 to 1×10^7 cells/mL
- Keep cells on ice throughout the procedure
Stain with viability dye
- Add pre-titrated fixable viability dye to cell suspension
- Mix immediately and thoroughly by pipetting
- Incubate for 20-30 minutes at 2-8°C in the dark
Wash cells
- Add 2-3 volumes of cold buffer or culture media
- Centrifuge at 300-500 × g for 5 minutes
- Carefully aspirate supernatant without disturbing cell pellet
Proceed with additional staining
- Resuspend cells in appropriate buffer for surface marker staining
- Continue with your standard staining protocol
- Fix cells if necessary (the viability stain will be preserved)
Critical Steps for Success:
- Always titrate each new dye lot with your specific cell type
- Protect stained cells from light throughout the procedure
- Include both live and dead cell controls for setting gates
- Use the same staining conditions across all experiments
Optimized Gating Strategy Workflow
The following workflow diagram illustrates the hierarchical gating strategy for accurately resolving live/dead populations:
Step-by-Step Gating Explanation [62] [63]:
Exclude Debris: Plot Forward Scatter Area (FSC-A) against Side Scatter Area (SSC-A). Draw a gate around the main cell population, excluding events with low FSC and SSC signals that represent debris.
Select Single Cells: Plot FSC-A against FSC-Width (FSC-W) or FSC-Height (FSC-H). Single cells display a linear relationship, while doublets or cell aggregates appear as outliers. Gate the linear cluster representing single cells.
Resolve Live/Dead Populations: Create a histogram or dot plot of your viability dye channel. Live cells show dim staining while dead cells show bright fluorescence. Place a gate to exclude the bright (dead) population.
Analyze Target Phenotype: Proceed with analyzing your stem cell markers on the gated live, single cells.
The Scientist's Toolkit: Research Reagent Solutions
Viability Dye Selection Guide
| Dye Type | Examples | Excitation/Emission (nm) | Fixable | Best For |
|---|---|---|---|---|
| Amine-reactive | LIVE/DEAD Fixable Stains [15]; GloCell Fixable Dyes [27] | Varies by dye (UV to Near-IR) | Yes | Intracellular staining; Multiparameter panels |
| DNA-binding | Propidium Iodide [60] [29]; 7-AAD [29]; DRAQ7 [29] | PI: 535/617 [29] | No | Simple viability assessment; Cell cycle analysis |
| Esterase-activated | CFSE [29]; Calcein AM | CFSE: 492/517 [29] | Some (CFSE) | Live cell tracking; Metabolic activity |
Essential Materials for Viability Staining
| Item | Function | Recommended Specifications |
|---|---|---|
| Fixable Viability Dye | Distinguishes live/dead cells after fixation | Select color based on your panel; amine-reactive chemistry [15] [27] |
| Amine-reactive Compensation Beads | Generate single-stain controls for compensation | Use with viability dyes for proper compensation [15] |
| Saline Buffer | Staining buffer | 0.85% NaCl for minimal artifacts [60] |
| Control Cells | Protocol validation | Fresh (high viability) and heat-treated (low viability) cells |
| Fixation Reagent | Preserve staining | Methanol-free formaldehyde recommended [59] |
Workflow Diagram: Comprehensive Viability Staining
The following diagram illustrates the complete experimental workflow from sample preparation to data analysis:
By implementing these optimized gating strategies and troubleshooting approaches, stem cell researchers can significantly improve the accuracy and reproducibility of their flow cytometry data, leading to more reliable experimental outcomes in both basic research and drug development applications.
Mitigating the Impact of Cellular Debris in Cryopreserved Stem Cell Products
Cryopreserved stem cell products, such as cord blood units (CBUs), are invaluable for cell therapy and transplantation. However, these products often contain significant cellular debris, dead cells, and contaminants like red blood cells and platelets from the volume-reduction process before freezing. This debris can compromise post-thaw cell recovery, purity, and function, leading to inaccurate viability counts and inconsistent experimental or therapeutic outcomes. Effective mitigation strategies are therefore essential for ensuring the reliability of downstream applications, particularly in flow cytometry-based stem cell research.
FAQs on Cellular Debris and Stem Cell Analysis
Why does cellular debris in my thawed samples affect my flow cytometry data?
Cellular debris and dead cells are a primary source of high background fluorescence and non-specific staining in flow cytometry [33]. Debris particles can scatter light and bind fluorescent dyes or antibodies non-specifically, leading to inaccurate gating and overestimation of cell viability and target marker expression. Furthermore, the presence of dead cells and debris can clog the flow cytometer's fluidics system, causing acquisition rates to drop and potentially damaging the instrument [64].
My post-thaw viability seems high, but my cells perform poorly in functional assays. Why?
High viability measurements immediately post-thaw may not reflect the cells' functional fitness. Your sample might have a high proportion of early apoptotic cells that exclude viability dyes initially but undergo apoptosis over subsequent days in culture. Furthermore, certain post-thaw processing methods, while yielding a high number of cells, may not effectively remove contaminants like CD14+ monocytes. One study found that the presence of these cells was correlated with reduced T-cell proliferation in functional assays, despite good initial viability [65]. Therefore, a viability measurement is a snapshot; follow-up fitness assays are crucial.
I am using a viability dye, but my background is still high. What could be wrong?
Several factors could be at play:
- Fc Receptor Binding: Immune cells, such as monocytes, express Fc receptors that can bind the Fc portion of antibodies, causing non-specific staining. This can be mitigated by using an Fc receptor blocking reagent [33].
- Insufficient Washing: Residual, unbound dye or antibodies in the solution can elevate background. Increase the number or volume of washes after staining [33].
- Fixation and Permeabilization: If you are performing intracellular staining, the use of detergents like Triton X-100 can sometimes cause high background. Alternative permeabilization methods, such as alcohol (e.g., methanol), may be necessary, though these can affect some fluorochromes [33].
- Presence of Dead Cells: Even with a viability dye, a large number of dead cells can contribute to background. Ensure you are properly gating to exclude these cells during analysis [64].
Troubleshooting Guide: Debris and Poor Viability in Thawed Samples
| Problem | Possible Causes | Recommended Solutions |
|---|---|---|
| High background / non-specific staining in flow cytometry | Non-specific antibody binding via Fc receptors.High levels of cellular debris.Insufficient washing steps. | Block samples with an Fc receptor blocking reagent prior to antibody staining [33].Use a viability dye (e.g., PI, DAPI, 7-AAD) to gate out dead cells and debris during analysis [64] [33].Increase the number and duration of wash steps after staining [33]. |
| Low post-thaw cell yield and viability | Cryoinjury from ice crystal formation during freezing/thawing.High concentration of cytotoxic cryoprotectant (e.g., DMSO).Inefficient removal of cryoprotectant post-thaw. | Optimize cryopreservation protocol. Consider research into alternative CPAs like trehalose delivered via ultrasound, which shows promise for preserving membrane integrity [66].Ensure rapid and thorough washing to remove DMSO after thawing. |
| Clogged flow cytometer flow cell | Large cell clumps or high concentration of particulate debris in the sample. | Filter the cell suspension through a sterile cell strainer (e.g., 40-70 µm) before loading it onto the cytometer [64].Centrifuge samples to pellet cells and carefully aspirate the supernatant containing debris. |
| Inconsistent results between technical replicates | Variable sample processing post-thaw.Inconsistent gating strategies due to differing levels of debris. | Standardize the post-thaw processing method (e.g., always use the same wash medium, centrifugation speed, and time).Use fluorescence-minus-one (FMO) and isotype controls to establish consistent, accurate gates [33]. |
Post-Thaw Processing Methods: A Comparative Analysis
The choice of processing method after thawing a cryopreserved stem cell product involves a direct trade-off between the purity of the final cell population and the total yield of your target cells. Selecting the right method is therefore application-specific [65].
The table below summarizes key findings from a systematic evaluation of four post-thaw processing methods for cord blood mononuclear cells (CBMCs) [65].
| Processing Method | Post-Thaw CBMC Recovery (Yield) | Purity (Depletion of RBCs/Granulocytes) | Key Functional Outcomes |
|---|---|---|---|
| Wash-Only | Highest yield | Lowest purity levels | Retains all cell types; may contain contaminants that affect some functional assays. |
| Density Gradient | Moderate yield | Moderate depletion | Standard method for mononuclear cell isolation; balance of yield and purity. |
| CD15/CD235 Depletion (Beads) | Lower yield | High depletion | Best preserved cell viability over 5 days of culture. |
| EasySep PBMC Isolation Kit | Lower yield | Highest depletion | Highest percentage of viable cells on Day 0. Significantly depletes CD14+ cells, correlating with reduced T-cell proliferation. |
Experimental Workflow for Post-Thaw Stem Cell Analysis
The following diagram outlines a recommended workflow for processing and analyzing cryopreserved stem cells to minimize the impact of debris.
The Scientist's Toolkit: Key Reagents for Debris Mitigation
| Reagent Category | Specific Examples | Function & Rationale |
|---|---|---|
| Viability Dyes | Propidium Iodide (PI), DAPI, 7-AAD, Fixable Viability Dyes (e.g., eFluor) | Distinguish live from dead cells during flow cytometry. PI, DAPI, and 7-AAD are classic DNA-binding dyes that are excluded by live cells. Fixable viability dyes are essential for stained cells that will be fixed [33] [67]. |
| Fc Receptor Blockers | Human Fc Receptor Binding Inhibitor | Reduces non-specific antibody binding, a major source of background signal, especially in immune cell populations [33]. |
| Cell Strainers | 40 µm or 70 µm Nylon Mesh | Removes cell clumps and large debris particles immediately before flow cytometry analysis, preventing clogs in the instrument's flow cell [64]. |
| Post-Thaw Processing Kits | EasySep Direct Human PBMC Isolation Kit, CD15/CD235a Depletion Beads | Designed to efficiently remove specific contaminants (e.g., red blood cells, granulocytes, monocytes) from whole blood or cord blood samples, significantly improving sample purity [65]. |
| Alternative Cryoprotectants | Trehalose (delivered via ultrasonication) | Emerging research shows trehalose, a non-toxic disaccharide, can effectively preserve membrane integrity and cell viability during cryopreservation when delivered intracellularly, offering an alternative to cytotoxic DMSO [66]. |
Correcting for Spectral Overlap and Ensuring Proper Laser Alignment
FAQ: Resolving Common Spectral Flow Cytometry Issues
Q: In my stem cell sorting experiments, I keep getting false double-positive populations that don't make biological sense. What is the most likely cause, and how can I fix it?
A: This is a classic symptom of insufficient spectral compensation. The fluorescence emission from one dye is "spilling over" into the detector of another. To correct this, you must run and apply single-color controls. A proper control uses a bright, distinct positive peak and a clear negative population to calculate the precise compensation value needed to subtract the spillover signal [68]. Using compensation beads instead of cells for these controls can provide cleaner positive and negative peaks and make the calculation more accurate [68].
Q: My multi-color panel worked perfectly last month, but the results are not reproducible with a new batch of the same antibodies. Why?
A: This is a common issue, particularly with tandem dyes (e.g., PE-Cy7), which can degrade and change their spectral properties. This breakdown alters the amount of spillover into other channels, making previous compensation settings obsolete [69] [68]. To ensure reproducibility in longitudinal stem cell studies, validate all new reagent batches with single-color controls and recalibrate your compensation matrix. Consider using newer, more stable dye technologies known for high lot-to-lot consistency [70].
Q: After aligning the lasers on my cytometer, my fluorescence intensities are suddenly much lower. Did I break something?
A: Not necessarily. A common outcome of laser realignment is a shift in the laser-to-stream delay. This delay timing tells the instrument when a cell that was illuminated by one laser will arrive in front of the next laser [71]. If this setting is incorrect after alignment, the cytometer will not properly associate fluorescence pulses from different lasers with the same cell, leading to dropped signals and inaccurate data. You must recalibrate the laser delay using alignment beads after any significant maintenance or laser realignment.
Troubleshooting Guide: Spectral Overlap and Laser Performance
The following table outlines common problems, their root causes, and specific corrective actions.
| Problem Symptom | Root Cause | Corrective Action |
|---|---|---|
| High background noise in multiple channels [69] | Misaligned lasers or contaminated sheath fluid reducing sensitivity. | Perform full instrument quality control (QC) with alignment beads; replace sheath fluid and flush system [71]. |
| Poor separation between positive and negative populations [72] | Suboptimal laser power or voltage settings compressing the dynamic range. | Titrate antibodies to determine optimal concentration; create a voltage curve to find the linear range for your target antigen [69]. |
| Unexpected shifts in fluorescence intensity after instrument service [71] | Incorrect laser delay following realignment, causing misassignment of signals to cells. | Recalibrate the laser delay timing using manufacturer-specified alignment beads. |
| Consistent failure of a specific channel in a multi-color panel | Dye degradation, particularly of tandem dyes, or a clogged fluidic line affecting the sensing zone. | Test the dye with a fresh single-color control; inspect and clean the fluidic system and flow cell nozzle [70] [71]. |
Experimental Protocols for Reliable Data
Protocol 1: Accurate Spectral Compensation with Beads
This method is preferred for its consistency and for conserving precious stem cell samples [68].
- Prepare Single-Stain Controls: For each fluorescent dye in your panel, add one drop of compensation beads to a tube.
- Stain Beads: Add the corresponding antibody-dye conjugate to each tube. Incubate for 15-30 minutes at room temperature, protected from light.
- Include Unstained Control: Prepare one tube of beads without any antibody. This is essential for defining the negative baseline [68].
- Acquire Data: Run each single-stain control and the unstained control on the cytometer.
- Set Compensation Matrix: Using the software, adjust the compensation for each dye so that the median fluorescence intensity (MFI) of the positive population in its off-channel is equal to the MFI of the negative population.
Protocol 2: Validating Laser Alignment and Delay
Regular performance checks are critical for data integrity.
- Use Alignment Beads: Obtain fluorescent beads specifically designed for instrument alignment.
- Acquire Alignment Beads: Run the beads and ensure that the coefficient of variation (CV) for the core fluorescence channels is within the manufacturer's specifications. A high CV indicates poor laser alignment or fluidic instability.
- Check Laser Delay (for sorters): If your instrument has sorting capabilities, run a specialized "laser delay" bead set. These beads are detectable by all lasers. The instrument's software will use the signal pattern to calculate and verify the precise timing between lasers. Adjust if necessary [71].
The Scientist's Toolkit: Research Reagent Solutions
| Reagent / Material | Function in the Experiment |
|---|---|
| Compensation Beads [68] | Provide a consistent, high-signal positive control and a clear negative population for calculating accurate spectral compensation matrices, superior to using cells. |
| Amine-Reactive Viability Dyes (e.g., Ghost Dye, eFluor viability dyes) [73] [74] | Covalently label dead cells in a sample (which have compromised membranes), allowing them to be excluded from analysis. These dyes are fixable, making them compatible with intracellular staining protocols common in stem cell signaling studies. |
| Ultra-Bright Synthetic Dyes (e.g., StarBright Dyes) [70] | Offer narrow emission spectra and high lot-to-lot reproducibility, reducing spectral overlap challenges and improving the reproducibility of large multi-color panels. |
| Phospho-Specific Antibodies [75] | Enable the study of intracellular signaling pathways (e.g., phosphorylation) by flow cytometry ("phospho-flow"), providing a direct readout of the functional activity of proteins within stem cells. |
| Alignment & QC Beads [71] | Standardized particles used to verify and optimize laser alignment, fluidics stability, and optical path accuracy, ensuring the instrument is performing to specification. |
Workflow for Spectral Flow Cytometry Setup
The following diagram illustrates the logical workflow for setting up a flow cytometry experiment to minimize issues related to spectral overlap and laser alignment.
Principle of Spectral Compensation
This diagram visualizes the core concept of spectral overlap and how compensation corrects for it.
Preventing and Resolving Issues with Low Signal and Weak Fluorescence Intensity
In stem cell flow cytometry research, achieving a strong, clear fluorescence signal is paramount for accurate phenotyping and reliable data. Weak fluorescence intensity can obscure critical findings and compromise experimental integrity. This guide addresses the common challenge of low signal, providing targeted troubleshooting methodologies to ensure your viability dye and antibody staining protocols yield optimal results.
Quick Diagnosis Table
Use this table to quickly identify potential causes and solutions for weak fluorescence signals in your stem cell experiments.
| Possible Cause | Immediate Action |
|---|---|
| Insufficient Antibody | Titrate antibody to determine optimal concentration [76]. |
| Poor Laser Alignment | Run flow check beads and service instrument if needed [76]. |
| Low Gain/High Offset | Adjust flow cytometer settings using a positive control [76]. |
| Photobleaching | Protect fluorophores from light; use fresh reagents [76] [19]. |
| Inaccessible Intracellular Target | Validate permeabilization step; use ice-cold reagents for surface targets [76]. |
| High Background from Dead Cells | Incorporate a fixable viability dye into your panel [77] [78]. |
Troubleshooting FAQs
Why am I getting a weak or no signal from my cell surface markers?
Weak or absent signals for cell surface antigens, common in stem cell research, can arise from multiple factors.
Antibody and Staining Issues: The antibody concentration may be insufficient for detection. Titrate your antibodies to find the optimal concentration that provides a clear signal without background [76]. Furthermore, surface proteins can internalize during processing. Perform all staining steps on ice or at 4°C with ice-cold buffers to halt cellular activity. Adding sodium azide can also prevent this internalization [76]. If you have used trypsin to detach adherent stem cells, consider a gentler alternative, as trypsin can cleave surface antigens [76].
Instrument Configuration Problems: The flow cytometer may be misconfigured. Check that the offset is not too high and the gain is not too low [76]. Use a single-color positive control to properly set up the instrument and ensure you are correctly compensating for spectral overlap to capture all events [76]. Laser misalignment can also drastically reduce signal. While benchtop cytometers rarely need user adjustment, you should run flow check beads to verify alignment; consistent issues may require professional servicing [76].
Antigen and Fluorophore Factors: Confirm that your target protein is genuinely expressed by your stem cell population and at a level high enough for detection with your chosen fluorophore [76] [19]. For low-abundance antigens, a straightforward strategy is to switch to a brighter fluorophore or one attached to a fluorescent polymer [79]. Alternatively, enzymatic signal amplification systems provide a highly effective and practical way to boost sensitivity without affecting antibody function [79]. Finally, always protect your stained samples from light, as photobleaching can fade fluorescence signals [76] [19].
How can I improve the signal from my intracellular staining?
Staining for intracellular targets in fixed and permeabilized stem cells presents unique challenges.
Permeabilization Efficiency: The primary cause of weak intracellular signal is inadequate permeabilization. Ensure you are using a validated permeabilization buffer and that the protocol (duration, temperature) is rigorously followed to allow antibody access [76].
Fluorophore Size: For intracellular targets, the size of the fluorophore matters. Large fluorochrome conjugates can reduce antibody motility and its ability to efficiently enter the cell [76]. If you are getting weak signals, test a fluorophore with a lower molecular weight.
Protein Secretion: If your target protein is secreted, the signal may be lost. Performing a Golgi-blocking step (e.g., with Brefeldin A) during culture can accumulate the protein within the cell, improving the signal for intracellular staining [76].
My panel has high background; how does this relate to weak signal, and how can I fix it?
High background noise directly reduces your signal-to-noise ratio, making a true positive signal appear weak or indistinguishable. In stem cell work, a major contributor to background is non-specific binding in dead cells.
Exclude Dead Cells: Dead cells exhibit high levels of non-specific antibody binding and autofluorescence [19]. Incorporating a fixable viability dye into your multicolor panel is critical. These dyes covalently label dead cells (with compromised membranes) before fixation, allowing you to exclude them from your final analysis, thereby dramatically reducing background and improving clarity [77] [78].
Optimize Staining Protocol: High background can also result from inadequate washing or blocking [19]. Increase the number or volume of wash steps after antibody incubations. Including a low concentration of detergent (e.g., Tween) in your wash buffer can be more effective at removing unbound antibody. Always include an Fc receptor blocking step when working with immune cells or stem cells that may express Fc receptors to prevent non-specific antibody binding [19].
Experimental Workflow for Signal Optimization
The following diagram outlines a logical pathway for diagnosing and resolving low fluorescence signal issues in your experiments.
Research Reagent Solutions
The table below lists key reagents essential for preventing and resolving low signal intensity in flow cytometry.
| Reagent Category | Specific Examples | Function in Resolving Low Signal |
|---|---|---|
| Fixable Viability Dyes | LIVE/DEAD Fixable Stains, Ghost Dyes [77] [78] | Covalently labels dead cells prior to fixation, allowing their exclusion from analysis to reduce background and improve signal clarity. |
| Signal Amplification Kits | Enzymatic amplification systems [79] | Dramatically enhances detection sensitivity for low-abundance cell surface antigens on stem cells. |
| Bright Fluorophores | Brilliant Violet, PE/Cyanine dyes [79] [19] | Provides stronger emission per antibody binding event, ideal for detecting dim markers. |
| Permeabilization Buffers | Commercial kits (e.g., FoxP3/Transcription Factor Staining Buffers) | Enables antibody access to intracellular targets for nuclear transcription factors in stem cells. |
| Fc Receptor Blocking Reagents | Purified anti-CD16/32, species-specific serum | Reduces non-specific antibody binding, lowering background and improving signal-to-noise ratio. |
| Compensation Beads | ArC Amine Reactive Beads [78] | Essential for setting accurate compensation on the cytometer, preventing signal spillover that can weaken apparent intensity. |
Resolving weak fluorescence intensity in stem cell flow cytometry requires a systematic approach that scrutinizes instrument settings, reagent quality, staining protocols, and sample health. By systematically applying these troubleshooting guidelines—from proper antibody titration and the mandatory use of viability dyes to considering advanced signal amplification techniques—you can significantly enhance your data quality, ensuring your research findings are both robust and reliable.
Beyond the Basics: Validating and Comparing Dye Performance for Clinical-Grade Data
Accurate cell viability assessment is a critical component in stem cell research and therapy development. The selection of an appropriate viability assay directly impacts data reliability, reproducibility, and ultimately, the success of downstream applications. This technical support guide provides a comparative analysis of three predominant viability assessment methods: manual trypan blue counting, automated image-based cytometry, and flow cytometry. Framed within the context of stem cell flow cytometry research, this resource offers troubleshooting guidance and detailed protocols to address common experimental challenges.
Quantitative Method Comparison
The table below summarizes key performance characteristics of the three viability assessment methods, based on comparative validation studies.
| Method | Precision (CV%) | Linearity (R²) | Sample Throughput | Key Advantages | Key Limitations |
|---|---|---|---|---|---|
| Manual Trypan Blue [80] [81] | 4.3% - 37.2% [80] | >0.99 [80] | Low | Low cost; simple concept [80] | Labor-intensive; subjective; can overestimate viability [80] [81] |
| Automated Image-Based Cytometry [80] [82] | 2.0% - 6.2% [80] | >0.99 [80] | Medium | High reproducibility; automated; user-friendly [80] [82] | Lower single-cell resolution than flow cytometry |
| Flow Cytometry [80] [3] | 2.5% - 26.6% [80] | >0.99 [80] | High | Multiparametric data; high statistical resolution [80] [3] | Complex instrumentation; higher cost per test [80] |
Method Selection Guide
How do I choose the right viability assay for my stem cell research?
The choice of viability assay should be guided by your specific application, required throughput, and need for multiparametric data. The decision diagram below outlines a workflow for selecting the optimal method.
Research Reagent Solutions
The table below details key reagents used in advanced viability assessment protocols, particularly for flow cytometry.
| Reagent | Function | Application Note |
|---|---|---|
| Fc Receptor Block (e.g., Mouse/Rat Serum) [83] | Blocks non-specific antibody binding via Fc receptors on immune cells. | Critical for high-parameter flow cytometry to improve signal-to-noise ratio [83]. |
| Brilliant Stain Buffer [83] | Prevents dye-dye interactions between conjugated polymer dyes (e.g., SIRIGEN "Brilliant" dyes). | Essential for panels containing multiple "Brilliant" dyes to prevent fluorescence spillover [83]. |
| Tandem Stabilizer [83] | Reduces degradation of tandem dye conjugates (e.g., APC-Cy7). | Maintains signal integrity, especially in overnight staining protocols [83]. |
| Propidium Iodide (PI) [80] [81] | Fluorescent DNA dye excluded by live cells; stains nuclei of membrane-compromised cells. | Provides a more accurate and measurable signal for dead cells compared to Trypan blue [80] [81]. |
Detailed Experimental Protocols
This protocol is designed for high-parameter flow cytometry and includes steps to minimize non-specific binding and dye interactions, which is crucial for sensitive stem cell analysis.
- Blocking: Resuspend cell pellet in 20 µL of blocking solution (e.g., containing mouse and rat serum) and incubate for 15 minutes at room temperature in the dark.
- Stain Master Mix: Prepare surface antibody master mix in FACS buffer. For panels containing Brilliant dyes, add Brilliant Stain Buffer to a final concentration of up to 30% (v/v).
- Staining: Add 100 µL of the master mix to the pre-blocked cells. Mix gently by pipetting.
- Incubation: Incubate for 1 hour at room temperature in the dark.
- Washing: Wash the cells with 120 µL of FACS buffer, centrifuge at 300-400 × g for 5 minutes, and discard the supernatant. Repeat this wash step with 200 µL of FACS buffer.
- Resuspension: Resuspend the final cell pellet in FACS buffer containing tandem stabilizer (1:1000 dilution) for acquisition.
- Staining: Mix cell suspension 1:1 with Trypan blue or a fluorescent viability dye like propidium iodide (PI).
- Loading: Load the mixture into a disposable microchip or counting chamber.
- Analysis: Place the chip into the automated cytometer (e.g., Adam, Nanoentek or Cellometer series).
- Automated Counting: The instrument automatically captures images, differentiates live and dead cells based on contrast or fluorescence, and calculates concentration and viability percentage.
Troubleshooting Guides & FAQs
Frequently Asked Questions
Q: My manual trypan blue counts show high viability (>90%), but my flow cytometry data using PI indicates much lower health in my stem cell cultures. Why the discrepancy? [81]
A: This common issue often arises because trypan blue can cause the rupture of fragile, dead, or dying cells, transforming them into large, dim, diffuse objects that are difficult to see under a brightfield microscope. These ruptured cells are often under-counted as dead, leading to a significant overestimation of viability. Fluorescent dyes like PI, used in flow cytometry or fluorescent image cytometers, stain the nucleus of membrane-compromised cells and are not subject to the same morphological artifacts, providing a more accurate count of dead cells [81].
Q: When should I use Fc receptor blocking reagents in my viability staining protocol?[/citation:4]
A: Fc receptor blocking is highly recommended when performing any antibody-based staining (including viability markers that rely on antibody conjugates) on hematopoietic cells, which express Fc receptors. This step is crucial for reducing non-specific background binding and improving the specificity and sensitivity of your assay, especially in high-parameter flow cytometry [83].
Q: For my biomaterial cytotoxicity study, I have access to both fluorescence microscopy and flow cytometry. Which method is more reliable?[/citation:10]
A: A 2025 comparative study concluded that while both methods show a strong correlation (r = 0.94), flow cytometry demonstrated superior precision, particularly under conditions of high cytotoxic stress. Flow cytometry is less susceptible to interference from particulate biomaterials and provides higher statistical resolution by analyzing thousands of events, making it a more robust tool for quantitative cytocompatibility evaluation [3].
Troubleshooting Common Problems
| Problem | Possible Cause | Solution |
|---|---|---|
| High background in flow cytometry. | Non-specific antibody binding or insufficient washing [84]. | Incorporate an Fc receptor blocking step [83] and increase wash steps post-staining [84]. |
| Low cell viability in final sample. | Harsh processing or extended room temperature storage [84]. | Centrifuge cells at minimum required speed (300-400 × g), keep samples at 4°C throughout the procedure, and process samples quickly [84]. |
| Cell clumping during analysis. | DNA release from dead cells or presence of cations in buffers [84]. | Add DNase I to buffers and/or use metal-free (Ca²⁺/Mg²⁺ free) buffers [84]. |
| Inconsistent results with trypan blue. | Rupturing of dead cells and subjective manual counting [81]. | Switch to a fluorescent viability dye (e.g., PI/AO) and an automated image-based cytometer for objective, reproducible results [81] [82]. |
Benchmarking Dye Accuracy and Precision in Fresh and Cryopreserved Products
In stem cell research and therapy development, accurate viability assessment is a critical quality control checkpoint. The choice between using fresh or cryopreserved cells and the selection of appropriate viability dyes significantly impacts experimental outcomes and therapeutic efficacy. This technical support center addresses the specific methodological challenges researchers face when benchmarking dye accuracy and precision across different cell states, providing evidence-based troubleshooting guidance for the stem cell flow cytometry community.
↑Experimental Findings: Quantitative Comparisons
↑Comparative Performance of Viability Assessment Methods
Recent studies have directly compared viability assessment techniques, providing quantitative data essential for experimental design decisions.
Table 1: Comparison of Viability Assessment Methods in Particulate Systems
| Method | Correlation with FCM | Key Strengths | Key Limitations | Optimal Use Case |
|---|---|---|---|---|
| ↑Fluorescence Microscopy (FM) | ↑Strong correlation (r = 0.94) [3] | Direct cell visualization, accessible instrumentation | ↑Labor-intensive, sampling bias, limited throughput [3] | Initial viability screening with limited equipment |
| ↑Flow Cytometry (FCM) | Reference method | ↑Superior precision, high-throughput, multi-parameter analysis [3] | Requires suspended cells, specialized instrumentation [3] | High-precision studies requiring subpopulation analysis |
A 2025 comparative study specifically evaluated fluorescence microscopy and flow cytometry for assessing cytotoxicity in particulate systems, revealing a ↑strong correlation (r = 0.94, R² = 0.8879, p < 0.0001) between the methods [3]. However, flow cytometry demonstrated ↑superior precision, particularly under high cytotoxic stress conditions where microscopy-assessed viability was 9-10% compared to flow cytometry measurements of 0.2-0.7% for the same samples [3].
↑Impact of Cryopreservation on Stem Cell Markers
Cryopreservation induces specific changes to stem cell phenotypes that affect viability dye performance and marker expression.
Table 2: Cryopreservation-Induced Changes in Adipose-Derived Stem Cell Markers
| Surface Marker | Pre-Cryopreservation Expression | Post-Cryopreservation Expression | Significance |
|---|---|---|---|
| ↑CD105 [85] | >95% (both TCP and HFB systems) | ↓Significant decrease to ~75% (TCP only) | p < 0.05 [85] |
| ↑CD274 [85] | ↓Significantly less expressed on HFB cells | ↑Increased by ~48% in TCP cells, eliminating pre-freeze difference | p < 0.05 [85] |
| CD73/CD90 [85] | >95% (both systems) | Remained >95% (both systems) | Stable despite cryopreservation |
| ↑SPA2 subpopulation [85] | Significant difference between systems | ↓Significant decrease in TCP cells after thawing | p < 0.05 [85] |
A 2024 study on adipose-derived stem cells revealed that ↑cryopreservation drives differential changes in cellular subpopulations depending on the expansion system used [85]. While freeze-thawing didn't interfere with the production of fully functional stem cells, it significantly altered specific marker expression patterns, particularly for cells expanded in tissue culture polystyrene (TCP) flasks compared to hollow fiber bioreactor (HFB) systems [85].
↑Troubleshooting Guides
↑FAQ: Addressing Common Experimental Challenges
What are the primary causes of weak or no fluorescence signal in flow cytometry? Weak signals can result from multiple factors: insufficient target induction by treatment, inadequate fixation/permeabilization, pairing weakly expressed targets with dim fluorochromes, incorrect laser/PMT settings, or suboptimal cell scatter properties [86]. For rare proteins, always pair with bright fluorochromes like PE, while using dimmer fluorochromes like FITC for high-density targets [86].
How can I reduce high background fluorescence in my viability assays? High background often stems from autofluorescence (use fresh cells), non-specific Fc receptor binding (apply Fc blocking reagents), excessive antibody concentrations, poor compensation, or spillover spreading [87]. Include viability dyes to gate out dead cells and increase wash steps when using unconjugated primary antibodies [87].
Why do I observe inconsistent results between fresh and cryopreserved cells? Cryopreservation alters surface epitope accessibility and cellular properties. Studies show significant changes in marker expression like CD105 after thawing [85]. Always include cryopreserved controls in optimization and account for antigen accessibility changes caused by freezing protocols [87].
What specific considerations apply to stem cell viability assessment after cryopreservation? Stem cells exhibit ↑system-specific responses to cryopreservation. TCP-expanded cells showed significant CD105 reduction post-thaw, while HFB-expanded cells maintained expression [85]. These differences highlight the need for system-specific validation of viability assays for cryopreserved stem cells.
↑Research Reagent Solutions
Table 3: Essential Reagents for Viability Dye Benchmarking Studies
| Reagent Category | Specific Examples | Function & Application Notes |
|---|---|---|
| Viability Dyes | ↑Propidium Iodide (PI), FDA, ↑Annexin V-FITC, Hoechst, DiIC1 [3] | ↑Distinguish viable/apoptotic/necroptic populations; PI cannot penetrate intact membranes [3] |
| Fixation/Permeabilization Reagents | ↑Formaldehyde (4%), Saponin, Triton X-100, Methanol (ice-cold) [86] | ↑Preserve cellular structure while allowing dye access; concentration critical for epitope preservation [86] |
| Fc Blocking Reagents | ↑Bovine Serum Albumin, species-specific normal serum [86] | Reduce non-specific antibody binding, crucial for high background issues [86] |
| Compensation Controls | ↑Single-stained beads or cells, isotype controls [87] | Essential for accurate multicolor flow cytometry; >5,000 positive events recommended [87] |
| Cryopreservation Media Components | ↑DMSO-controlled rate freezing additives [88] | Maintain cell viability and marker integrity through freeze-thaw cycles [88] |
↑Experimental Protocols
↑Protocol 1: Benchmarking Dye Accuracy Using Controlled Cytotoxicity
Purpose: Systematically compare viability dye performance across fresh and cryopreserved stem cells under controlled cytotoxic conditions [3].
- Cell Preparation: Culture SAOS-2 osteoblast-like cells or relevant stem cell line to 80% confluence
- Cytotoxic Exposure: Treat cells with particulate biomaterials (e.g., Bioglass 45S5) of varying sizes (<38 μm, 63-125 μm, 315-500 μm) at concentrations (25, 50, 100 mg/mL) for 3h and 72h [3]
- Parallel Staining: Split each sample for parallel processing:
- FM Group: Stain with FDA/PI (fluorescein diacetate/propidium iodide)
- FCM Group: Stain with multiparametric panel (Hoechst, DiIC1, Annexin V-FITC, PI) [3]
- Analysis: Process samples simultaneously on both platforms, ensuring identical gating/threshold strategies
- Validation: Measure pH variations as cytotoxicity indicator (expected increase to 9.40±0.2 for highest cytotoxicity) [3]
↑Protocol 2: Cryopreservation Impact on Stem Cell Marker Expression
Purpose: Evaluate how freeze-thaw cycles affect viability dye access and marker detection in stem cells [85].
- Cell Expansion: Expand adipose-derived stem cells using both TCP and HFB systems, ensuring comparable population doublings [85]
- Pre-freeze Analysis: Collect samples for baseline surface marker analysis (CD73, CD90, CD105, CD274)
- Controlled Cryopreservation: Use controlled-rate freezing at default profiles or optimized conditions for sensitive cells (iPSCs, cardiomyocytes) [88]
- Post-thaw Analysis: After standard thawing (45°C/min warming rate), immediately analyze identical marker panel [88] [85]
- Functional Assessment: Confirm retained stemness through trilineage differentiation assays post-thaw [85]
↑Visual Workflows
↑Experimental Workflow for Dye Benchmarking
↑Troubleshooting Logic for Dye Performance Issues
↑Methodological Recommendations
↑Optimizing Dye Selection Based on Experimental Needs
The choice between simple live/dead stains and multiparametric panels should align with experimental objectives. For basic viability assessment of fresh cells, FDA/PI staining with fluorescence microscopy suffices [3]. However, for cryopreserved cells or when needing to distinguish apoptosis mechanisms, multiparametric flow cytometry with Annexin V, PI, and metabolic dyes provides superior resolution [3] [87].
↑Standardizing Cryopreservation Protocols for Reproducible Viability Assessment
Inconsistencies in freeze-thaw protocols significantly impact dye performance and viability measurements. Implement controlled-rate freezing with documented profiles rather than passive freezing, particularly for sensitive stem cell types [88]. Standardize warming rates at 45°C/min and always include post-thaw viability assessment in experimental timelines [88] [85].
↑Addressing Cryopreservation-Specific Challenges
Cryopreservation alters cellular properties in ways that affect viability dye binding and detection. Account for:
- Increased membrane permeability affecting dye access
- Altered surface epitope expression impacting antibody-based viability markers
- Changes in autofluorescence properties
- System-specific responses (TCP vs. HFB-expanded cells) [85]
Always include cryopreserved controls in assay validation and consider using invariant markers (CD73/CD90 for stem cells) as internal references for gating consistency [85].
Reliable in vitro cytotoxicity assessment is a cornerstone of preclinical biomaterial evaluation, particularly in advanced fields like stem cell research. Among the most widely used techniques for this purpose are fluorescence microscopy (FM) and flow cytometry (FCM). Each method offers distinct advantages and suffers from specific limitations regarding sensitivity, throughput, and the richness of the data obtained. A direct, quantitative comparison is essential for researchers, especially those working with viability dyes in stem cell flow cytometry, to select the most appropriate method for their experimental goals and to accurately interpret their results. This article provides a technical support framework, comparing these two fundamental techniques in the context of cytotoxicity assessment and offering detailed troubleshooting guidance for common experimental challenges.
Core Technique Comparison: Capabilities and Data Output
The choice between fluorescence microscopy and flow cytometry fundamentally shapes the type and quality of data acquired. The following table provides a direct comparison of their core characteristics based on a recent comparative study investigating the cytotoxicity of bioactive glass on SAOS-2 osteoblast-like cells [3] [89].
Table 1: Direct comparison between Flow Cytometry and Fluorescence Microscopy for cytotoxicity assessment.
| Feature | Flow Cytometry | Fluorescence Microscopy |
|---|---|---|
| Analysis Principle | Quantitative, single-cell analysis in suspension as cells pass lasers [3]. | Qualitative to semi-quantitative imaging of cells on a substrate [3]. |
| Throughput | High; can analyze hundreds of thousands of cells rapidly [3] [90]. | Low; typically analyzes tens to hundreds of cells per field of view [3] [90]. |
| Sensitivity & Resolution | High sensitivity; detected viability as low as 0.2% under high cytotoxicity [3] [89]. | Lower sensitivity; reported 9% viability under the same high cytotoxicity [3] [89]. |
| Cell State Discrimination | Multiparametric: Can distinguish viable, early apoptotic, late apoptotic, and necrotic cells [3] [89]. | Primarily binary: Typically distinguishes only viable vs. non-viable cells [3]. |
| Spatial Information | No information on the location or distribution of cellular components [90]. | Provides subcellular localization and context of cellular interactions [90]. |
| Sample Preparation | Requires cells in a monodispersed suspension [90]. | Can image adherent cells directly; no suspension needed [90]. |
| Key Advantage | Robust, quantitative, high-throughput data with detailed cell state classification [3]. | Visual confirmation and spatial context of cell health and morphology [90]. |
Quantitative Experimental Data from a Comparative Study
A seminal 2025 study directly compared FM and FCM for assessing the cytotoxicity of particulate Bioglass 45S5 (BG), providing robust quantitative data on their performance. The experimental protocol and key findings are summarized below [3] [89].
Detailed Experimental Protocol
- Cell Model: SAOS-2 human osteoblast-like cells, relevant for bone tissue engineering [3].
- Test Material: Bioglass 45S5 (BG) particles in three size ranges: <38 µm, 63–125 µm, and 315–500 µm [3].
- Experimental Conditions: Cells were exposed to BG at concentrations of 25, 50, and 100 mg/mL for 3 and 72 hours [3].
- Staining Protocols:
- Fluorescence Microscopy: Used FDA (fluorescein diacetate) for viable cells and PI (propidium iodide) for non-viable cells [89].
- Flow Cytometry: Used a multiparametric panel including Hoechst (nuclei), DiIC1 (membrane potential), Annexin V-FITC (apoptosis), and PI (necrosis) to classify viable, apoptotic, and necrotic populations [3] [89].
Key Quantitative Findings
The study confirmed a strong, statistically significant correlation between FM and FCM data (r = 0.94, R² = 0.8879, p < 0.0001), validating both methods for cytotoxicity screening. However, critical differences in sensitivity were observed, as detailed in the table below [3] [89].
Table 2: Comparison of cell viability readings under high cytotoxic stress (<38 µm particles at 100 mg/mL) [3] [89].
| Time Point | Viability by Fluorescence Microscopy | Viability by Flow Cytometry |
|---|---|---|
| 3 hours | 9% | 0.2% |
| 72 hours | 10% | 0.7% |
| Control Viability | >97% | >97% |
The data demonstrates that flow cytometry offers superior precision and sensitivity, particularly under conditions of high cytotoxic stress where it can detect more subtle variations in cell health that microscopy may overlook [3] [89]. Furthermore, FCM's ability to resolve early and late apoptotic populations provides a more nuanced understanding of the cell death mechanisms triggered by the biomaterial [3].
The Scientist's Toolkit: Essential Research Reagents
Selecting the appropriate reagents is critical for successful cytotoxicity experiments. The following table lists key dyes and their applications, with a focus on stem cell-compatible viability assessment.
Table 3: Key reagents for cytotoxicity and viability assessment in flow cytometry and fluorescence microscopy.
| Reagent / Dye | Primary Function | Application Notes |
|---|---|---|
| Propidium Iodide (PI) | Labels dead cells by binding to DNA in cells with compromised membranes [3]. | Common in both FM and FCM. Cannot penetrate live cells. Used with RNase in cell cycle analysis [91]. |
| Annexin V-FITC | Binds to phosphatidylserine (PS) exposed on the outer leaflet of the cell membrane during early apoptosis [3] [89]. | Crucial for distinguishing apoptosis from necrosis in FCM. Often used in combination with a viability dye like PI. |
| Hoechst Stains | Cell-permeable DNA binding dyes used to identify all nucleated cells [3]. | Useful for gating on nucleated cells in FCM and for identifying cell nuclei in FM. |
| DiIC1(5) | A lipophilic cationic dye that accumulates in mitochondria of viable cells based on membrane potential [3]. | Used in FCM multiparametric panels as an indicator of cell health. |
| FDA (Fluorescein Diacetate) | Cell-permeable esterase substrate; cleavage in live cells produces fluorescent fluorescein [89]. | Used in FM for live-cell staining. The signal is enzymatic activity-dependent. |
| Calcein AM | Similar to FDA; converted by intracellular esterases to green-fluorescent calcein in viable cells [92]. | A common, bright alternative to FDA for labeling live cells in both FM and FCM. |
| Fixable Viability Dyes | Amine-reactive dyes that covalently bind to cells before fixation, marking dead cells [91]. | Essential for intracellular staining in FCM, as they withstand fixation/permeabilization steps better than PI. |
Troubleshooting Guides
Flow Cytometry Troubleshooting
Table 4: Common flow cytometry issues and solutions [91].
| Problem | Possible Causes | Recommendations |
|---|---|---|
| Weak or No Fluorescence Signal | - Inadequate induction of target.- Poor fixation/permeabilization.- Dim fluorochrome for low-abundance target. | - Optimize treatment conditions.- Follow standardized fixation/permeabilization protocols (e.g., ice-cold methanol).- Use bright fluorochromes (e.g., PE) for low-density targets [91]. |
| High Background in Negative Controls | - Non-specific Fc receptor binding.- Presence of dead cells.- Excessive antibody concentration. | - Block with BSA or Fc receptor blocking reagents.- Gate out dead cells using a viability dye.- Titrate antibodies to find the optimal concentration [91]. |
| Poor Cell Cycle Resolution | - Flow rate is too high.- Insufficient staining with PI/RNase. | - Run samples at the lowest flow rate setting.- Ensure direct resuspension in PI/RNase solution and adequate incubation [91]. |
| High Autofluorescence | - Inherent property of some cell types (e.g., neutrophils). | - Use fluorochromes emitting in red-shifted channels (e.g., APC over FITC).- Use very bright fluorochromes to overcome the background [91]. |
Fluorescence Microscopy Troubleshooting
Table 5: Common fluorescence microscopy issues and solutions [93] [92].
| Problem | Possible Causes | Recommendations |
|---|---|---|
| Dim Image or Low Signal | - Insufficient excitation light.- Low numerical aperture (NA) objective.- Incorrect filter set. | - Use high-energy light sources (mercury/xenon).- Use high-NA objectives (brightness ∝ NA⁴/Mag²).- Ensure filter sets match the fluorophore specs [93] [92]. |
| High Background (Autofluorescence) | - Unwashed excess dye.- Autofluorescence of sample or objectives.- Contaminated immersion oil. | - Wash specimen thoroughly after staining.- Use objectives with low autofluorescence.- Use PCB-free, low-fluorescence immersion oil [93] [92]. |
| Photobleaching | - Excessive exposure to excitation light. | - Add anti-fading reagents to mounting media.- Reduce light intensity or exposure time.- Use a shutter to block light when not acquiring images [92]. |
| Blurred or Unclear Image | - Dirty objectives or filters.- Incorrect coverslip thickness.- Misaligned light source. | - Clean optics gently with appropriate solvents (e.g., absolute ethanol).- Use correct coverslip thickness (0.17 mm).- Realign the mercury burner [93]. |
Frequently Asked Questions (FAQs)
Q1: My flow cytometry data shows a significantly lower viability percentage than my fluorescence microscopy data for the same sample. Why is this?
This is a common finding, as demonstrated in recent studies [3] [89]. Flow cytometry is more sensitive and can detect subtle changes in cell health and the early stages of apoptosis that are not yet visible with standard live/dead FM staining. FM might still classify a cell in early apoptosis as "viable" if its membrane is intact, whereas a multiparametric FCM panel with Annexin V would correctly identify it as apoptotic, leading to a lower calculated viability [3] [89].
Q2: When should I choose fluorescence microscopy over flow cytometry for my cytotoxicity assay?
Choose fluorescence microscopy when you need spatial context. This includes confirming that your cells are properly attached, observing morphological changes during cell death, investigating cell-to-cell interactions, or verifying the specific subcellular localization of a fluorescent signal [90]. If your primary need is a high-throughput, quantitative number for viability and cell death classification without spatial information, flow cytometry is the superior choice.
Q3: How can I improve the contrast and quality of my fluorescence microscopy images?
Several factors are critical for good image contrast [93] [94]:
- Use high-NA objectives: Image brightness is proportional to the fourth power of the NA.
- Match filters to fluorophores: Ensure your filter sets are optimized for the specific dyes you are using to maximize signal collection.
- Reduce background: Wash samples thoroughly to remove unbound dye and use anti-fade mounting media to reduce photobleaching.
- Optimize acquisition: Avoid using "autoexpose" functions for quantitative work. Use consistent settings across samples and maximize the dynamic range of your camera without saturating the signal [94].
Q4: I am working with fixed cells for intracellular targets. What viability dye should I use in flow cytometry?
For fixed and permeabilized cells, standard DNA dyes like PI are not reliable for viability gating because fixation compromises all membranes. Instead, you should use fixable viability dyes [91]. These dyes covalently bind to amines on the cell surface before the fixation step, permanently marking dead cells (which have more accessible amines) and allowing you to gate them out even after permeabilization.
Assessing Differential Susceptibility of Stem Cell Subpopulations to Cryopreservation
Technical Support Center
Frequently Asked Questions (FAQs)
1. Why is it crucial to exclude dead cells when analyzing stem cell subpopulations via flow cytometry? Dead cells exhibit greater autofluorescence and allow non-specific antibody binding through their compromised membranes, which can lead to false positive results and obscure the identification of distinct, often rare, stem cell subpopulations. Using a viability dye to gate out these cells is essential for obtaining accurate immunophenotyping data [27] [29].
2. What is a key advantage of using fixable viability dyes over traditional DNA-binding dyes like PI or 7-AAD? Fixable viability dyes form a stable, covalent bond with cellular amines, preserving the live/dead staining pattern even after cells are fixed and permeabilized for intracellular staining. Traditional dyes like PI are not fixable and lose their staining pattern after fixation, making them incompatible with protocols that require these steps [15] [29].
3. How can cryopreservation selectively affect specific stem cell subpopulations? Research indicates that the cryopreservation and thawing process can apply selective pressures, potentially depleting certain subpopulations. For example, one study observed a marked depletion of CD248-negative adipose-derived stem cell (ASC) subpopulations post-thaw. This shift in immunophenotypic composition could impact the overall functional potency of the stem cell product [95].
4. Can the immunophenotype of a sorted stem cell subpopulation change after expansion and cryopreservation? Yes, studies show that sorted subpopulations can lose their distinct immunophenotypic profiles during subsequent in vitro expansion. However, evidence also suggests that key functional capacities, such as adipogenic potential, may be preserved despite these surface marker changes, indicating that the initially sorted cell's intrinsic functional program may be retained [95].
5. Are the functional properties of a stem cell subpopulation maintained after long-term cryopreservation? Evidence suggests that with optimized protocols, functionality can be preserved. One study on Stem Cells of the Apical Papilla (SCAPs) found that even after 19 months in cryopreservation, cells retained their differentiation capacity and immunophenotype. Similarly, peripheral blood stem cells cryopreserved for up to 8 years maintained viability and clonogenic potential [96] [97].
Troubleshooting Guides
Table 1: Troubleshooting Flow Cytometry Analysis of Stem Cell Subpopulations
| Problem | Possible Cause | Recommendation |
|---|---|---|
| High Background/Non-specific Staining | Presence of dead cells [98]. | Incorporate a fixable viability dye into your staining protocol and gate out dead cells during analysis [98] [29]. |
| Non-specific binding to Fc receptors [98]. | Block cells with Fc receptor blocking reagent, BSA, or serum from the host species of your antibodies prior to staining [98]. | |
| Weak or No Fluorescence Signal | The fluorochrome is too dim for a low-abundance target [98]. | Pair your lowest-abundance surface markers with the brightest fluorochromes (e.g., PE) [98]. |
| Inadequate fixation/permeabilization for intracellular targets [98]. | Follow optimized protocols, ensuring fresh fixatives and proper permeabilization methods (e.g., methanol, saponin) are used [98]. | |
| Loss of Immunophenotypic Resolution Post-Cryopreservation | Selective depletion of sensitive subpopulations during freeze-thaw [95]. | Systematically compare pre- and post-thaw immunophenotype distributions using multicolor flow cytometry to identify vulnerable subpopulations [95]. |
| Variability in Results Day-to-Day | Inconsistent gating strategies [27]. | Always include viability dye-stained controls to establish consistent, reproducible gates for excluding dead cells [27]. |
Table 2: Troubleshooting Cryopreservation of Stem Cell Subpopulations
| Problem | Possible Cause | Recommendation |
|---|---|---|
| Low Post-Thaw Viability | Suboptimal cryoprotectant formulation [96]. | Test and optimize the type and concentration of cryoprotectants (e.g., DMSO). Studies show that a lower final concentration of DMSO (4.35%) with additives like methyl cellulose can be effective for long-term storage [96]. |
| Loss of Specific Functional Subpopulations | Differential susceptibility of subpopulations to freeze-thaw stress [95]. | Perform functional assays (e.g., CFU assays) and subpopulation-specific immunophenotyping on post-thaw cells to confirm the retention of critical subsets [95] [96]. |
| Functional Drift After Thawing and Expansion | Immunophenotypic instability introduced by post-thaw culture [95]. | Analyze the functional capacity of thawed and re-expanded subpopulations (e.g., differentiation potential) to ensure it aligns with the pre-cryopreservation profile, even if surface markers shift [95]. |
Experimental Protocols & Data
Table 3: Viability Dye Selection Guide for Stem Cell Flow Cytometry
This table summarizes key dyes and their properties as referenced in the technical literature [15] [27] [29].
| Dye Name | Type | Fixable? | Primary Laser Line (nm) | Key Consideration |
|---|---|---|---|---|
| Propidium Iodide (PI) | DNA-binding | No [29] | 488 [29] | Incompatible with fixation/intracellular staining [15]. |
| 7-AAD | DNA-binding | No [29] | 488 [29] | Incompatible with fixation/intracellular staining [29]. |
| LIVE/DEAD Fixable Stains | Amine-reactive | Yes [15] | Multiple (UV, 405, 488, etc.) [15] | 14 color options; requires amine-reactive beads for compensation [15]. |
| GloCell Fixable Dyes | Amine-reactive | Yes [27] | Multiple (UV, Violet, Red) [27] | Compatible with fluorescence microscopy and intracellular staining [27]. |
| Zombie Dyes | Amine-reactive | Yes [31] | Multiple | Often used with amine-reactive compensation beads [31]. |
| Calcein AM | Esterase-activated | No (Live-cell dye) [31] | 488 | Stains live cells; used for tracking location and proliferation [31]. |
Table 4: Quantitative Data on Long-Term Cryopreservation from Cited Studies
This table summarizes key quantitative findings from the provided search results.
| Cell Type | Cryopreservation Duration | Cryoprotectant | Post-Thaw Viability | Key Functional Assessment |
|---|---|---|---|---|
| Peripheral Blood Stem Cells (PBSCs) [96] | Median: 6.6 years (Range: 3.8-11.5 yrs) | 4.35% DMSO + Methyl Cellulose | >80% (Trypan Blue & FC-7AAD) [96] | Good CFU potential; viability declined in samples >8 years [96]. |
| Stem Cells of Apical Papilla (SCAPs) [97] | 19 months | 10% DMSO in FBS | No significant difference in morphology, immunophenotype, or differentiation capacity [97] | Retained osteogenic, adipogenic, and chondrogenic differentiation capacity [97]. |
| Adipose-Derived Stem Cells (ASCs) [95] | Not Specified | Not Specified | Not Specified | Selective depletion of CD248-negative subpopulations observed [95]. |
The Scientist's Toolkit
Table 5: Research Reagent Solutions for Subpopulation Cryopreservation Studies
| Item | Function/Application |
|---|---|
| Fixable Viability Dyes [15] [27] [29] | Critical for accurately excluding dead cells from flow cytometry analysis, especially in conjunction with intracellular staining protocols. |
| Amine-Reactive Compensation Beads [15] | Used with amine-reactive viability dyes to create single-stain controls for proper fluorescence compensation on the flow cytometer. |
| Dimethyl Sulfoxide (DMSO) [96] [97] | A standard cryoprotectant agent (CPA). Concentrations between ~4-10% are commonly used, with lower concentrations potentially reducing toxicity [96]. |
| Methyl Cellulose [96] | An additive used in some cryopreservation protocols that can improve post-thaw recovery and viability when used with low-concentration DMSO [96]. |
| Collagenase/Dispose Enzymes [97] | Used for the initial tissue digestion and isolation of stem cells (e.g., from adipose tissue or apical papilla) to create a single-cell suspension for sorting and culture. |
| CD Marker Antibody Panels [95] | Antibodies against specific cell surface markers (e.g., CD34, CD90, CD105, CD248) are essential for identifying, sorting, and tracking stem cell subpopulations before and after cryopreservation. |
Diagrams & Workflows
Cryopreservation Impact on Subpopulations
Experimental Assessment Workflow
Establishing Fit-for-Purpose Assay Validation and Standardization for Product Release
In stem cell research and therapy development, flow cytometry is indispensable for assessing cell viability, purity, and identity—critical quality attributes for product release. A fit-for-purpose validated assay ensures that viability measurements are accurate, reproducible, and reliable for making critical decisions. This technical resource center addresses key challenges in viability dye selection, assay validation, and standardization specific to stem cell flow cytometry.
FAQ: Viability Assay Validation for Stem Cell Flow Cytometry
1. Why is proper viability assay selection critical for stem cell products? Selecting a suboptimal viability assay based on convenience or tradition, rather than fitness-for-purpose, is a common pitfall. Some researchers incorrectly justify less sensitive assays because they produce "better-distributed" data; however, this often means the assay has a high limit of detection and fails to capture biologically relevant small variations, potentially leading to incorrect conclusions about product quality [5]. The right assay must be sensitive enough to detect subtle changes in stem cell health.
2. How do I standardize flow cytometry data across multiple instruments or experimental runs? Standardization is essential for longitudinal studies. After initial photomultiplier tube (PMT) voltage optimization using your experimental samples, run bright fluorescent multicolor beads or a biological reference sample (e.g., frozen PBMC pool from healthy donors) to record fluorescence intensities as target values. In subsequent experiments, run the calibration beads first and adjust PMT voltages to match these target values. This minimizes day-to-day instrument variability, though it does not eliminate batch effects from sample preparation and staining [99].
3. When should I use DAPI, and when should I choose an alternative viability dye? DAPI remains a reliable, cost-effective choice for simple viability gating in live, unfixed cell sorting and for cell cycle analysis in ethanol-fixed cells. However, for complex multicolor panels, choose a fixable viability dye if your protocol requires cell fixation and permeabilization for intracellular staining. DAPI's broad emission spectrum can bleed into other detectors and compete with violet- and UV-excited dyes like Brilliant Violet 421, complicating high-dimensional panels [67].
4. What are the key advantages of flow cytometry over fluorescence microscopy for viability assessment? While fluorescence microscopy allows direct cell imaging, flow cytometry provides rapid, high-throughput, quantitative single-cell analysis. A comparative study demonstrated that flow cytometry offers superior precision and statistical resolution, especially under high cytotoxic stress, and can further distinguish early and late apoptosis from necrosis, which is a significant advantage for detailed stem cell characterization [3].
Troubleshooting Guide: Common Flow Cytometry Viability Assay Issues
| Problem | Possible Causes | Recommendations |
|---|---|---|
| Weak or no fluorescence signal | Inadequate fixation/permeabilization for intracellular targets [100]. | For intracellular staining, ensure proper protocol is followed. Use formaldehyde fixation with saponin, Triton X-100, or ice-cold 90% methanol for permeabilization [100]. |
| A dim fluorochrome paired with a low-abundance target [100]. | Use the brightest fluorochrome (e.g., PE) for the lowest density targets and dimmest fluorochrome (e.g., FITC) for high-density targets [100]. | |
| Incorrect laser/PMT settings [100]. | Verify instrument settings match fluorochrome excitation/emission wavelengths. | |
| High background in negative controls | Presence of dead cells [100]. | Use a viability dye (e.g., PI, 7-AAD, or a fixable dye) to gate out dead cells during analysis. |
| Non-specific antibody binding [100]. | Block cells with BSA, Fc receptor blockers, or normal serum prior to staining. | |
| Too much antibody used [100]. | Titrate antibodies to find the optimal concentration. | |
| Poor resolution in cell cycle analysis | Flow rate is too high [100] [101]. | Run the sample at the lowest possible flow rate. High flow rates increase coefficient of variation (CV), blurring distinctions between G0/G1, S, and G2/M phases [100]. |
| Insufficient staining with DNA dye [100]. | Resuspend the fixed cell pellet directly in a Propidium Iodide/RNase or DAPI/RNase solution and incubate adequately. |
Experimental Protocol: Validating a Viability Assay for Stem Cell Flow Cytometry
This protocol outlines a method to validate a viability staining procedure using multiparametric staining for a fit-for-purpose stem cell release assay.
1. Reagent Preparation
- Staining Panel: Select antibodies for critical stem cell markers (e.g., CD34, CD45, CD90) and a viability dye. For a fixable dye, choose a color that fits your panel and is compatible with fixation [67].
- Staining Buffer: Phosphate-buffered saline (PBS) supplemented with 0.5% - 2% bovine serum albumin (BSA) or fetal bovine serum (FBS).
- Fixation/Permeabilization Buffer: If performing intracellular staining, prepare 4% methanol-free formaldehyde for fixation and ice-cold 90% methanol or a saponin-based buffer for permeabilization [100].
2. Cell Staining Workflow
- Harvest and Wash: Harvest stem cells, ensuring a single-cell suspension. Wash cells with staining buffer.
- Viability Staining: Resuspend cell pellet in staining buffer containing the viability dye. Incubate in the dark for the recommended time.
- Surface Marker Staining: Wash away excess viability dye. Resuspend cells in staining buffer containing titrated antibodies against surface markers. Incubate in the dark.
- Fixation and Permeabilization (if needed): For intracellular targets, fix cells immediately after staining. Wash, then permeabilize cells using the appropriate buffer before proceeding with intracellular antibody staining [102] [100].
- Final Resuspension: Wash cells and resuspend in a suitable buffer for flow cytometry analysis.
The following diagram illustrates the key decision points in this validation workflow:
Standardization and Optimization Procedures
1. Instrument Standardization Protocol
- Voltage Optimization: Perform initial PMT voltage optimization using your experimental stem cell samples to maximize assay performance and dynamic range [99].
- Create Target Values: Run bright multicolor calibration beads with the optimized voltages and record the mean fluorescence intensity (MFI) for each channel as your target values [99].
- Daily Calibration: Before each experiment, run the calibration beads and adjust PMT voltages to re-establish the target MFI values. This corrects for instrument drift over time [99].
2. Assay Performance Qualification
- Precision: Run replicate samples (n≥3) of a control stem cell line in the same experiment to determine intra-assay precision. Run the same control across multiple days to determine inter-assay precision.
- Accuracy: Spike a known number of non-viable (e.g., heat-treated) cells into a viable stem cell sample and compare the measured viability to the expected value.
- Linearity/Range: Serially dilute non-viable cells with viable cells across a relevant range (e.g., 0% to 50% non-viable) to ensure the assay responds proportionally.
The standardization process to ensure data consistency is summarized below:
Quantitative Data Comparison: Flow Cytometry vs. Fluorescence Microscopy
A 2025 study directly compared Fluorescence Microscopy (FM) and Flow Cytometry (FCM) for assessing cytotoxicity, providing robust data to justify method selection [3].
Table 1: Comparative Viability Measurements (%) of SAOS-2 Cells Treated with Bioglass 45S5 Particles
| Particle Size & Concentration | Time | FM Viability | FCM Viability |
|---|---|---|---|
| Control | 3 h | > 97% | > 97% |
| < 38 µm at 100 mg/mL | 3 h | 9% | 0.2% |
| < 38 µm at 100 mg/mL | 72 h | 10% | 0.7% |
Key Findings from the Data:
- Strong Correlation: A strong correlation was found between FM and FCM data (r = 0.94, R² = 0.8879, p < 0.0001), confirming both methods track similar biological trends [3].
- Superior FCM Precision: Flow cytometry demonstrated superior precision, especially under conditions of high cytotoxic stress where most cells were non-viable [3].
- Additional Phenotyping: A key advantage of FCM was its ability to use multiparametric staining to further distinguish cell states, classifying populations as viable, early apoptotic, late apoptotic, and necrotic [3].
The Scientist's Toolkit: Essential Reagents for Stem Cell Viability Flow Cytometry
Table 2: Key Research Reagent Solutions for Viability Assays
| Reagent | Function/Application | Key Considerations |
|---|---|---|
| DAPI | Viability dye and DNA content analysis for cell cycle [67]. | Inexpensive, simple. Not fixable; emission can interfere with violet/UV dyes in complex panels [67]. |
| Fixable Viability Dyes | Viability staining in experiments requiring cell fixation [67]. | Available in various colors; allow for intracellular staining after fixation. Must select a color compatible with your panel [67]. |
| Propidium Iodide (PI) | Dead cell exclusion in live-cell assays [3]. | Membrane-impermeant; stains DNA in dead cells. Typically used without fixation. |
| Annexin V | Detection of phosphatidylserine exposure during early apoptosis [3]. | Often used in combination with a viability dye (e.g., PI) to distinguish early apoptotic (Annexin V+/PI-) from late apoptotic/necrotic (Annexin V+/PI+) cells [3]. |
| Phospho-Specific Antibodies | Detect phosphorylation states of intracellular proteins for signaling studies [102]. | Require cell fixation and permeabilization. Provide insight into functional activity of key signaling pathways [102]. |
| Calibration Beads | Standardize instrument performance across runs and between instruments [99]. | Used to create target MFI values for PMTs, critical for longitudinal study data integrity [99]. |
Conclusion
Selecting the appropriate viability dye is not a one-size-fits-all decision but a critical, strategic choice that directly impacts the quality and interpretation of stem cell flow cytometry data. A 'fit-for-purpose' approach, which considers the specific stem cell product, experimental goals, and downstream applications, is paramount. As research advances toward more complex, high-dimensional panels and clinical translation, the rigorous validation and standardization of viability assays will be essential. Future directions will likely involve greater integration of viability assessment with functional assays and the development of novel dyes compatible with spectral cytometry, further enhancing our ability to ensure the safety and efficacy of stem cell-based therapies.
References
- 1. Safety Assessment of Stem Cell-Based Therapies [https://www.mdpi.com/2073-4409/14/21/1660]
- 2. Safety Assessment of Stem Cell-Based Therapies [https://pubmed.ncbi.nlm.nih.gov/41227306/]
- 3. Evaluating cell viability assessment techniques: a comparative ... [https://biomedical-engineering-online.biomedcentral.com/articles/10.1186/s12938-025-01452-y]
- 4. Designing a multicolor flow cytometry panel [https://www.abcam.co.jp/primary-antibodies/multicolor-flow-cytometry-panel-design]
- 5. A review of cell viability assays and their applications [https://pubmed.ncbi.nlm.nih.gov/41276195/]
- 6. Quality Assessment Test (QAT) [https://prostem.co.id/en/layanan/quality-assessment-test-qat/]
- 7. Troubleshooting Guide for hPSC Culture [https://www.stemcell.com/troubleshooting-tips-for-hpsc-culture.html]
- 8. Cytotoxicity Assays: In Vitro Methods to Measure Dead Cells [https://www.ncbi.nlm.nih.gov/sites/books/NBK540958/]
- 9. To dye or not to dye? Understanding the different viability ... [https://www.ptglab.com/news/blog/to-dye-or-not-to-dye-understanding-the-different-viability-dyes-available-for-flow-cytometry/?srsltid=AfmBOorh4JXYwa1gEyu9WEkkJ3d3puRW5U5FdVEcVmOjRbYIZSDrg86P]
- 10. Flow Cytometry Troubleshooting Guide [https://www.cellsignal.com/learn-and-support/troubleshooting/flow-cytometry-troubleshooting-guide?srsltid=AfmBOorvAjUQ4mmiRhQAoUGJLR00UymGFb9qpKfuUfQ3pOIGhEITvuPX]
- 11. Live Dead Measurement and Cell Viability - Blog [https://blog.td2inc.com/live-dead-measurement-and-cell-viability?hsLang=en]
- 12. Assessment and Comparison of Viability Assays for ... [https://pmc.ncbi.nlm.nih.gov/articles/PMC10872314/]
- 13. Assessment and comparison of viability assays for cellular ... [https://www.sciencedirect.com/science/article/pii/S1465324923011003]
- 14. Analysis FAQs - Flow Cytometry Facility [https://flow.usc.edu/faqs/analysis-faqs-2/]
- 15. Fixable Viability Dyes for Flow Cytometry [https://www.thermofisher.com/us/en/home/life-science/cell-analysis/flow-cytometry/flow-cytometry-assays-reagents/cell-viability-assays-flow-cytometry/fixable-viability-dyes-flow-cytometry.html]
- 16. Amine-Reactive Dyes for Dead Cell Discrimination in Fixed ... [https://pmc.ncbi.nlm.nih.gov/articles/PMC2915540/]
- 17. To dye or not to dye? Understanding the different viability ... [https://www.ptglab.com/news/blog/to-dye-or-not-to-dye-understanding-the-different-viability-dyes-available-for-flow-cytometry/?srsltid=AfmBOooyG5SjOKeIevgstMOHaEkCI8FWY1p9GwGjOtQMzojq8JQ20MKb]
- 18. Flow Cytometry Troubleshooting Guide [https://www.cellsignal.com/learn-and-support/troubleshooting/flow-cytometry-troubleshooting-guide?srsltid=AfmBOopyHHcB265YEcl5B0yZrqRH5WEudGCxmNtTZW-QT3i3x1XAZ6eU]
- 19. Flow Cytometry Troubleshooting Guide [https://fluorofinder.com/flow-cytometry-troubleshooting/]
- 20. An Overview of the Current State of Cell Viability ... [https://www.mdpi.com/1422-0067/26/1/220]
- 21. Metabolic profiling of antigen-specific CD8+ T cells by spectral ... [https://pmc.ncbi.nlm.nih.gov/articles/PMC12570331/]
- 22. Cell Viability Assays for Flow Cytometry [https://www.thermofisher.com/us/en/home/life-science/cell-analysis/flow-cytometry/flow-cytometry-assays-reagents/cell-viability-assays-flow-cytometry.html]
- 23. The VVBlue assay: a plate-readable, dye exclusion-based cell ... [https://pubs.rsc.org/en/content/articlehtml/2025/ra/d4ra08606f]
- 24. Flow Cytometry Support—Troubleshooting [https://www.thermofisher.com/us/en/home/technical-resources/technical-reference-library/cell-analysis-support-center/flow-cytometry-support/flow-cytometry-support-troubleshooting.html]
- 25. Flow Cytometry Troubleshooting Guide [https://www.cellsignal.com/learn-and-support/troubleshooting/flow-cytometry-troubleshooting-guide?srsltid=AfmBOopHRwPJdq5mNdhUPE8PwfUP1WA-dag0z8MzWRrjbu_6qBHO6IWI]
- 26. Flow cytometry troubleshooting [https://www.abcam.com/en-us/technical-resources/applications/flow-cytometry/troubleshooting]
- 27. GloCell™ Fixable Viability Dyes [https://www.stemcell.com/products/brands/glocell-fixable-viability-dyes.html]
- 28. Flow Cytometry Protocol | Abcam [https://www.abcam.com/en-us/technical-resources/protocols/flow-cytometry-for-intracellular-and-extracellular-targets]
- 29. Cell viability dyes for flow cytometry [https://www.abcam.com/en-us/products/selection-guides/cell-viability-dyes-for-flow-cytometry]
- 30. Flow Cytometry: A Comprehensive Guide to Staining Protocols [https://www.clyte.tech/post/how-to-do-flow-cytometry-a-comprehensive-guide-to-staining-protocols?srsltid=AfmBOorDhbqnm8Tuzm8hXjffLtzkjFP5J-dL6yD57nNyPGpXqZNqUg2x]
- 31. Viability Dye Selection Guide [https://fluorofinder.com/guide-to-viability-dyes/]
- 32. Lasers and Dyes for Multicolor Flow Cytometry [https://www.bdbiosciences.com/en-us/learn/applications/multicolor-flow-cytometry/lasers-and-dyes]
- 33. Flow Cytometry Troubleshooting Guide [https://www.bio-techne.com/applications/flow-cytometry/flow-cytometry-troubleshooting-guide]
- 34. Blog Post - Seeing in Full Color – Selecting the Right ... [https://www.cerbaresearch.com/article/blog-post-seeing-in-full-color-selecting-the-right-reagents-and-instrumentation-for-your-flow-cytometry-assay/]
- 35. Spectral Flow Cytometry: The Current State and Future of ... [https://pmc.ncbi.nlm.nih.gov/articles/PMC12193525/]
- 36. Recent Developments (After 2020) in Flow Cytometry ... [https://pmc.ncbi.nlm.nih.gov/articles/PMC11940362/]
- 37. BestProtocols: Viability Staining Protocol for Flow Cytometry [https://www.thermofisher.com/us/en/home/references/protocols/cell-and-tissue-analysis/protocols/viability-staining-flow-cytometry.html]
- 38. DAPI Counterstaining Protocols [https://www.thermofisher.com/us/en/home/references/protocols/cell-and-tissue-analysis/dapi-protocol/basic-dapi-counterstaining-protocols.html]
- 39. Propidium Iodide Cell Viability Flow Cytometry Protocol [https://www.rndsystems.com/resources/protocols/flow-cytometry-protocol-analysis-cell-viability-using-propidium-iodide]
- 40. 7-Amino Actinomycin D Flow Cytometry Protocol [https://www.rndsystems.com/resources/protocols/analysis-cell-viability-using-7-amino-actinomycin-d-7-aad]
- 41. Flow Cytometry Troubleshooting Guide [https://www.cellsignal.com/learn-and-support/troubleshooting/flow-cytometry-troubleshooting-guide?srsltid=AfmBOopwvSQyKEQYcXfAgtYpMaoJf0wjWfE2rd1LpbTCVy8abNX8X9CX]
- 42. Flow Cytometry Troubleshooting Guide [https://www.sigmaaldrich.com/US/en/technical-documents/technical-article/protein-biology/flow-cytometry/flow-cytometry-troubleshooting-guide?srsltid=AfmBOoqLZwyiPyPZnbj8TKgouApyNiswOy5ET-IhJwiPGLzGtZ34NMzU]
- 43. Long-Term −80 °C Cryopreservation Sustains CD34+ ... [https://www.mdpi.com/2077-0383/14/19/7032]
- 44. Flow Cytometry Troubleshooting Guide [https://www.cellsignal.com/learn-and-support/troubleshooting/flow-cytometry-troubleshooting-guide?srsltid=AfmBOorRP9W_fwgOrSeAliLzxRZFsViV1JkMgA7CwU2ev5SWVAtxTUsj]
- 45. Long-Term Cryopreservation of Hematopoietic Stem and ... [https://www.sciencedirect.com/science/article/abs/pii/S1465324925008369]
- 46. Designing a multicolor flow cytometry protocol [https://www.abcam.com/en-us/technical-resources/guides/flow-cytometry-guide/designing-a-multicolor-protocol]
- 47. Current practices in peripheral blood stem cell processing ... [https://pmc.ncbi.nlm.nih.gov/articles/PMC12283502/]
- 48. Cryopreservation of biological materials: applications and ... [https://link.springer.com/article/10.1007/s11626-025-01027-0]
- 49. Flow Cytometry Troubleshooting Guide [https://www.cellsignal.com/learn-and-support/troubleshooting/flow-cytometry-troubleshooting-guide?srsltid=AfmBOor8VFhimh9hemPqttxZMnbch5He0X4qcd0O3oCLRoluCqDa1vDr]
- 50. Flow Cytometry Protocol for Cell Surface Markers [https://www.rndsystems.com/resources/protocols/flow-cytometry-protocol-staining-membrane-associated-proteins-suspended-cells]
- 51. a multi-platform comparative study | Scientific Reports [https://www.nature.com/articles/s41598-025-14865-5]
- 52. Optimizing PBMC Viability and Recovery: Updated Best ... [https://cgt.global/pbmc-viability-and-recovery/]
- 53. Cryopreserved PBMC Considerations | Immune System ... [https://sanguinebio.com/blog/cryopreserved-pbmc-considerations/?srsltid=AfmBOoqPTHsy8n1QWvhZ3aoTSHMorvWjGEB3HRy31V58OEz35YNTx33P]
- 54. Protocol for FACS Staining and Considerations for Gating [https://www.stemcell.com/protocol-for-facs-staining.html]
- 55. Flow Cytometry Live Cell Protocol [https://www.cellsignal.com/learn-and-support/protocols/protocol-flow-live-cell?srsltid=AfmBOopRW3QEHKe4sMqEJNbi7aKy6o3GIUKuxyuExk_BBmxvZuvFX5ft]
- 56. Ten tips for the design of multi-color flow panels [https://www.labclinics.com/2019/05/21/ten-tips-for-the-design-of-multi-color-flow-panels/?lang=en]
- 57. Flow Cytometry Troubleshooting Guide [https://www.cellsignal.com/learn-and-support/troubleshooting/flow-cytometry-troubleshooting-guide?srsltid=AfmBOop3V_U0VVjLxap5N2rtRHK95kL4N9gKOj__LHMtuPszoUkvxmL0]
- 58. Troubleshooting Flow Cytometry Issues [https://www.bosterbio.com/protocol-and-troubleshooting/flow-cytometry-troubleshooting?srsltid=AfmBOooPmQXYiwDvrF3Agc7e0icgIKVmlrcf79wbad-tVmjyrq9Emi-z]
- 59. Flow Cytometry Troubleshooting Guide [https://www.cellsignal.com/learn-and-support/troubleshooting/flow-cytometry-troubleshooting-guide?srsltid=AfmBOoo8ycDOaCQ-3PhLfjhnzCZ9rfl_slAcK8sQ96lPPgZ31ggZFzOh]
- 60. An Optimized LIVE/DEAD Assay Coupled with Flow ... [https://pmc.ncbi.nlm.nih.gov/articles/PMC12453624/]
- 61. Spectral Flow Cytometry Glossary of Terms [https://www.thermofisher.com/us/en/home/life-science/cell-analysis/flow-cytometry/flow-cytometry-learning-center/flow-cytometry-resource-library/flow-cytometry-methods/spectral-flow-cytometry-glossary.html]
- 62. Flow Cytometry Gating for Beginners [https://www.ptglab.com/news/blog/flow-cytometry-gating-for-beginners/?srsltid=AfmBOorZW7gM0rVElJeFadumaBTsMBYE7GahMhUo8w3it2FnNYN5kYd5]
- 63. Comprehensive Guide to Gating Strategies in Flow Cytometry [https://www.bosterbio.com/blog/post/comprehensive-guide-to-gating-strategies-in-flow-cytometry?srsltid=AfmBOoqA6pGRDqVbfTwvI28ihieFDqoH2CvZMKRjDtRFLy3dvzdJ4O0t]
- 64. Flow Cytometry Troubleshooting Guide [https://www.cellsignal.com/learn-and-support/troubleshooting/flow-cytometry-troubleshooting-guide?srsltid=AfmBOopmYnVMj0ZRnCvfQ3h5ZuuLyEI3PpJ0Mcf7ZG8UA9_wB1b3FDFn]
- 65. Impact of pre- and post-thaw processing on recovery ... [https://www.sciencedirect.com/science/article/abs/pii/S1465324925008400]
- 66. Mesenchymal stem cell cryopreservation with cavitation- ... [https://www.nature.com/articles/s44172-024-00265-6]
- 67. Is DAPI flow cytometry still relevant in the age of high- ... [https://www.abcam.com/en-us/stories/articles/dapi-flow-cytometry]
- 68. Spectral Compensation in Flow Cytometry [https://www.ptglab.com/news/blog/spectral-compensation-in-flow-cytometry/?srsltid=AfmBOop24VSODlPofDIRetgAb-dAdFzSBAaPHOGNDTyB2RoB3qxFQo_U]
- 69. Separating Stem Cells By Flow Cytometry [https://pmc.ncbi.nlm.nih.gov/articles/PMC3076188/]
- 70. 心态崩了!流式结果重复不出来怎么办?_染料_Bio-Rad [https://www.sohu.com/a/510738450_121124347]
- 71. Guidelines for the use of flow cytometry and cell sorting in ... [https://pmc.ncbi.nlm.nih.gov/articles/PMC9165548/]
- 72. 流式细胞分析实验方案主要步骤 [https://www.sigmaaldrich.cn/CN/zh/technical-documents/protocol/protein-biology/flow-cytometry/key-steps-in-flow-cytometry-protocols]
- 73. 用于流式细胞术的活性染料 - CST 博客 [https://blog.cellsignal.cn/why-use-viability-dyes-in-flow-cytometry-experiments]
- 74. 最佳方案:流式细胞术活力染色方案 - 赛默飞 [https://www.thermofisher.cn/cn/zh/home/references/protocols/cell-and-tissue-analysis/protocols/viability-staining-flow-cytometry.html]
- 75. Overview of Flow Cytometry [https://www.cellsignal.com/applications/flow-cytometry/flow-cytometry-overview?srsltid=AfmBOoq-ZjGjLLe_VwEhGyTlBVo9eMfZhnGqtn7j6qVNy15a-KfVjzrp]
- 76. No or weak signal in Flow cytometry [https://www.abcam.cn/technical-resources/troubleshooting/no-or-weak-signal-flow-cytometry]
- 77. for Viability | CST Blog dyes Flow Cytometry [https://blog.cellsignal.com/why-use-viability-dyes-in-flow-cytometry-experiments]
- 78. Fixable Viability for Dyes Flow Cytometry [https://www.thermofisher.com/de/de/home/life-science/cell-analysis/flow-cytometry/flow-cytometry-assays-reagents/cell-viability-assays-flow-cytometry/fixable-viability-dyes-flow-cytometry.html]
- 79. Signal amplification in flow cytometry for cell surface ... [https://pubmed.ncbi.nlm.nih.gov/31251348/]
- 80. Comparison of the automated fluorescence microscopic ... [https://pmc.ncbi.nlm.nih.gov/articles/PMC6647696/]
- 81. Is your Trypan blue rupturing dead or dying immune cells ... [https://www.revvity.com/blog/your-trypan-blue-rupturing-dead-or-dying-immune-cells-leading-overestimation-cell-viability]
- 82. Comparing Manual and Automated Counting Methods [https://www.revvity.com/ask/comparing-manual-and-automated-counting-methods]
- 83. Optimization of the Blocking and Signal Preservation ... [https://pmc.ncbi.nlm.nih.gov/articles/PMC12462741/]
- 84. Flow Cytometry Staining Protocols for High-Quality Data [https://www.technologynetworks.com/cell-science/infographics/flow-cytometry-staining-protocols-for-high-quality-data-404722]
- 85. Comparative analysis of cryopreserved adipose stem cells ... [https://www.nature.com/articles/s41598-024-83255-0]
- 86. Flow Cytometry Troubleshooting Guide [https://www.cellsignal.com/learn-and-support/troubleshooting/flow-cytometry-troubleshooting-guide?srsltid=AfmBOooCKSzqck5tWs-FbkQvJQV-TayQHjBty-SLi5uxuqBzUuzfGB0t]
- 87. Flow Cytometry Troubleshooting Guide [https://www.novusbio.com/support/support-by-application/flow-cytometry/troubleshooting?srsltid=AfmBOoqfVBcTUynLaH3o3p-AWrAQVKuovXYZp_wIkiEmrY06NhhZRrK7]
- 88. Cryopreservation - Key Survey Findings from the ISCT ... [https://www.isctglobal.org/telegrafthub/blogs/ken-ip1/2025/05/28/cryopreservation-key-survey-findings-from-the-isct]
- 89. Comparing Cell Viability: Flow Cytometry vs. Microscopy [https://bioengineer.org/comparing-cell-viability-flow-cytometry-vs-microscopy/]
- 90. Flow Cytometry vs. Fluorescence Microscopy [https://www.news-medical.net/life-sciences/Flow-Cytometry-vs-Fluorescence-Microscopy.aspx]
- 91. Flow Cytometry Troubleshooting Guide [https://www.cellsignal.com/learn-and-support/troubleshooting/flow-cytometry-troubleshooting-guide?srsltid=AfmBOooNU5fwO3v8XiaJFl8ebCGVW1-UBKeKD6m9xNxofOARg_FxSJgo]
- 92. Cellular Fluorescence Microscopy Troubleshooting & Best ... [https://www.aatbio.com/resources/application-notes/cellular-fluorescence-microscopy-troubleshooting-best-practices]
- 93. Optimization and Troubleshooting [https://evidentscientific.com/en/microscope-resource/knowledge-hub/techniques/fluorescence/troubleshoot]
- 94. Brightness and Contrast in Microscopy Imaging [https://bitesizebio.com/25556/brightness-and-contrast-in-microscopy-imaging/]
- 95. Challenges in the processing and preservation of adipose ... [https://pmc.ncbi.nlm.nih.gov/articles/PMC11703104/]
- 96. Long-Term Cryopreservation of Peripheral Blood Stem Cell ... [https://www.sciencedirect.com/science/article/pii/S2666636723015142]
- 97. Effect of Long-Term Cryopreservation on the Stemness ... [https://pmc.ncbi.nlm.nih.gov/articles/PMC9810390/]
- 98. Flow Cytometry Troubleshooting Guide [https://www.cellsignal.com/learn-and-support/troubleshooting/flow-cytometry-troubleshooting-guide?srsltid=AfmBOorFMBvvR2eEXeeEyL65rD5FQhcIMpVAnOPWnNX2tpPFgOI1bp5B]
- 99. Data Standardization | McGovern Medical School [https://med.uth.edu/imm/flow-cytometry-services/protocols-and-guidelines/data-standardization/]
- 100. Flow Cytometry Troubleshooting Guide [https://www.cellsignal.com/learn-and-support/troubleshooting/flow-cytometry-troubleshooting-guide?srsltid=AfmBOop_oIH_TNsXf0rF09EuRFeOAPTo0AYDP6I4qcpC2-VyuhhJnNmi]
- 101. 3 Components Of Every Flow Cytometer You Don't Know ... [https://expertcytometry.com/components-of-a-flow-cytometer-you-must-know-about/]
- 102. Overview of Flow Cytometry [https://www.cellsignal.com/applications/flow-cytometry/flow-cytometry-overview?srsltid=AfmBOoqx3MlbMdaDrx9dyskDvEsZvKpG39kKLo_rcAPWY1weQp_XUWjx]